View Flow Scenario - Building a link to the View Flow Report
The following scenario illustrates how the URL of the K2 View Flow Report can be used as a Hyperlink in a SharePoint column.
We have an expense item that gets created and kicks off a workflow process. As soon as the workflow process is started, we want to populate the URL of the View Flow Report in the SharePoint column to enable the user to view the color coded graphical representation of the workflow process within the SharePoint List.
Follow the steps below to configure the View Flow as a URL in a SharePoint column:
- Create a SharePoint List or Library and add a column of type Hyperlink. Call it View Workflow Report
- Create a process in K2 for Visual Studio.
- Configure the SharePoint Workflow Integration Wizard (in Advanced Mode) and specify the SharePoint Site and List or Library
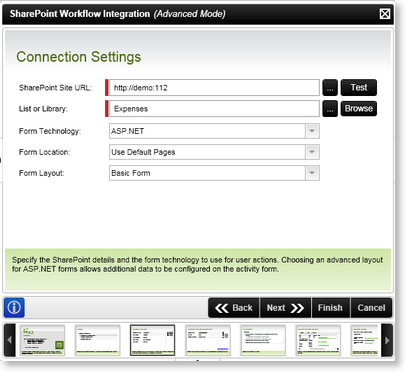
Fig. 1. SharePoint Workflow Integration Wizard - Connection Settings
- Select a Start Option such as Automatically start this workflow when a new item is created
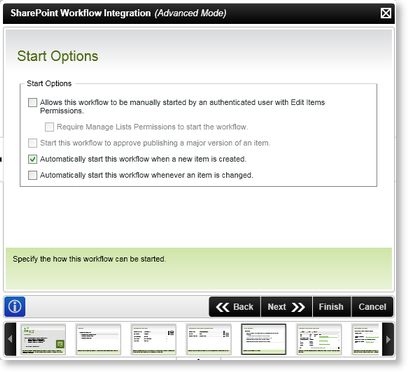
Fig. 2. SharePoint Workflow Integration Wizard - Connection Settings
- Configure the SharePoint List Items Wizard.
- Select Update List Items on the first screen.
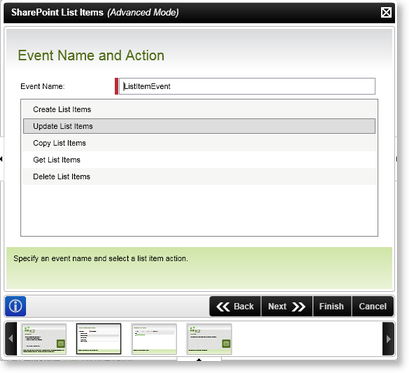
Fig. 3. SharePoint List Items Wizard - Event Name and Action screen
- Click Add and select Item on the Update List Items screen.

Fig. 4. SharePoint List Items Wizard - Update List Items screen
- Provide the SharePoint Site URL, List Name and List Item ID. The List Item ID can be found in the Process/Activity Data tab of the Context Browser under XML Fields. The workflow process needs the SharePoint ID in order to know which item should be updated.
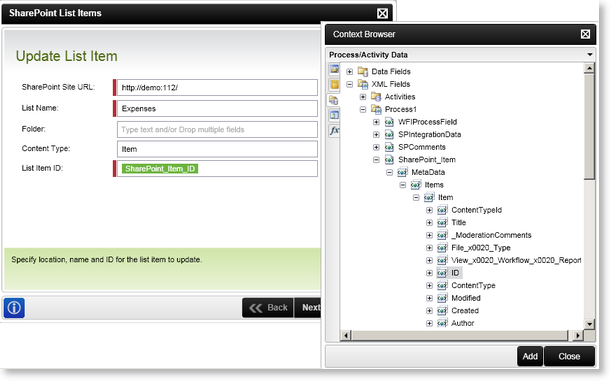
Fig. 5. SharePoint List Items Wizard - Add List Item ID
- Select View Workflow Report, click Assign and select Specific value for selected column
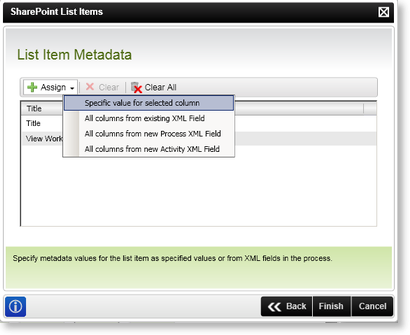
Fig. 6. SharePoint List Items Wizard - List Item Metadata screen
- The following URL's should be used for the View Flow link:
- Workspace - [RuntimeServicesUrl]/workspace/Tasklistcontrol/ViewFlowMain.aspx?ProcessID=[Drag in process Instance ID]
- SharePoint - [SPSITE]/_layouts/k2/Tasklist/ViewFlowMain.aspx?ProcessID=[Drag in Process Instance ID]
Copy the relevant URL from above and paste it in the View Workflow Report field. Remove the id at the end. Then select the Process Instance ID from the Workflow Context Browser and drag it next to the View Flow URL. Supply a description that will be displayed as the link.
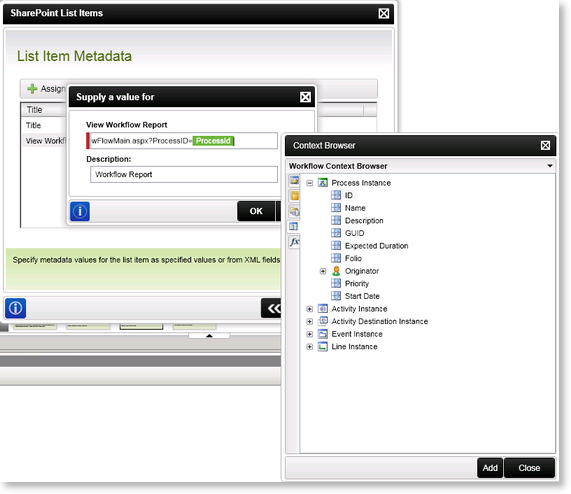
Fig. 7. SharePoint List Items Wizard - Add View Flow URL and Process Instance ID
- The process can now be completed and deployed.
- Start the workflow process by creating a new SharePoint List item in this case. The workflow process is started and the View Flow Hyperlink is updated

Fig. 8. SharePoint List Items Wizard - Add View Flow URL and Process Instance ID
- Click on the Workflow Report link to open the View Flow Report for that specific instance.
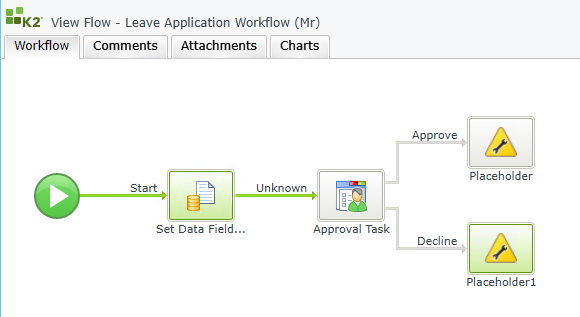
Fig. 9. SharePoint List Items Wizard - Add View Flow URL and Process Instance ID
