Deploying K2 Packages Using PowerShell
The PowerShell Snap-in can be used to automate the deployment of single or multiple artifact packages from source environments to target environments without the need for user intervention. This may be especially useful where it is necessary to make regular or frequent package deployments, or where script-based installations and updates might be preferred. The PowerShell Snap-in functionality cannot be used to create deployment packages, but only to deploy them. Package creation can only be done through the K2 Package and Deployment interface.
PowerShell package deployments utilize Namespaces. For a detailed explanation, please refer to the Important Considerations section below.
Prerequisites
Microsoft Management Console (MMC) 3.0 or later, and Microsoft PowerShell 3.0 or later are prerequisites for K2 Package and Deployment. MMC 3.0 and PowerShell 3.0 are components of the Windows Management Framework 3.0 package, which can be downloaded from http://www.microsoft.com/en-us/download/details.aspx?id=34595.
Quick steps
The following quick steps outline how PowerShell deployment is typically used:
- Create a Deployment Package using the K2 Package and Deployment console.
- Open PowerShell. Add the K2 Package and Deployment Snap-in.
- Run the Write-DeploymentConfig command to create the deployment configuration *.XML file for the .kspx file generated in step 1 above.
- Edit the deployment configuration file to customize the default settings for the specific deployment.
- Run the Deploy-Package command to deploy the package.
Automating a package deployment using PowerShell
- Open Microsoft PowerShell with Administrator privileges.
When copying code from this help file to the PowerShell interface, make sure there are no unwanted line breaks in the code text.
- Enter the PowerShell environment setup command. This command must be entered every time a PowerShell deployment is made:
#Adds the PowerShell Deployment snapin.
add-pssnapin SourceCode.Deployment.PowerShell - The Write-DeploymentConfig command examines the K2 Package and creates a default configuration *.XML file. This file is used by the Deploy-Package command to create or update K2 artifacts within the target environment. A sample Write-DeploymentConfig command might be written as follows:
#Scripts the sample XML configuration file to be used for deployment.
Write-DeploymentConfig 'C:\Users\Dewald\Desktop\Perf Packages\RTM\Package3.kspx' 'C:\Users\Dewald\Desktop\Perf Packages\RTM\Package3.xml' - The following options may be used to customize the Write-DeploymentConfig command:
-InputFile (where 'InputFile' is the *.KSPX (K2 Package) file to be deployed.)
-OutputFile (where 'OutputFile' is the corresponding *.XML configuration file which will be generated.)
An optional command is -ConnectionString (Connection string to K2 server, for example: “Host=LOCALHOST;Port=5555;Integrated=True;IsPrimaryLogin=True”. If no value is specified, known defaults will be used.)
- If necessary, edit the contents of the configuration *.XML file to customize the default settings, using the ResolveOptions options below.
- The ResolveOptions section of the *.XML configuration file contains two sub-sections:
- defaultOptions (This section sets the default action for the Namespaces contained in the K2 package.)
- specificOptions (This section sets actions for each of the Artifacts contained in the K2 package.)
The following configuration options are supported by the K2 PowerShell snap-in:
- Default (Applies the default action previously set within the GUI.)
- Deploy (Deploys the given item, providing the named item is contained within the relevant *.KSPX file).
- Exclude (Excludes the given item, providing the named item is contained within the relevant *.KSPX file).
- UseExisting (Directs use of the existing item, providing the named item is contained within the relevant *.KSPX file).
If needed, these options must be manually inserted into the *.XML configuration file. ServiceInstances and Environmental fields will always default to "UseExisting" and must manually be changed to "Deploy" or "Default". In context of the *.XML, each configuration option must be phrased as an action which is applied to a specific artifact. For example, if the UseExisting configuration command was applied to a 'From Address' namespace, the command might be expressed as follows:
<resolve name="From Address" namespace="urn:SourceCode/EnvironmentSettings/Fields" action="UseExisting" />
Note that in order for the UseExisting option to function, an item must already exist on the target environment to which the new item is being deployed. If the item being deployed has a different name to the existing item, the targetName and targetNamespace attributes of the existing item must be specified within the *.XML configuration file.
For example, where "GIVEN ITEM" is the given item, the following configuration option will deploy the item:
<resolve name="GIVEN ITEM" action="Deploy" namespace="urn:SourceCode/Files"/>
For more information on variables, refer to the 'Assigning Variables' sub-section of 'Creating a Package'.
- Once the package configuration *.XML file has been created and edited, use the Deploy-Package command to deploy the package from the PowerShell interface. Optional sub-commands for the Deploy-Package command are as follows:
- -FileName (Required) The full name and file extension of the K2 package *.KSPX file are required for the file to be deployed.
- -ConfigFile (Optional) Should an *.XML configuration file with the same name as the package file already exist in the same target location, it will be used. If the *.XML configuration file is not located in the same location as the package file, specify the location using this command option.
- -ConnectionString (Optional) Denotes the connection string to K2 server, for example: “Host=LOCALHOST;Port=5555;Integrated=True;IsPrimaryLogin=True”. If no value is specified, known defaults will be used.
- -NoAnalyze (Optional) This is a switch parameter, indicating whether the package should be loaded in 'No Analyze' mode. If not specified, the $false switch value will be used, i.e. the package will be analyzed by default.
- If needed, the -ConnectionString sub-command above may be refined using the following advanced options:
- -K2Host An option denoting the K2 Server host name. if no value is specified, a “LOCALHOST” default will be used.
- -Port An option denoting the port through which Package and Deployment will connect to the K2 Server. Should no value be specified, the "5555" default will be used.
- -Integrated (Optional) This is used to define if the connection is integrated (e.g. $true) or not. If no value is specified, the "$true" default will be used.
- -IsPrimaryLogin (Optional) If no value is specified, the "$true" default will be used.
- -UserName (Required if the 'Integrated' value above is set as 'False') It denotes the user name to be used for connection to the K2 Server.
- -Password (Required if the 'Integrated' value above is set as 'False') The relevant password for the user name must be entered.
- -WindowsDomain (Required if the 'Integrated' value above is set as 'False') The domain relevant to the UserName option
- -SecurityLabel (Required if the 'Integrated' value above is set as 'False') For example, 'K2'.
A sample Deploy-Package command might be written as follows:
#Scripts the deployment of a package
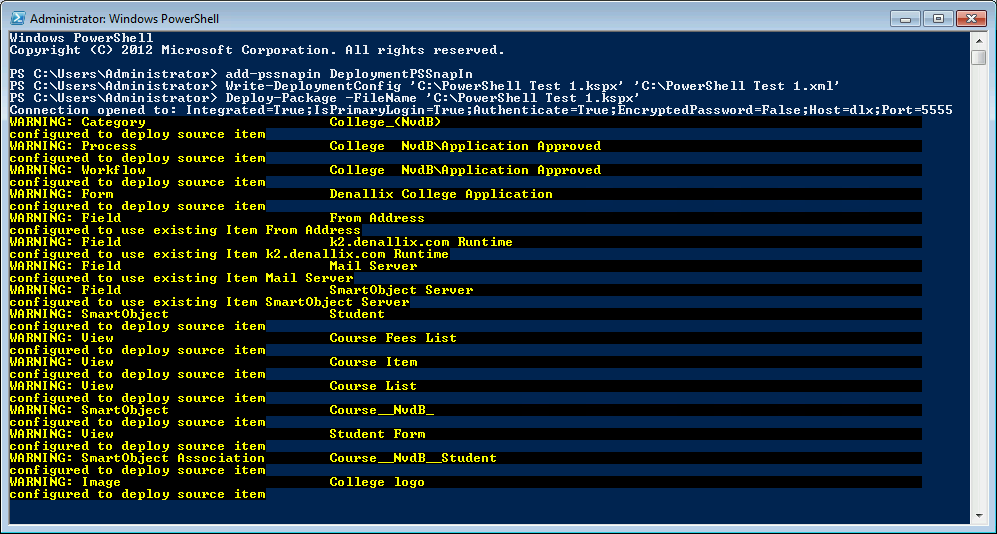
Deploy-Package -FileName 'C:\TestPackage.kspx' -ConfigFile 'C\TestPackage.XML' - If the automated deployment is successful, the deployed items will be shown on the PowerShell interface. (Note that the screen shot below does not show all the available commands and is for demonstration only.)
Important Considerations
The K2 Deployment PowerShell Snap-in uses a combination of Namespace/Class structures and Name/Namespace structures to deploy the package to the target environment.
Service Instances use a Namespace/Class structure. All other packaged items use a Name/Namespace structure. Note that all Namespace/Class and Name/Namespace structures must be unique to the specific item being described.
As an example, Namespace/Class conditions for Service Instances must be taken into account as follows within the configuration *.XML file. (The %2E in this case represents a full stop [i.e. '.']):
#urn:SourceCode/SmartObjects/ServiceInstance
SourceCode%2ESmartObjects%2EServices%2ESQL%2EsqlServerService
The Package and Deployment namespace structure relates to namespace and class as defined within the code itself. For example, the code in the block above is not a reference to the Assembly Name, but rather to the Namespace and Class within the Assembly, which inherits properties from ServiceAssemblyBase. For the example above, the name of the Assembly is 'SourceCode.SmartObjects.Services.SqlServer.dll'. However, the namespace and class structure is as per the code block below:
namespace
SourceCode.SmartObjects.Services.SQL
{
public class SqlServerService : ServiceAssemblyBase
{
Some examples are as follows:
urn:SourceCode/Categories?AdventureWorks#Path.%2F represents a 'root' category called 'AdventureWorks'.
Thus, the output would be:
1. AdventureWorks
The representation above is explained as follows:
urn:SourceCode/Categories defines the namespace of the object.
?AdventureWorks defines the 'Instance name' of the object (In this case, a category called AdventureWorks (i.e. '/AdventureWorks/')).
#Path defines the object path. In this instance, the object path is 'blank', as AdventureWorks is the 'root' category.
%2F is the path-separator symbol, being URI code for the 'forward slash' used as a separator.
urn:SourceCode/Categories?Production#Path.%2FAdventureWorks %2F represents a sub-category under 'AdventureWorks' called 'Production'.
Thus, the output would be:
1. AdventureWorks
a. Production
The definitions are the same as for the first example. However, in this instance, Path.%2FadventureWorks%2F defines the object path (In this case, a category below 'AdventureWorks' called 'Production' (i.e. /AdventureWorks/Production/ )).
urn:SourceCode/Categories?Forms#Path.%2FAdventureWorks%2FProduction%2F represents a sub-category under 'AdventureWorks' and 'Production' called 'Forms'.
Thus, the output would be:
1. AdventureWorks
a. Production
i. Forms
The definitions are the same as for the first example. However, in this instance, Forms#Path.%2FAdventureWorks%2FProduction%2F defines the object path (in this case, a sub-category below 'AdventureWorks' and 'Production', called 'Forms', i.e. /AdventureWorks/Production/Forms/).
PowerShell deployments to distributed environments
When PowerShell is used to make a deployment to a distributed environment, you will need to specify named parameters, including a connection string, in the following format: -FileName -ConfigFile -ConnectionString.
A sample command for deployments to distributed environments might be presented as follows:
Deploy-Package -FileName 'C:\GenericPackage.kspx' -ConfigFile 'C:\GenericPackage.XML' -ConnectionString 'Host=main.hostserver.local;Port=5555;Integrated=True; IsPrimaryLogin=True;SecurityLabelName=K2;UserID=User1; Password=mypassword;WindowsDomain=HOSTSERVER'
CRM
From K2 blackpearl 4.6.9 and following, to deploy a CRM Smart Object using PowerShell there must be an existing CRM service instance in the destination environment. The CRM Service Instance SystemName and GUID must also match the CRM service instance of the source environment. To specify that the service instance should use the existing service instance, update the Reference Options tag as follows:
<referenceOptions>
<rebind id="1727" name="CRM_Denallix" baseType="SourceCode.SmartObjects.CRM5Entity.CRMEntityService" action="UseExisting" targetName="CRM_Denallix" />
</referenceOptions>
Deployment log file
By default, the deployment log file is saved to the same location as the package (*.KSPX) file used for the given deployment. Should any deployment errors occur and require troubleshooting, these errors will be recorded within the log file.