30. Add the Form Viewer Web Part
In this step, you will configure a K2 SmartForms Viewer web part to display the reporting form. To do this, you will create a new page in SharePoint, then add a K2 SmartForms Viewer app to the page. You will configure the app to call the reporting form. This way, you have easy access to your dashboard where you can view data on active expense claim instances.
- In your SharePoint site, add a new Site Page called ExpenseClaimDashboard.
- Return to your SharePoint site, navigate to the Site Contents page, then open Site Pages. If you created a subsite - navigate to your subsite's Site Contents page.
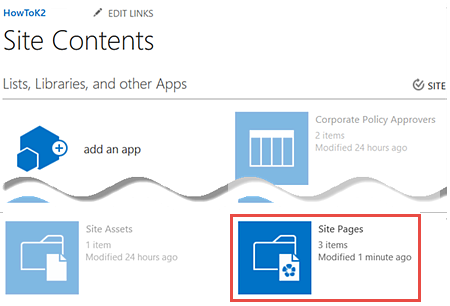
- Click the New button to add a site page to your site.
- Name the new page
ExpenseClaimDashboard
then click Create.
- Return to your SharePoint site, navigate to the Site Contents page, then open Site Pages. If you created a subsite - navigate to your subsite's Site Contents page.
- Add a K2 SmartForms Viewer web part to the page.
- Next, you will add the form viewer. After you add a new site page, it opens in edit mode. Select the INSERT tab. Click the Web Part button found in the Parts group. Click the K2 folder found in the categories pane. Add a K2 SmartForms Viewer web part. (Your screen may not look exactly like the image below if you are not on Office 365. The functionality is the same, however.)
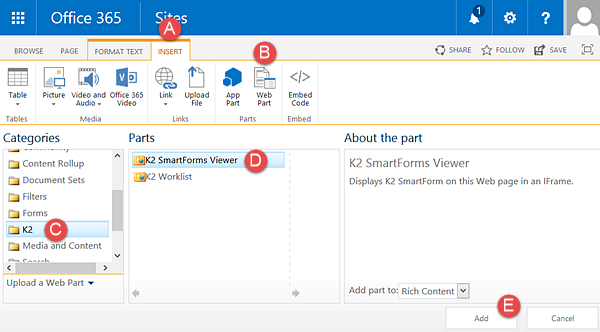
- Next, you will add the form viewer. After you add a new site page, it opens in edit mode. Select the INSERT tab. Click the Web Part button found in the Parts group. Click the K2 folder found in the categories pane. Add a K2 SmartForms Viewer web part. (Your screen may not look exactly like the image below if you are not on Office 365. The functionality is the same, however.)
- Configure the form viewer to host the Expense Claim Dashboard form. Set the Chrome type to None and set the web part height to 1000 pixels.
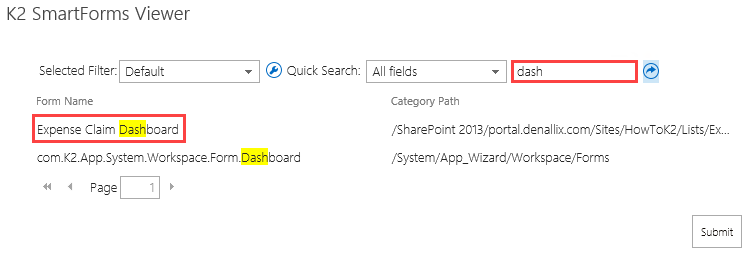
- When the form viewer finishes loading, locate and select the Expense Claim Dashboard form and then click Submit. Note that it may take a few minutes for the list view to finish loading, you can use the search box to filter list if desired.
- Edit the web part.
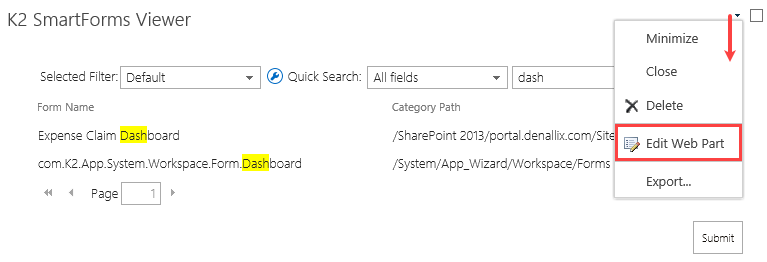
- In the K2 SmartForms Viewer settings pane, set the Chrome Type to None, set the Web Part height to 1000 pixels, then click OK.
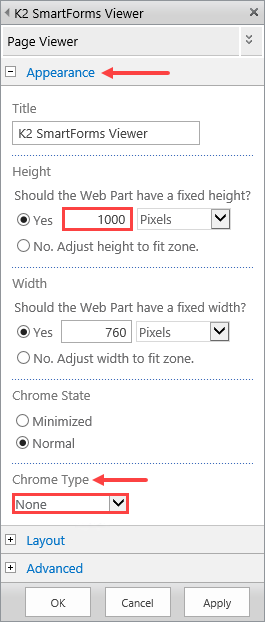
- Click SAVE in the ribbon bar to complete the changes.

- When the form viewer finishes loading, locate and select the Expense Claim Dashboard form and then click Submit. Note that it may take a few minutes for the list view to finish loading, you can use the search box to filter list if desired.
- Obtain the URL for your new page in SharePoint, then add a new Quick Launch navigation link that points to this new page.
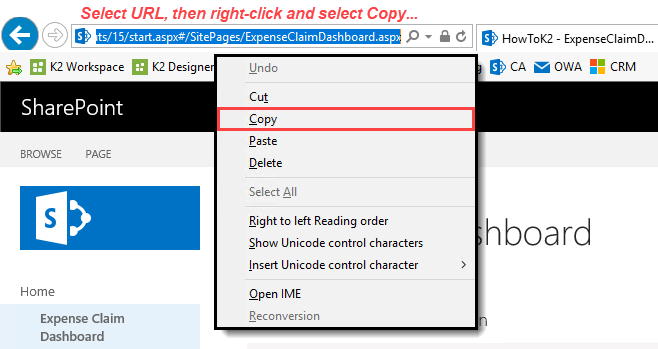
- Select, then copy the URL of the new page that you just created. Paste this URL into a notepad or other text editor tool.
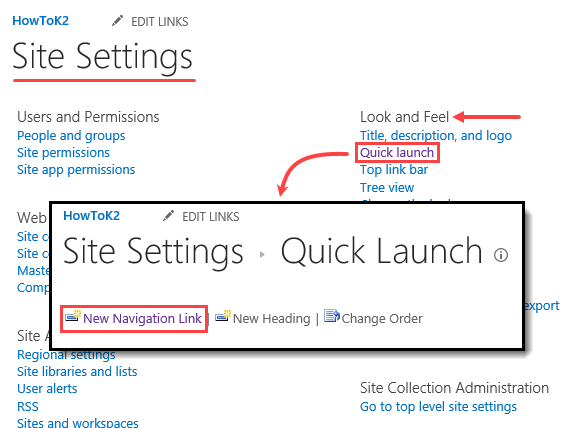
- Open Site Settings for your site, then open Quick Launch. On the Quick Launch page, click New Navigation Link.
- Add a New Navigation Link, then paste the URL that you obtained in the previous step. For the description, enter
Expense Claim Dashboard
then click OK.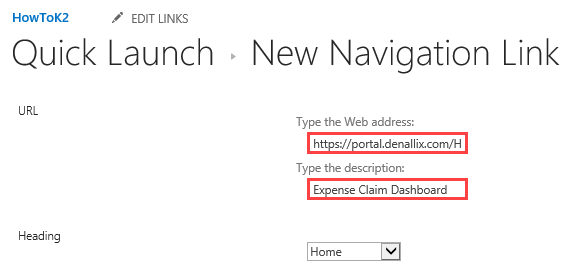
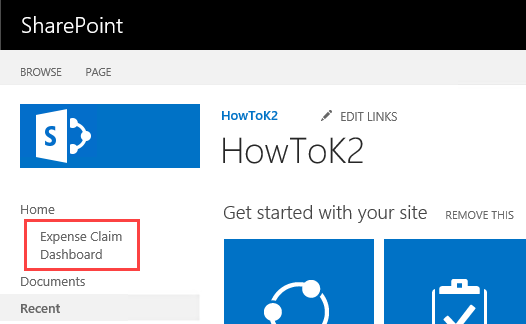
- Return to your site’s home page. You now have a quick link to your expense claim dashboard.
- Select, then copy the URL of the new page that you just created. Paste this URL into a notepad or other text editor tool.
Review
In this step, you added a new site page to SharePoint and configured it to host the expense claim dashboard form. The very last step is to check in all forms and views, after which your application is complete!