15. Complete the Accepted Outcome Steps
In this step, you will complete the Reviewed and Accepted steps. First, you will update the review status, then you will add a Send Email step. The email informs the originator of the accepted review.
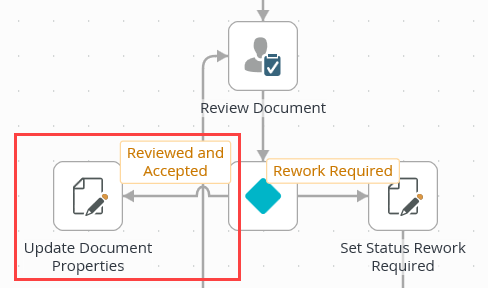
- Copy and paste the Set Status Pending Approval step. Align it with the Reviewed and Accepted outcome, then connect the outcome to the step. Edit the step and change the Review Status to Reviewed and Accepted. Rename the step Set Status Review Accepted.
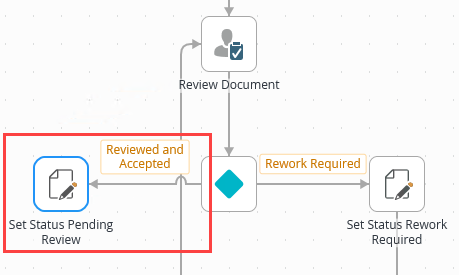
- Once again, you will reuse an existing step. Copy, then paste the Set Status Pending Review step. Align it to the left of the Reviewed and Accepted > Decision step outcome. Connect the outcome to the step.
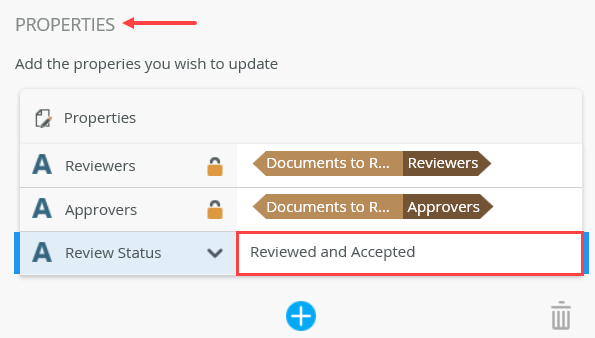
- Select the new step, then expand the Configuration Panel. Under the PROPERTIES heading, change the Review Status value to
Reviewed and Accepted . - Click the General Properties tab. Name the step
Set Status Review Accepted
then collapse the Configuration Panel.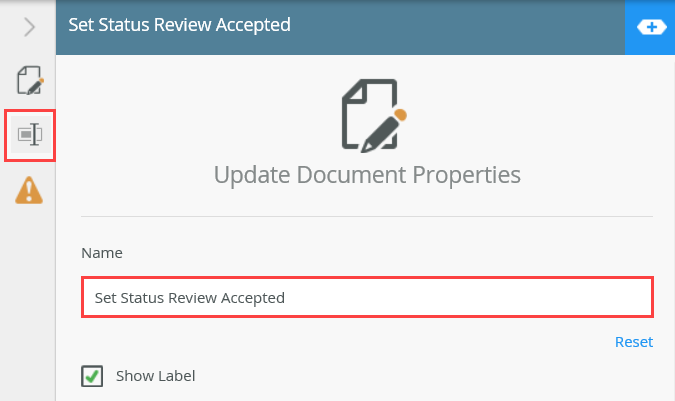
- Once again, you will reuse an existing step. Copy, then paste the Set Status Pending Review step. Align it to the left of the Reviewed and Accepted > Decision step outcome. Connect the outcome to the step.
-
Add a Send Email step and connect it to the Set Status Review Accepted step. Configure the subject line and message body with any content you like. Use variables from the Context Browser to personalize your message. Rename the step Email Originator Accepted. (Optional) To complete the workflow, add End steps for the Email Originator Accepted and Set Status Review Canceled outcomes.
- The final step sends an email back to the workflow originator. The email lets the originator know the document reviewers accepted the document.
From the Toolbox > Basic node, drag a Send Email step below the Set Status Review Accepted step. Connect the two steps.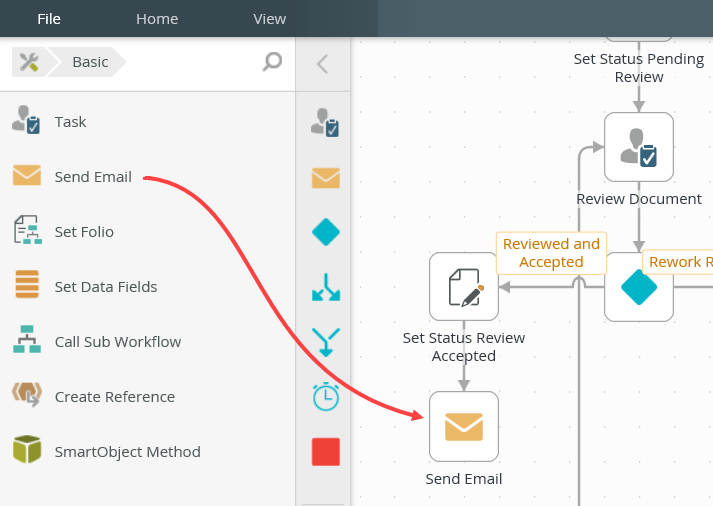
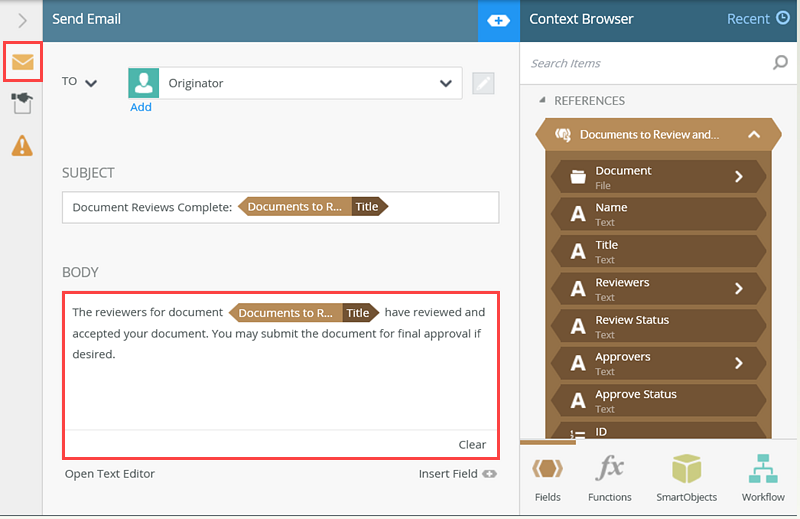
- Select the Send Email step, then expand the Configuration Panel. Click the Notification tab to make it active, if it is not already. Confirm the TO value is the default Originator. For the SUBJECT, enter
Document Reviews Complete:
then expand the Context Browser. Drag the Documents to Review and Approve > Title reference to the end of the subject line.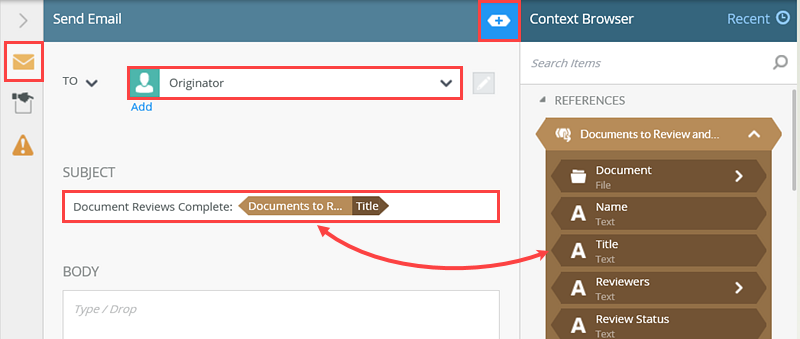
- For the BODY, enter a message to the originator to let them know the reviewers approved their document. Use the example below for reference, if needed.
- Click the General Properties tab. Change the step name to
Email Originator Accepted
then collapse the Configuration Panel.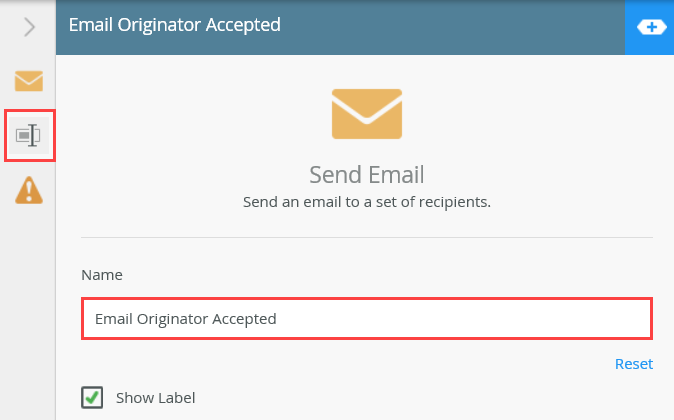
- Finally, you will complete the workflow by adding End steps. The End step provides a clean visual ending to your workflow structure. (The End step is not required to complete a workflow build. This step can also be configured to terminate the entire workflow instance. You might use this for more complex workflows where you have split steps. In this case, you are just using the End step for visual purposes.)
From the Toolbox > Logic node, drag an End step onto the canvas just below the Email Originator Accepted step. Connect the Email Originator Accepted step to the End step. Add another End step and connect it to the Set Status Review Canceled step.
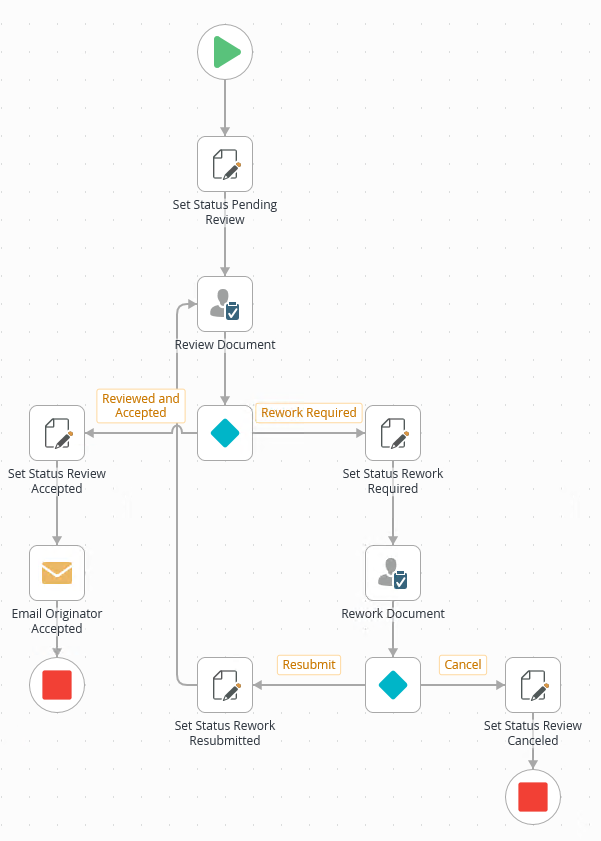
The completed Document Review Workflow should look similar to the image below.
- The final step sends an email back to the workflow originator. The email lets the originator know the document reviewers accepted the document.
Review
In this step, you completed the Reviewed and Accepted path of the workflow. You reused a step to update the review status property, then configured an email to the originator. In the next step, you will deploy the Document Review Workflow to the K2 server.