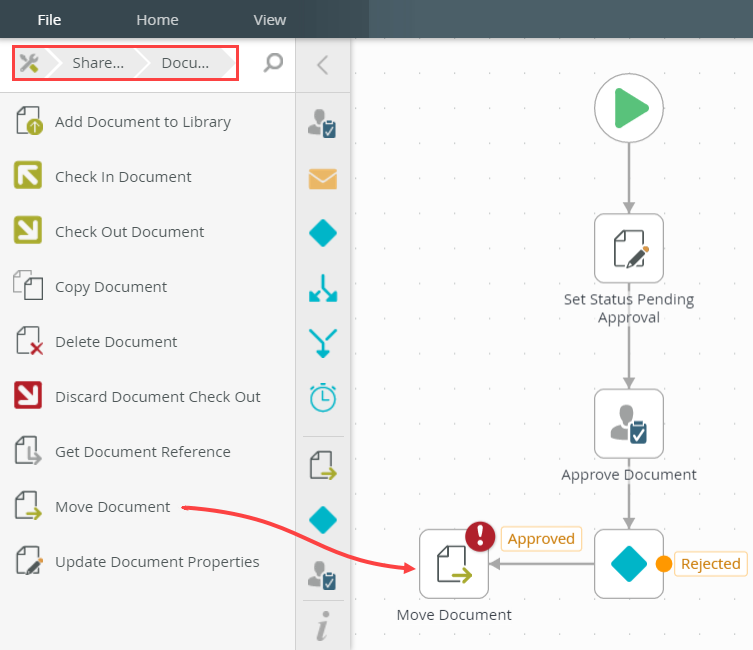
7. Complete the Approved Outcome Steps
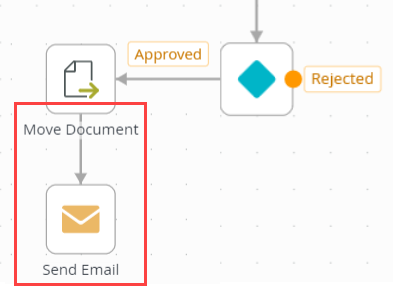
In this step, you complete the Approved outcome. First, you will add a Move Document step that moves the document to the Approved Documents library. Next, you will add a Send Email step. This email informs the originator of the approved status and the new document location.
-
Begin by moving the document to the Approved Documents library. From the Toolbox > SharePoint > Document node, add a Move Document step and connect it to the Approved outcome.
- Add a Move Document step to the workflow. From the Toolbox > SharePoint > Document node, drag a Move Document step onto the design canvas and connect it to the Approved outcome.
- Add a Move Document step to the workflow. From the Toolbox > SharePoint > Document node, drag a Move Document step onto the design canvas and connect it to the Approved outcome.
-
Select the Move Document step, then expand the Configuration Panel. CHECK the Pick Document option. Select the Document to Review and Approve library. This is the current library, or starting point for the move document action. (Your browse structure may be different than the image below depending on where your library lives and naming conventions.) (The Pick options moves the current document. The Find option moves the entire library of documents.)
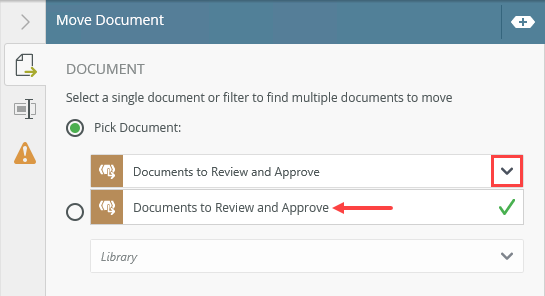
- First, you configure the source library, or location where the document currently lives. Select the Move Document step, then expand the Configuration Panel. Click the Move Document tab if it isn't already active. CHECK the Pick Document option under the DOCUMENT heading. Select the Documents to Review and Approve library.
- First, you configure the source library, or location where the document currently lives. Select the Move Document step, then expand the Configuration Panel. Click the Move Document tab if it isn't already active. CHECK the Pick Document option under the DOCUMENT heading. Select the Documents to Review and Approve library.
-
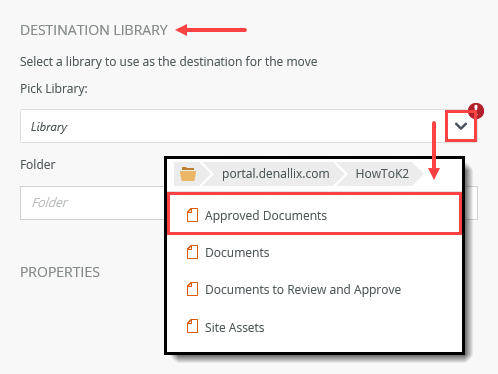
Locate the DESTINATION LIBRARY heading near the bottom of the panel. Browse to, then select the Approved Documents library. You will move the document to this library.
- Locate the DESTINATION LIBRARY heading near the bottom of the panel. Browse to, then select the Approved Documents library. Click OK. This is the destination library or new location for the document. (Your browse structure may be different than the image below depending on where your library lives and naming conventions.)
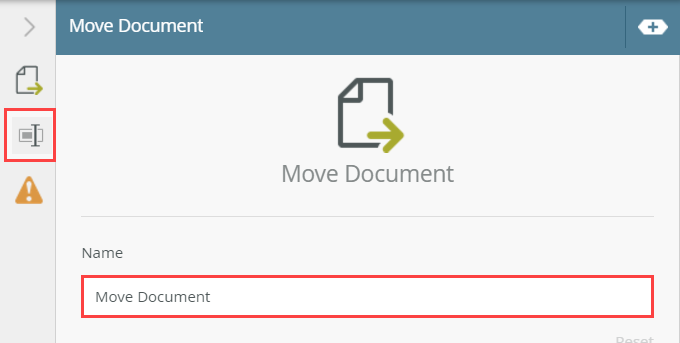
- Click the General Properties tab. Notice the step name is Move Document. This is already descriptive of the action, so you do not need to change the name. Collapse the Configuration Panel.
- Locate the DESTINATION LIBRARY heading near the bottom of the panel. Browse to, then select the Approved Documents library. Click OK. This is the destination library or new location for the document. (Your browse structure may be different than the image below depending on where your library lives and naming conventions.)
-
Next, you will add a Send Email step that informs the originator of the approved decision. From the Toolbox > Basic node, add a Send Email step and connect it to the Move Document step. Use properties from the Context Browser to customize your message with any content you like. Use the image below as a guide, if needed.
-
Next, you will add a Send Email step. You will configure the step so that the originator knows the approver(s) decision. From the Toolbox > Basic node, drag a Send Email step below the Move Document step. Connect the two steps. Select the Send Email step, then expand the Configuration Panel.
If you are running out of screen space, click anywhere in the design canvas, then drag your mouse. You can move the entire workflow structure as needed by clicking and dragging on the canvas.
-
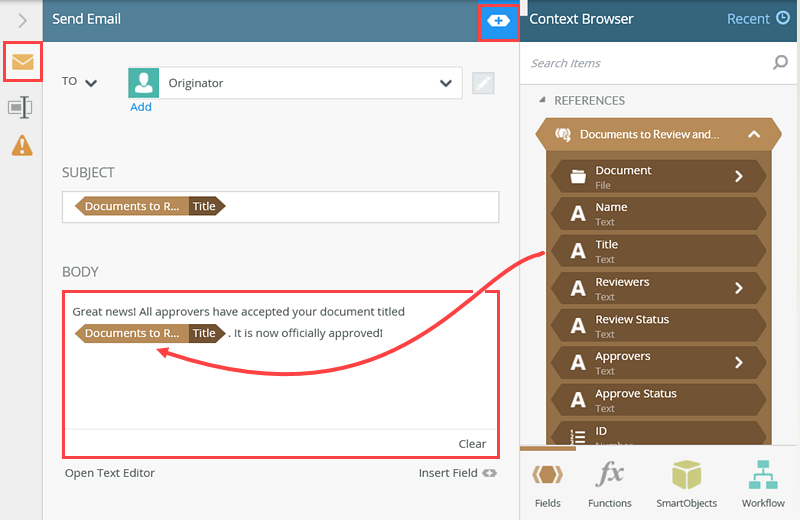
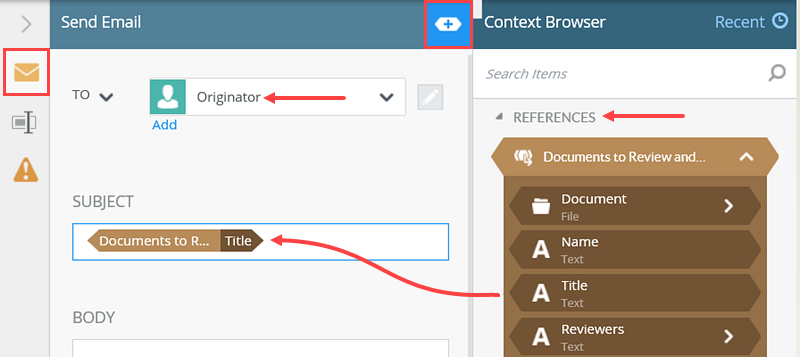
Click the Notification tab to make it active. Confirm the TO value is Originator. Originator is the default value for email steps. Expand the Context Browser. From the Documents to Review and Approve REFERENCES, drag the Title property into the SUBJECT text box.
-
Enter some comments in the BODY. Use properties from the Documents to Review and Approve REFERENCES to personalize the message. For example,
Great news! All approvers have accepted your document titled: [Title]. It is now officially approved!
-
Next, you will add a Send Email step. You will configure the step so that the originator knows the approver(s) decision. From the Toolbox > Basic node, drag a Send Email step below the Move Document step. Connect the two steps. Select the Send Email step, then expand the Configuration Panel.
-
Rename the step Email Originator Approved.
- Finally, you will rename the step for clarity. Click the General Properties tab. Change the step name to
Email Originator Approved
then collapse the Context Browser and Configuration Panel.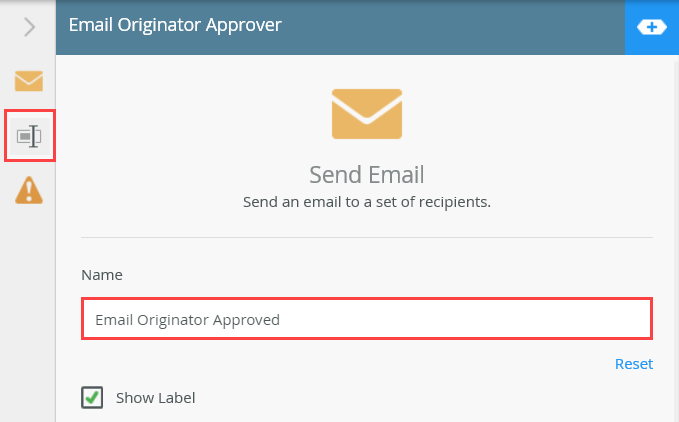
- Finally, you will rename the step for clarity. Click the General Properties tab. Change the step name to
Review
In this step, you completed the Approved outcome steps. First, you configured a Move Document step to move the document to the Approved Documents library. Then, you configured a Send Email step to inform the originator of the approved decision. In the next step, you will complete the Rejected outcome steps.