Integrations
You can integrate other Nintex solutions and third-party applications to use within Nintex DocGen. Third-party applications are Apps that have no affiliation with Nintex, but have capabilities to run with Nintex DocGen.
Before adding the following integrations, ensure that Nintex DocGen has been authorized to access your Salesforce instance. This can be done through the Nintex Admin tab by clicking the Authorize Nintex DocGen button.
The following applications are available to integrate with Nintex DocGen:
You can add Nintex eSign integration to deliver documents for electronic signature.
- Select the Nintex Admin tab.
-
Under Configuration, select Integrations.
- Under the Add Service drop down, select eSign.
- Select or enter the following fields:
- eSign Identity Provider - The region and URL that you use to log into eSign (e.g. https://account.esign.net).
- Nintex eSign Username - The Nintex eSign Admin's username that is used to log into Nintex eSign.
Administrators can configure which Nintex eSign user is used for sending envelopes. To configure a Nintex eSign user for this task, go to Setup > Custom Settings > eSign User Settings > Manage. Then, set the Nintex eSign Context User at the Default Organization Level Value, Profile, or User level.
- Nintex eSign Password - The password associated to the Nintex eSign Admin's username.
- Click Authorize.
- If you have separate environments, complete the following: Select an Environment - The Site URL that displays under the eSign Administration and Settings in Nintex eSign.
- Click Save.
Caution: Once saved, the API user is created in Nintex eSign and is based on the app name and the creator's Salesforce org ID. For example, the format of the API user is DocGen_{org ID}_{GUID added by eSign}.
You can add Box for Nintex DocGen integration to store your output files.
- Select the Nintex Admin tab.
-
Under Configuration, select Integrations.
- Under the Add Service drop down, select Box. A new window for Boxopens. Click Authorize.
- A new log in window opens for Box. Enter your credentials for Box and then click Authorize.
- Once the log in is successful, your Box account will be added to Nintex DocGen.
You can add DocGen API An application programming interface (API) is a set of subroutine definitions, communication protocols, and tools for building software. integration to send your output documents.
- Select the Nintex Admin tab.
- Under Configuration, select Integrations.
- Under the Add Service drop down, select DocGen API. A new window for DocGen API opens.
- Enter your Base URL and Tag Source URL.
- Click Save.
You can add DocuSign integration to deliver documents for electronic signature.
- Select the Nintex Admin tab.
- Under Configuration, select Integrations.
- Under the Add Service drop down, select DocuSign. A new window for DocuSign opens.
- Enter your Account ID.
Note: To find your DocuSign Account ID, log in to your DocuSign account, click on Settings, and then click on Apps and Keys under Integrations. 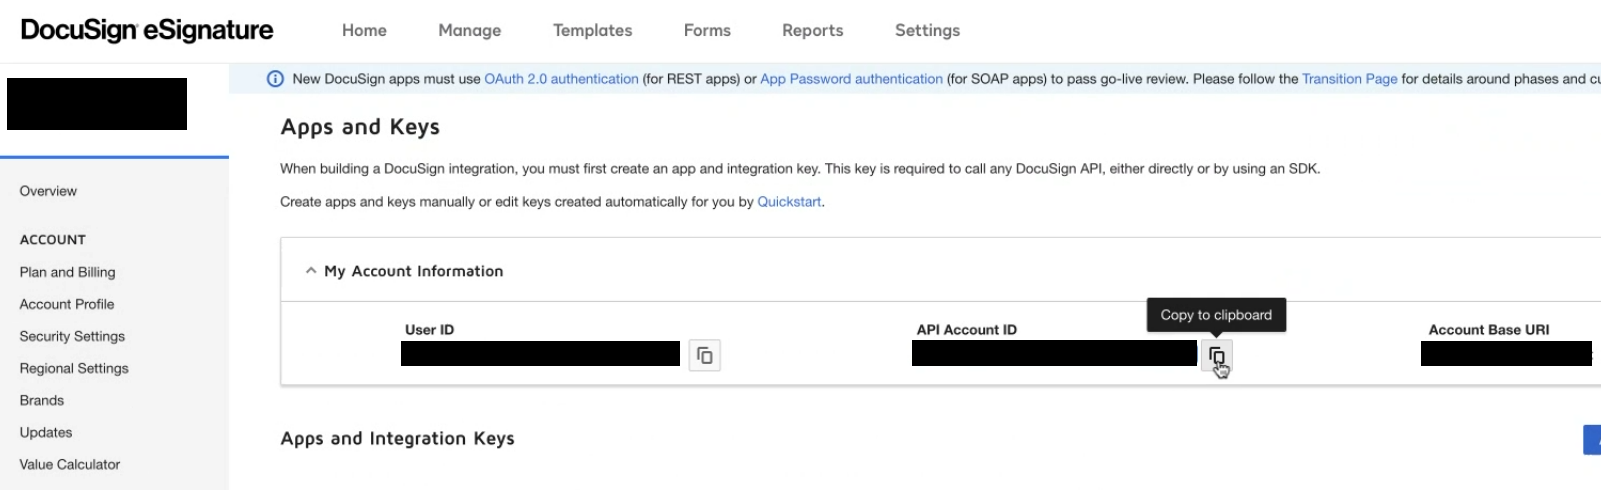
- Select the DocuSign Environment from the drop down:
- Live: This option is for production accounts.
- Demo: This option is for test or sales demonstration accounts.
- Select the Authentication to Use option from the drop down (only one authentication method may be selected):
- OAuth - Admin Consent: This is the OAuth - Admin Consent option. To use the standard authentication method, you must have DocuSign's Admin Tools (a paid feature) to claim your domain. See this DocuSign help reference to claim your domain. Note that when adding DocuSign standard authentication for the first time, a pop up will prompt you for Admin Consent approval. If you are already logged in to DocuSign, it may automatically complete the Admin Consent process without the pop up request for approval. It is recommended to use a service account for the standard authentication method.
You can add DocuSign integration to deliver documents for electronic signature.
- Select the Nintex Admin tab.
- Under Configuration, select Integrations.
- Under the Add Service drop down, select DocuSign. A new window for DocuSign opens.
- Enter your Account ID.
Note: To find your DocuSign Account ID, log in to your DocuSign account, click on Settings, and then click on Apps and Keys under Integrations.
- Select the DocuSign Environment from the drop down:
- Production: This option is for production accounts.
- Developer: This option is for test or development accounts.
- Select the Authentication to Use option from the drop down (only one authentication method may be selected):
- Standard authentication: This is the OAuth - Admin Consent option. To use the standard authentication method, you must have DocuSign's Admin Tools (a paid feature) to claim your domain. See this DocuSign help reference to claim your domain. Note that when adding DocuSign standard authentication for the first time, a pop up will prompt you for Admin Consent approval. If you are already logged in to DocuSign, it may automatically complete the Admin Consent process without the pop up request for approval. It is recommended to use a service account for the standard authentication method.
- Legacy Configuration: This option may require users to enter their password at run time.
- Specify credentials for Send on Behalf Of: This option will require your log in information immediately. When prompted, enter your DocuSign username and password.
- Click Authorize.
You can add OneSpan Sign integration to deliver documents for electronic signature.
- Select the Nintex Admin tab.
- Under Configuration, select Integrations.
- Under the Add Service drop down, select OneSpan Sign.
- Type your API Key and Base URL.
- Click Save.
You can add Office 365 integration to retrieve templates and store them on SharePoint sites.
- Select the Nintex Admin tab.
- Under Configuration, select Integrations.
- Under the Add Service drop-down list, select Office 365. A new window for Office 365 opens.
- Type the following information:
- Name: Descriptive text that will appear in the Select Files section of a DocGen Package.
- Site URL: The base URL for SharePoint.
- Site Path Name: Descriptive text of what you want to call the site path.
- Site Path: Allows you to limit users with the site path.
- +add site path: Allows you to add additional site paths if necessary.
- Click Authorize.
You can add SMTP The Simple Mail Transfer Protocol (SMTP) is a communication protocol for electronic mail transmission. credentials to store multiple SMTP accounts to use for the SMTP delivery method.
- Select the Nintex Admin tab.
- Under Configuration, select Integrations.
- Under the Add Service drop down, select SMTP. A new window for SMTP opens.
- Type the following information:
- Name: This is the name that will appear in your DocGen Package.
- Domain: Enter the domain name of the SMTP server. For example, you would enter gmail.com for the Google email service.
- Username: Enter your username. For example, you would enter your email address.
- Password: Enter your password you use for your email address.
- Click Save.
- Select the Nintex Admin tab.
- Under Configuration, select Integrations.
- Click Edit for the SMTP credentials you want to edit.
- Edit the credentials, then click Save.
Note: You must enter your password any time you edit credentials.
- Select the Nintex Admin tab.
- Under Configuration, select Integrations.
- Click Delete next to the SMTP credentials you want to delete.
Send your output documents to an FTP File Transfer Protocol (FTP) is a standard network protocol used for the transfer of computer files between a client and server on a computer network. folder. You must have FTP credentials to use this integration.
- Select the Nintex Admin tab.
- Under Configuration, select Integrations.
- Under the Add Service drop down, select FTP. A new window for FTP opens.
- Type the following information:
- Name: Descriptive text of what your file will be called.
- Domain: ftp:// domain of the folder.
- Secure: Check this box to make it secure. Leave it unchecked to make it not secure.
- Username: Enter your username.
- Password: Enter your password.
- Click Save.
Send your output documents to an SFTP SSH File Transfer Protocol (SFTP) is a network protocol that provides file access, file transfer, and file management over any reliable data stream. folder. You must have SFTP credentials to use this integration.
- Select the Nintex Admin tab.
- Under Configuration, select Integrations.
- Under the Add Service drop down, select SFTP. A new window for SFTP opens.
- Type the following information:
- Name: Descriptive text of what your file will be called.
- Domain: sftp:// domain of the folder.
- Secure: Check this box to make it secure. Leave it unchecked to make it not secure.
- Username: Enter your username.
- Password: Enter your password.
- Click Save.