
You must tag templates for OneSpan Sign delivery. You set up the OneSpan Sign Delivery with at least one recipient, then add OneSpan Sign tags to your templates wherever OneSpan Sign signatures should appear.
Tag OneSpan Sign templates
You add OneSpan Sign tags to templates where you want OneSpan Sign signatures to appear.
To tag an OneSpan Sign template
Note: You must create an OneSpan Sign Delivery and add at least one recipient to tag a template for OneSpan Sign. For more information, see OneSpan Sign.
-
From the Force.com app menu, select Nintex DocGen, and then click DocGen Packages.
Tip: You can also select this from Lightning with the
 App Launcher.
 -
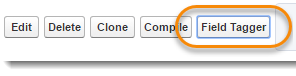
Select a DocGen Package with an OneSpan Sign delivery that has at least one recipient and click Field Tagger.
-
In Field Tagger, from Main Object, select Recipients.
-
From Recipient, select the Recipient that corresponds to the recipient from the OneSpan Sign Delivery.
Fields defined for the selected Recipient appear in Field Tagger.
-
From Field Tags, copy the value from Tag and add it to your document.

Note: After you tag your templates, change the font color of the tags to match the background of your document. This makes the tag invisible in the PDF output document, but allows the signing service to tag the documents.
e-Sign Live, e Sign Live