
Available only with Enterprise Edition
Use a workflow and an outbound message to automate generating documents. There are three high-level steps.
-
You create a field in Salesforce that includes references to all the fields a user would manually select to generate documents.
-
You create an outbound message and bind it to the field.
-
You create a workflow that specifies when to send the outbound message.
When the criteria for the workflow is met, the message is sent, automatically generating documents, which creates output and deliveries specified in the DocGen Package.
Note: Workflow/Apex DocGen Packages require the Enterprise Edition and the Workflow/Apex add-on. For more information, see Purchase, upgrade, or manage edition options.
Create a Salesforce field
You create a field in Salesforce that includes references to all the fields a user would manually select to generate documents.
To create a Salesforce field
-
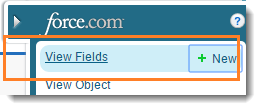
Navigate to a record on an object you want to use to generate documents and then select the View Fields link.
-
On the Custom Fields & Relationships related list for the object you're working with, click New.
-
In Data Type, select Formula and click Next.
-
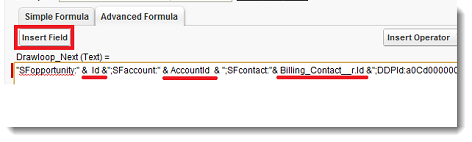
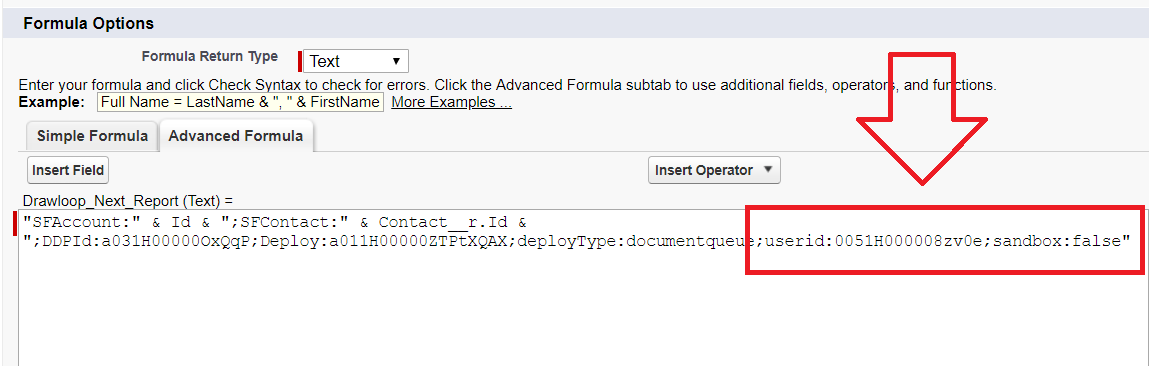
In Field Label, type Drawloop_Next.
Note: You must use Drawloop_Next in Field Label. If you need to create more than one field, append a number or some other character, but always start the string in Field Label with Drawloop_Next.
-
In Formula Return Type, select Text and click Next.
-
Type the formula using these guidelines:
-
Append the letters SF to all object names.
-
Pass all relevant objects IDs.
Note: You can find object Ids in the URL. For example, to find the Salesforce Id for a Delivery Option, navigate to the Delivery Option detail page and examine the URL. For more information, see Understanding the parts of a formula field.
-
You must specify a DocGen Package ID and deployment type.
"SFobject_name__c:" & ObjectId & ";SFanother_object__c:" & AnotherId & ";DDPId:static Id;Deploy:staticid"Where
-
SFobject_name__c the API name of the object the DocGen Package is based on with the letters SF appended to the front.
-
ObjectId a record Id from the object the DocGen Package is based on.
-
SFanother_object__c (Optional) the API name of another object with data you want to include in the DocGen Package with the letters SF appended to the front.
-
AnotherId (Optional) The record Id from another object you want to include in the DocGen Package.
-
DDPId:static Id The static Id of a DocGen Package
-
Deploy:staticId The Salesforce Id of a Delivery option.
Note: Download Delivery option is not supported for Workflow DocGen Packages.
Some delivery options take the DeployType parameter. If you use a delivery option that takes DeployType, use this syntax:
Deploy:StaticId: DeployType: ValueFor example, if you want to specify Salesforce email Delivery Option, it would look like this:
DeployType:autoemail;
Delivery Option
DeployType
Salesforce email autoemail SMTP autosmtp HTTP Service
autohttpservice
Document Queue
documentqueue
DocuSign
autodocusign
Note: If your DocGen Package contains images or reports, see If your DocGen Package contains images or a report:
nserted by the Insert Field function built into Salesforce.
 Understanding the parts of the formula field
You can understand the individual parts of the automated formula field by looking at the manual DocGen Package deployment.
Example
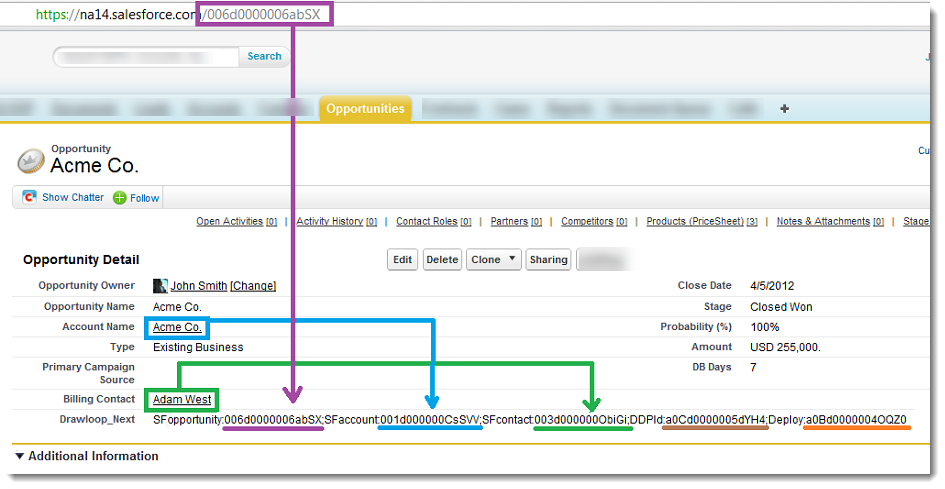
This is an example of what happens when a user runs a DocGen Package from an object.
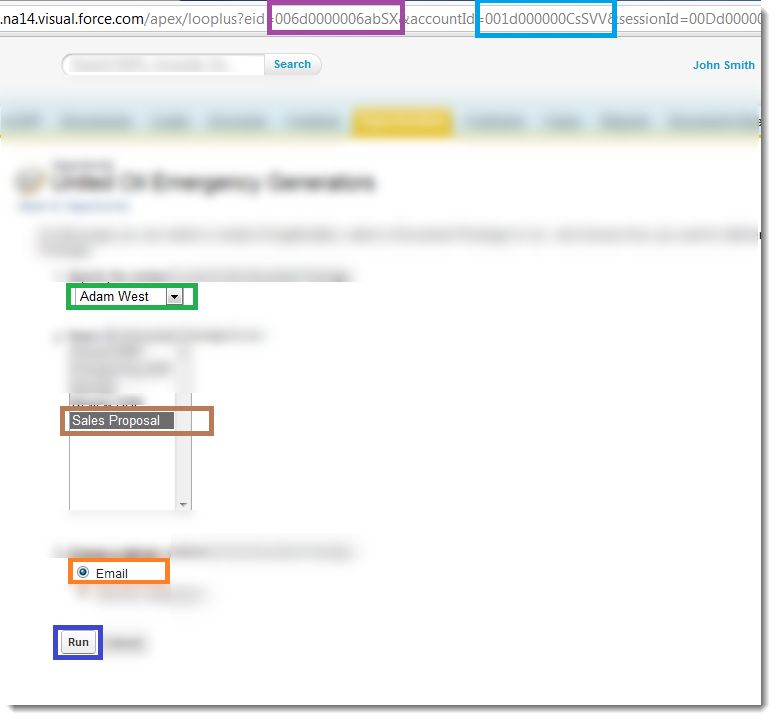
A summary of the important aspects of the manual experience.
Element Description 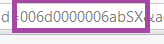
DocGen Package Main Record Id - This Id appears in the URL. The app automatically pulls this Id when the user clicks Generate Documents. 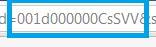
Account Id - This Id appears in the URL. The app automatically pulls this Account from the record on which the uses clicks Generate Documents. 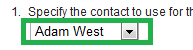
Contact Id - The app gets the Contact Id from the manually selected contact.
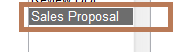
DocGen Package Id - The app gets the DocGen Package Id from the manually selected DocGen Package.
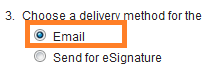
Delivery Option - The app gets the Delivery Option from the manually selected delivery method.
Trigger the DocGen Package Process - Run initiates the DocGen Package.
Example
This is an example of the formula field and how its Ids relate to the manual experience in the example above.
A summary of the important aspects of the automated experience.
-
DocGen Package Main Record Id - The formula automatically pulls this from the main record.
-
Account Id - The formula automatically pulls this from the Account related to the main record.
-
Contact Id - The formula automatically pulls this from the contact related to the main record.
-
DocGen Package Id - This was hard coded into the Drawloop_Next field, but could have been dynamically added with a more complex formula.
-
Delivery Option - This was also hard coded, but could have been made dynamic with a more complex formula field.
-
Trigger the DocGen Package Process - The Workflow rule we tie the Outbound Message to will automatically trigger this DocGen Package.
-
-
Click Next twice, and then click Save.
Create New Outbound Message
After you create the Drawloop_Next formula field, you must add the field to an Outbound Message that can send all of the necessary IDs to Nintex.
To create a new Outbound Message
-
In Setup, click Create, click Workflow & Approvals and then click Outbound Messages.
You may have to click Continue on Understanding Workflow.
-
On All Outbound Messages, click New Outbound Message.
-
From Object, select the object on which the DocGen Package you are trying to automate is based and click Next.
For example, all the samples in this topic are based on the Opportunity object.
-
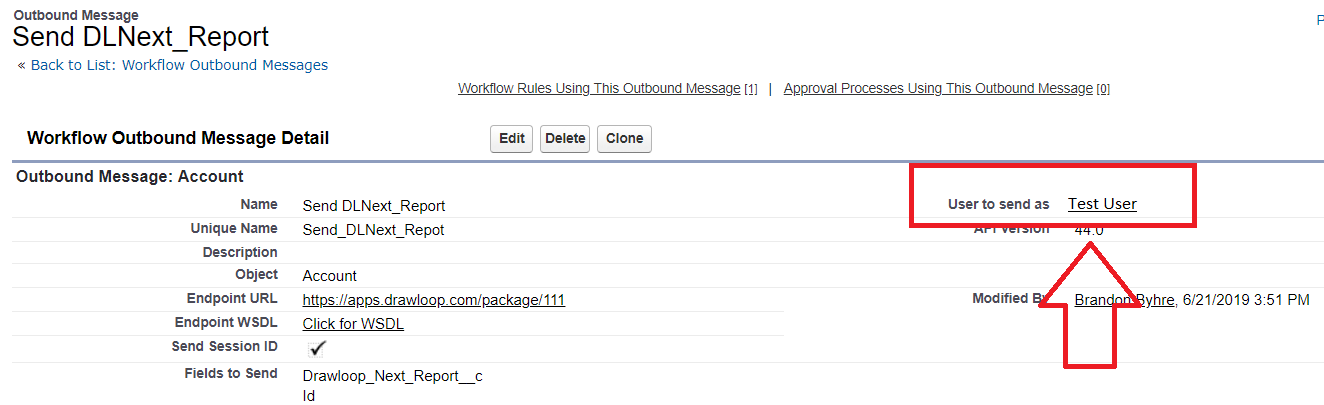
On the outbound message configuration page, in Name and Unique Name, type a name.
-
In User to send as, select a user.
-
In Endpoint URL, type https://apps.drawloop.com/package/111
-
Select Send Session Id.
-
From Available Fields, select Drawloop_Next and click Add. Drawloop_Next is the field you created. It should appear in Selected Fields with Id.
-
Click Save.
Update the Drawloop_Next fields with additional parameters.
Update the field used for OBM with following at the end of the current value:
- Production:
userid:{userId};sandbox:false
- Sandbox:
userid:{userId};sandbox:true
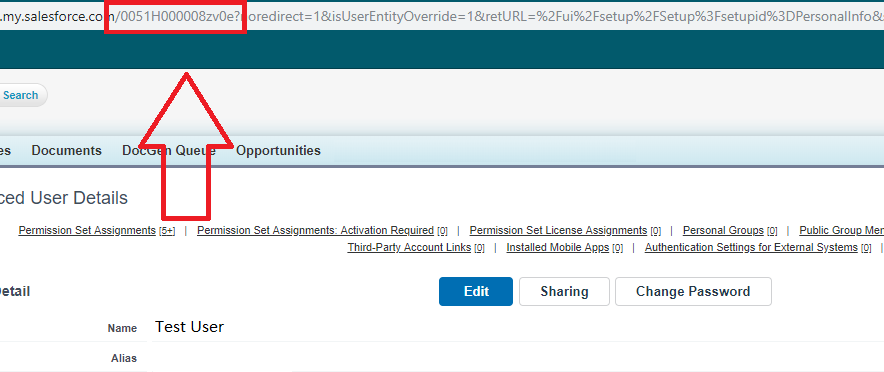
Replace {userId} with the record id for the User set as the User to send as on the Outbound Message for Production and Sandbox orgs.
Outbound Message:
User ID:
Drawloop Next Field:
Click Save.
Create a Workflow Rule
After you create an outbound message, you must create a workflow rule that can trigger the outbound message.
To create a workflow rule
-
In Setup, click Create, click Workflow & Approvals and then click Workflow Rules.
You may have to click Continue on Understanding Workflow.
-
Click New Rule.
-
From Object, select the object on which the DocGen Package you are trying to automate is based and click Next.
For example, all the samples in this topic are based on the Opportunity object.
-
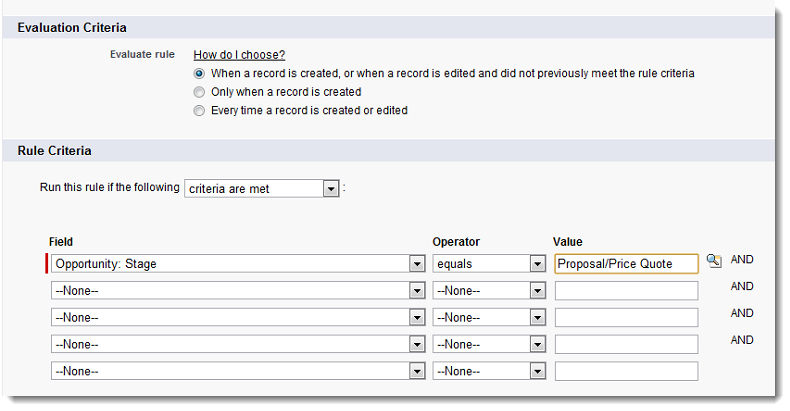
On the workflow rule configuration page, in Rule Name, type a name.
-
In Evaluation Criteria and Rule Criteria, select the criteria you want to trigger the Outbound Message.
-
Click Save & Next.
-
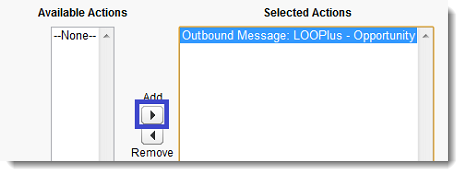
In the workflow action editor, click Add Workflow Action and choose Select Existing Action.
-
On Select Existing Actions, from Choose Action Type, select Outbound Message.
-
From Available Actions, select the outbound message you created and click Add.
-
Click Save.
-
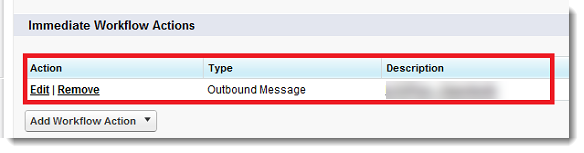
In the workflow action editor, under Action, confirm that your outbound message appears, and then click Done.
-
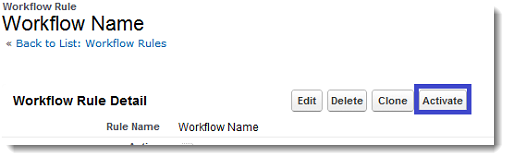
On the workflow rule page, click Activate.
Now, every time the criteria you set is met, the workflow is triggered, sending the outbound message and automatically generating the DocGen Package, using the formula field bound to the outbound message.