Custom Task
What does it do?
A user task is that point in the workflow that requires some human interaction; i.e. a workflow participant is required to do something. The Custom User Task facilitates the interaction with a workflow participant to complete an action/actions. Custom User Tasks define the actual points of interaction between the participants and the workflow. Adding events (client and server) entails considering:
- What needs to be done?
- The sequence in which it needs to happen?
- Who needs to be involved (participants) - and at what stage?
- What data the event needs?
- The sequencing and the participants are particularly important - as they provide clues as to when multiple events can be added to the same activity.
The Custom User Task generates an automated Task which is sent to workflow participants, and is used to keep users up to date and notify them of new worklist items. In the K2 Workflow Designer, the Custom User Task can be configured by dragging the Custom User Task icon onto the relevant step on the design canvas. The Custom User Task is used to create a task for a user which is not specifically linked to a Form in the K2 Workflow Designer. A URL can be specified where the task will be opened and a serial number or parameters can be added to the URL for identification purposes. The Custom User Task can be found by opening the User Tasks in the Workflow Steps tab.
How is it used?
Custom tasks are created when more functionality is required than provided by SharePoint forms or K2 smartforms. A business process may utilize a custom task for complex order processing.
In the following images, click a field or control to get more information, such as what the field or control is used for and how to configure the field and use the control.
Wizards can be edited. For more information see Edit Wizards.
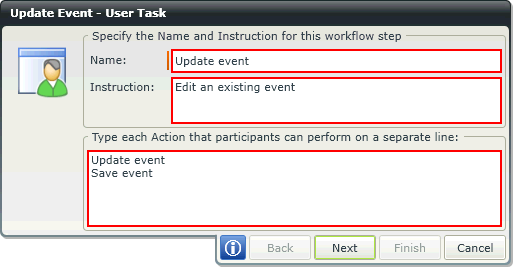
On the User Task page of the wizard, enter the name of the workflow step, any required instructions, and the actions participants can perform.
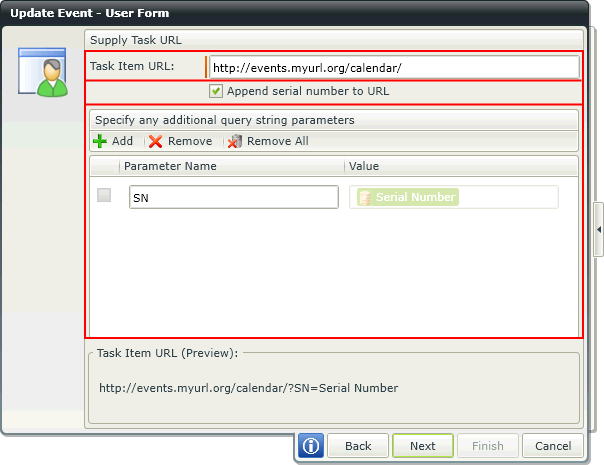
On the User Form page of the wizard, configure the URL to open and the parameters to send.
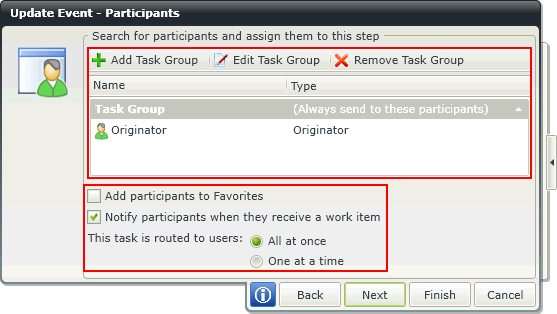
Participants define who executes the User Task (one participant minimum). To add participants to a Task Group, drag the icon from the Context Browser onto the Participants window. Select participants based on relationship (such as Manager), role, group, or individual accounts.
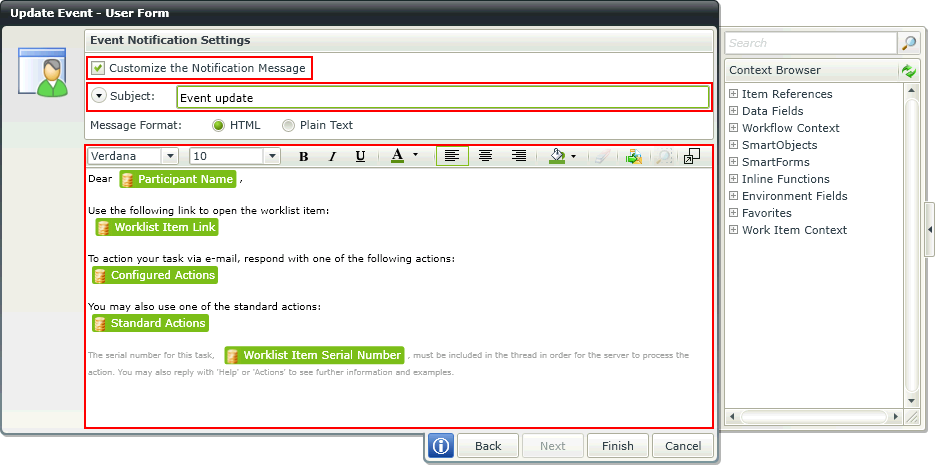
You can customize the notification sent to participants. (Notify participants when they receive a work item must be selected in the Participants window of the wizard.)
Customize the notification message by providing a subject line, additional recipients, and custom message text. Use the Context Browser to add fields (form, list, and data) from the workflow item.