User Task
What does it do?
The User Task wizard assists you in adding user tasks linked to a K2 Form to your workflow. A User Task generates an automated step which is sent to workflow participants, and is used to keep users up to date and notify them of new worklist items that require their interaction by completion of an action.
While a basic User Task wizard is included in the General wizard set, K2 includes additional User Task wizards and configuration options in the User Task wizard set.
How is it used?
A User Task is used by a business process to allow participants to approve, reject, review, edit, route, or otherwise act on data.
- The default behavior when integrating a Form with a workflow has been enhanced. The integration wizard initially creates a state called Workflow Task which will be reused in all subsequent user tasks that appear in the workflow. This enhancement reduces the duplication of rules and allows the same state to be used for either multiple steps in the same workflow, or even steps in different workflows. Previously the wizard always created a new state and replicated the rules. Existing workflows will continue to function as before and any existing configured rules that contain the relevant actions will not be modified. A customized state can still be created if required.
- Wizards can be edited. For more information see Edit Wizards.
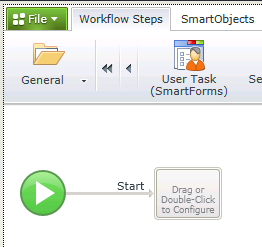
To launch the User Task wizard:
- Drag the User Task wizard from the ribbon onto a target workflow step.
- Double-click a blank workflow step. The User Task wizard is the default wizard.
| Field | Description | Sample Value |
|---|---|---|
| Name | The name to be used for the workflow step. | Type the name for this workflow step. |
| Instruction | Represents an instruction of what the user is expected to do or what the workflow step will do. | Type the instruction or description of what this workflow step will do or what the user is expected to do. |
| Action | Represents the action or actions that can be performed with this workflow step for example Approve, Decline | Type a name for each action that needs to be completed by participants on this workflow step. To add multiple actions, press Enter after each action. |
| Allow user to action the task without completing the Form |
When selected, participants will be provided with the ability to select an Action without opening the specified form. |
This option is selected by default and is not visible when using the wizard for the first time. Edit the wizard to see this option and amend as required. |
| Automatically generate Outcomes for the above Actions |
When selected, Outcomes are automatically created from the entered actions. |
This option is selected by default and is not visible when using the wizard for the first time. Edit the wizard to see this option and amend as required. |
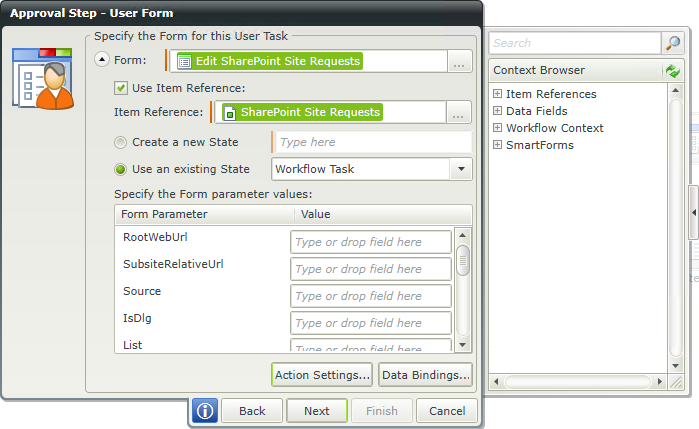
On the User Form page of the wizard, select the form used to perform the User Task. Click the arrow next to the form name to configure advanced form properties.
| Field | Description | Sample Value |
|---|---|---|
| Form | The Form to use for the User Task. |
Click on the ellipses button to open the Category Tree and drag the required Form from the Category. |
| Use Item Reference |
The option to create an Item Reference is enabled by default and the Item Reference will be created using the default SmartObject linked to the selected Form. An Item Reference is an XML structure that contains all the information of the specific SmartObject. The Item Reference feature automatically binds the SmartObject data used in a Form to the workflow making it easier and quicker to design a workflow. This eliminates the need to manually configure certain rules such as the rule to return data on a Form at approval and the need to define each Data Field.
|
This option is enabled by default. Deselect the option if this is not required. Note that when disabling this option manual configuration will be required to configure rules and define data fields for example. |
| Item Reference | The SmartObject to be used to create item references. If there is more than one View on the Form, the specific SmartObject to be used as the Item Reference must be manually selected from the Context Browser. | Drag and drop the SmartObject from the Context Browser. |
| Create new State | Form States are typically used when using different states for different Client Events in a Workflow, but the same Form is used for the different events. Each Form State will have it's own Rules but will inherit the Base State Rules. So different Rules can be applied to the same Form in different states of the Workflow. | Select this option if a new State should be created, then type a name for the State. This state can be edited in the Form Designer. |
| Use an existing State | States can be created in the Rule Designer. If previously configured, the existing state can be selected here. See above for more information in States. | Select this option if an existing State should be applied, then select the State from the drop-down list. |
| Form Parameter | Parameters are used to parse data from one Form to another. The Data Type of the Parameter should be consistent where data mappings etc. are done. | A list of Form parameters are displayed. Specify the mapping by typing text or drag and drop a value from the Context Browser into the Value field. |
| Value | The value to be mapped to the Form parameter. See above for more information on parameters. | There are two ways to specify Form parameters:
|
| Action Settings | Determines where the workflow view appears when participants execute the user task.
|
Select the appropriate action. |
| Data Bindings | Defines the relationship between data fields and form fields. | Open Task
Drag data fields from the Context Browser to the form fields and controls list to bind them together. Fields such as pre-configured Data Fields, Item References or SmartObject Load method property. Note that when a SmartObject Load method property is used, an input property is required for the correct information to load. When the form loads, those data fields are used to populate values in the form. Action Task The Action Task data bindings tab defines how form data is mapped onto data bindings when participants complete the task. To bind data fields and form data:
|
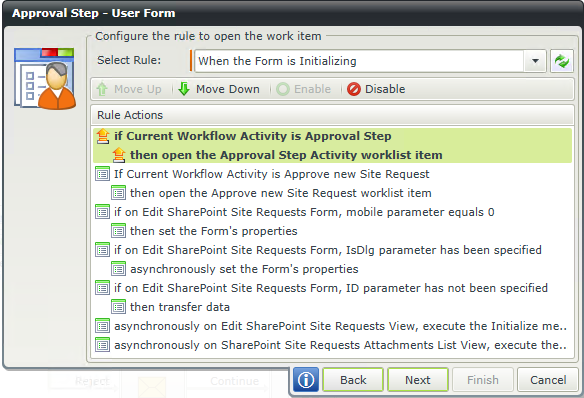
On the Rules screen of the User Task wizard, define the set of actions to open the work item for participants.
| Field | Description | Sample Value |
|---|---|---|
| Select Rule | Default rules are added to identify the specific activity. | Select the rule to execute the workflow activity. |
| Rule Actions | Rule action execution can be customized within the workflow. | To modify an action, select the action and click one of the available options:
|
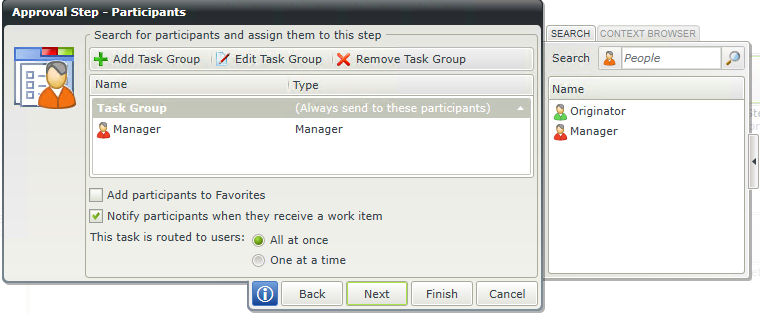
Participants define who executes the User Task (one participant minimum). To add participants to a Task Group, drag the icon from the Context Browser onto the Participants window. Select participants based on relationship (such as Manager), role, group, or individual accounts.
| Field | Description | Sample Value |
|---|---|---|
| Task Group | Represents the users or groups worklist items will be sent to |
|
| Add participants to Favorites | Adds the members of the Task Groups to the Favorites list for easy access. | Select this option to add the members of the Task Groups to the Favorites list. |
| Notify participants when they receive a work item | Sends a notification to members of the Task Groups when they receive the work item | Select this option to send a notification to members of the Task Groups when they receive the work item. |
| This task is routed to users |
All at once - All members of all Task Groups receive the User Task at the same time. |
Select the routing option to be executed. |
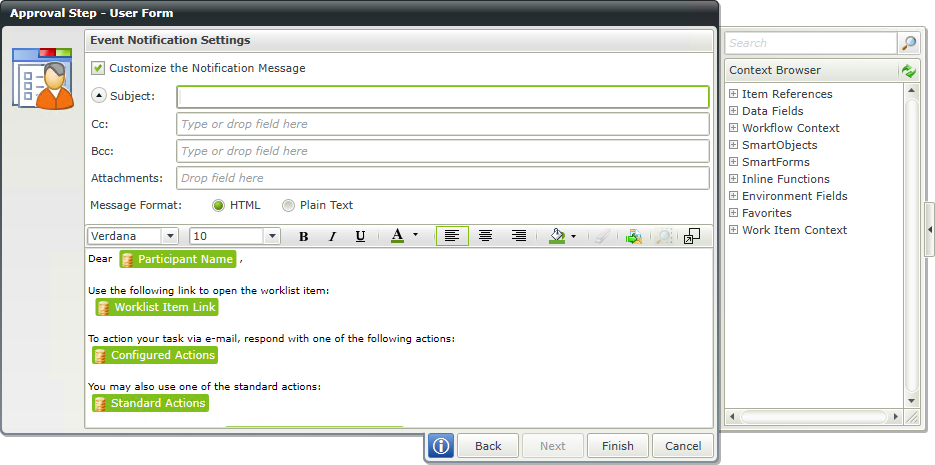
You can customize the notification sent to participants. (Notify participants when they receive a work item must be selected in the Participants window of the wizard). Customize the notification message by providing a subject line, additional recipients, and custom message text. Use the Context Browser to add fields (form, list, and data) from the workflow item.
| Field | Description | Sample Value |
|---|---|---|
| Customize the Notification Message | If this option is not selected, a default event notification will be sent. When selected, the notification can be customized. | Select the option to customize the notification. |
| Subject | When configuring the customized notification, not all the available options are displayed at first. Clicking the drop-down in front of the Subject property will display all of the options that can be configured. Add a subject for the e-mail | Add a subject for the e-mail for example Approve Leave. |
| Cc | Configure this property to send a carbon copy | Type a value or drag a pre-configured field from the Context Browser such as a Data Field, Item Reference or SmartObject Load method property. Note that when a SmartObject Load method property is used, an input property is required for the correct information to load. |
| Bcc | Configure this property to send a blind carbon copy | Type a value or drag a pre-configured field from the Context Browser such as a Data Field, Item Reference or SmartObject Load method property. Note that when a SmartObject Load method property is used, an input property is required for the correct information to load. |
| Attachments | Send an attachment with the e-mail | SmartObject methods, Workflow Context Attachments, and Inline Functions that return images or files, can be used to configure the Attachment property. Note that when a SmartObject Load method property is used, an input property is required for the correct information to load. The Process Instance node of the Workflow Context Browser contains the Attachment field for use when a workflow has attachments enabled. See the Use the Workflow Comment and Workflow Attachment SmartObjects topic for more information. |
| Message Format |
HTML - Full formatting of the message, including fonts, colors, and images. |
Select one of the two options. |
| Message | Enter the email message. | To include information from the workflow task, drag values from the Context Browser into the editor such as a pre-configured Data Field, Item References or a SmartObject Load method property. Note that when a SmartObject Load method property is used, an input property is required for the correct information to load. If the message is HTML, formatting can be applied using the toolbar above the message editor. |