Quick Start Scenario - Working with Views on a Form
Now that we have a SmartObject, we want to create different Views and a Form based on the information of the SmartObject. For this purpose we will use the feature to automatically generate Views and Forms. On the Item View, which is the View that will be used to capture the student's details, we will configure the E-mail Address control to validate the E-mail Address Text Box when the Create button is clicked.
- On the SmartObject Finish screen, click on Generate a View.
- Select to create an Item View, List View, and Generate Form, then select Save and edit the Form.
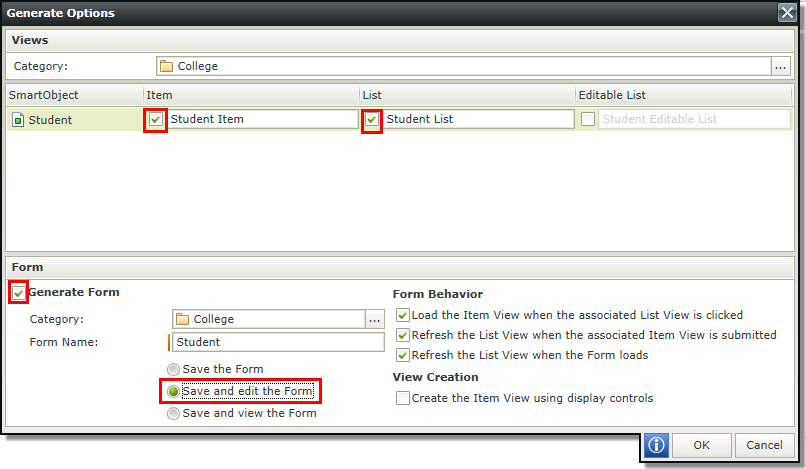
- Click OK.
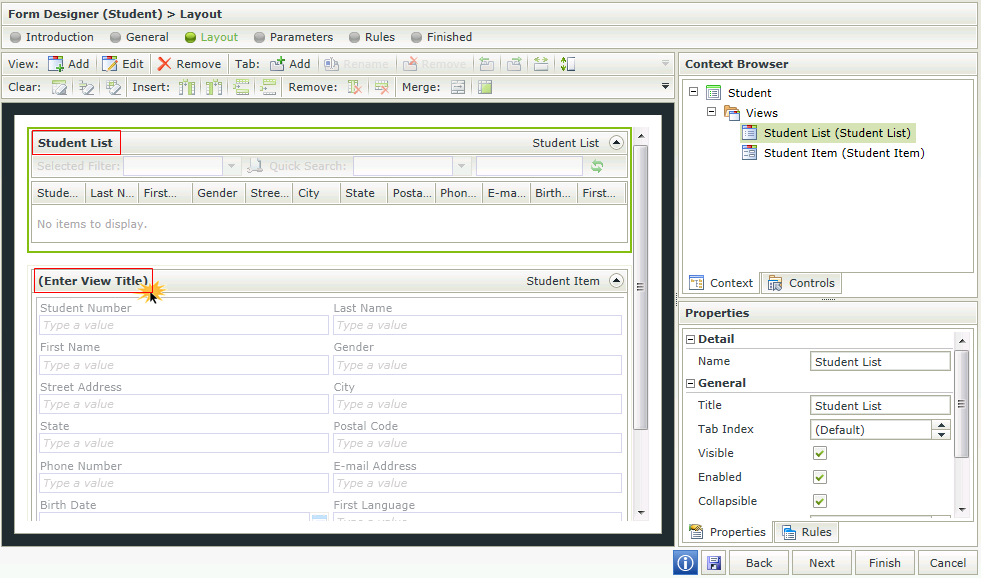
- The Form opens in edit mode and the Views we've selected are displayed on the Form.
- Rename the Views by clicking on the Enter View Title link. Change the List View to Student List and the Item View to Student Details.
- Click outside the Views on the white part of the canvas. Navigate to the Appearance node in the Properties menu and type 800px in the Min. Form Width and Max. Form Width fields as shown below.

- Click Finish to save the View, then Run on the Finish screen. Note that the size is now applied to the Form.
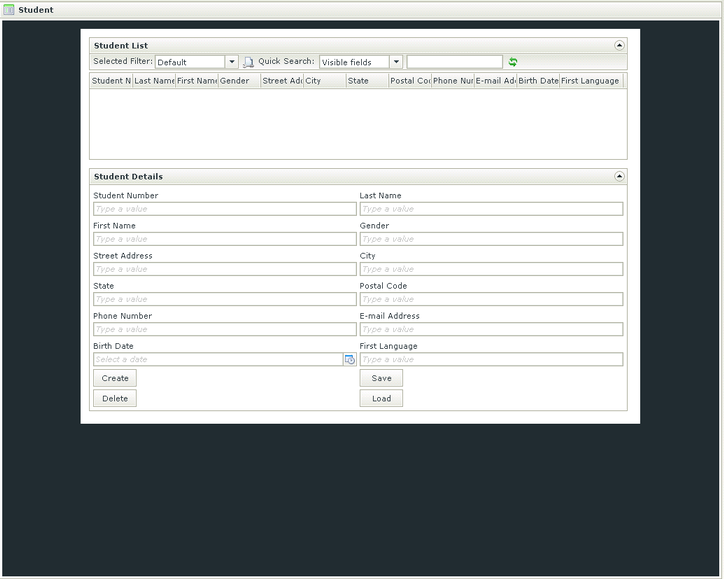
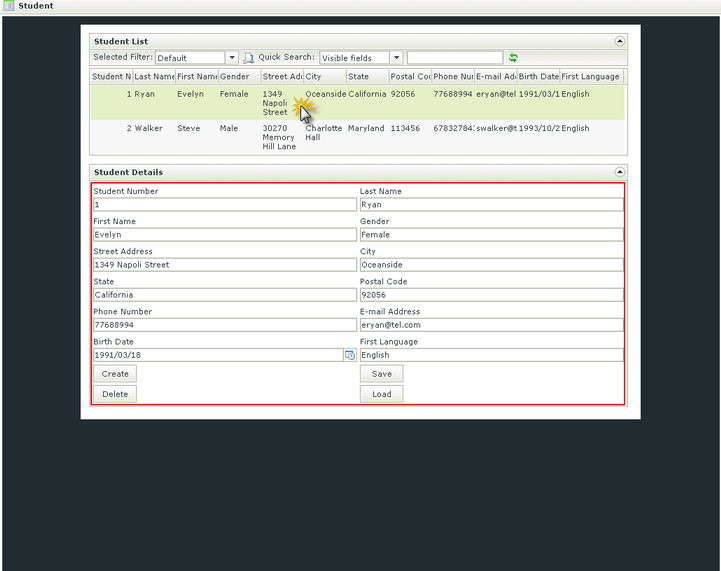
- Test to see if your Student Details View is set up correctly by entering the following details in the SmartForm:
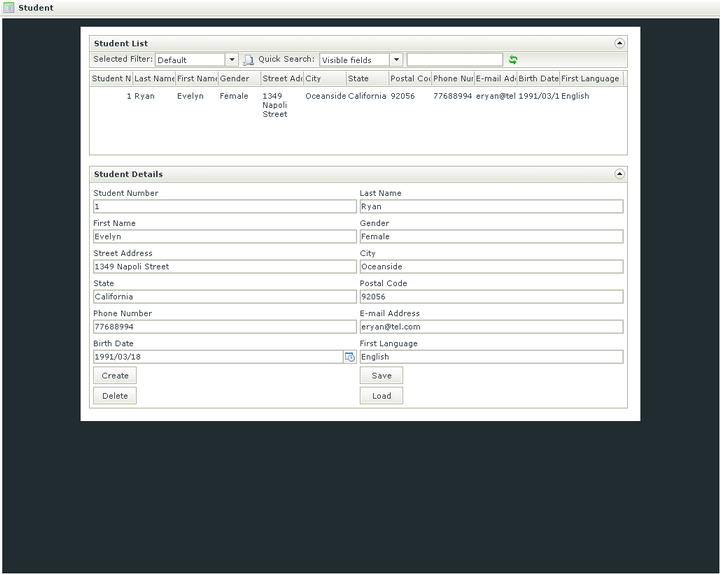
Last Name: Ryan First Name: Evelyn Gender: Female Street Address: 1349 Napoli Street City: Oceanside State: California Postal Code: 92056 Phone Number: 77688994 E-mail Address: eryan@tel.com Birth Date: 1991/03/18 First Language: English - Note that we don't populate the Student Number as this is an automatically generated field.
- Click Create. Note how the Student List View is automatically updated when clicking the Create button. This is as a result of us using the auto-generate function earlier on. If we didn't use the auto-generate function to create the Views and Form, we would've had to create a Rule to perform this action.
- Create another record by entering the following details in the Student Details SmartForms:
Last Name: Walker First Name: Steve Gender: Male Street Address: 30270 Memory Hill Lane City: Charlotte Hall State: Maryland Postal Code: 113456 Phone Number: 678327843 E-mail Address: swalker@tel.com Birth Date: 1993/10/29 First Language: English - Click Create. Note how the second record is automatically added to the Student List as with the first.

- Click on Evelyn Ryan's record in the Student List SmartForms and see how the Student Details SmartForms is populated with her data.
- Change her Last Name to Scott and click Save. Note how the Student List is updated with the new Last Name.
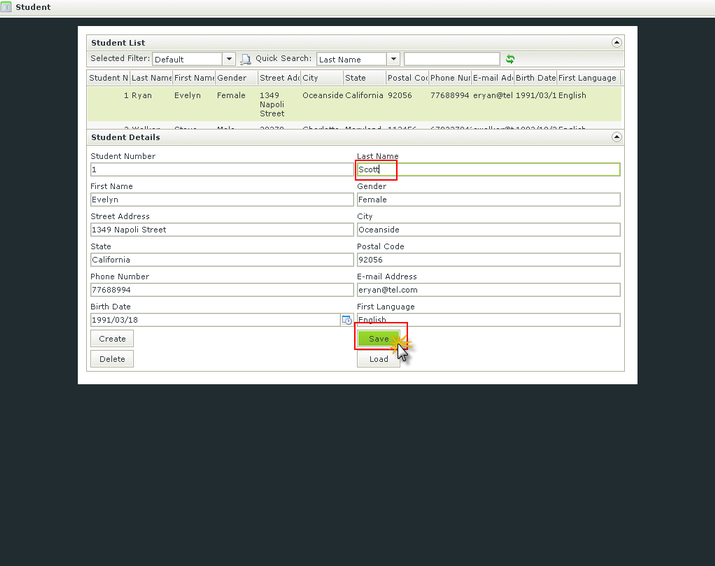
- Now perform a search on the Student List SmartForms by selecting an item to search on from the drop-down menu, then type search criteria and click on the refresh icon as shown below.
