Building the "Hello, World" SmartForm
This document contains the step-by-step instructions to build the simple "Hello, World" K2 SmartForm. If required, please refer to the Application Design topic for an overview of the SmartForm to understand what the Form does.
In Step 1, we will prepare the K2 category system with folders to store our SmartForm's components (strictly speaking, creating folders is not required, but it is recommended because using a logical folder structure will help to keep the SmartForms environment organized). In Step 2, we introduce you to SmartForms by building a simple SmartForm View that contains some simple formatting and controls, and executes basic Rules. In Step 3, we will build a Form to contain our View and in Step 4, we will test our new SmartForm.
The first step in our Application is to create the categories that will house our form and view. You can think of categories as “folders” that contain things like Forms, Views, SmartObjects and Workflows. While it is not necessary to group elements into folders like we do here, it does help to keep the similar elements organized and grouped, especially for larger Applications that may contain several SmartObjects, Views, Forms and Workflows.
Step 1 Tasks
- Launch K2 Designer, then create a new category under All Items called
K2 Learning - Create a new category under K2 Learning called
Hello World - Create two new categories under Hello World called
Forms
Views
- Launch K2 Designer (Start > All Programs > K2 blackpearl > K2 smartforms > K2 Designer)
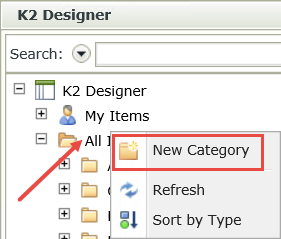
(If the shortcut is not on your desktop or if you are not using a K2-provided virtual machine for this tutorial, check with your K2 administrator to find out what the web address (URL) is for your K2 Designer environment and then open the site using a browser like Internet Explorer, Chrome or Firefox. We recommend using Firefox or Chrome since these fast web browsers tend to be a little more responsive) - In this step we will create a new category under All Items for our application. Right-click All Items and select New Category. Name the new category
K2 Learning - Create a new category under K2 Learning and name it
Hello World - Create two new categories under Hello World and name them
Forms
Views
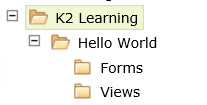
Your category folders should look like the image below when you are done.
STEP 1 REVIEW
In this preliminary step, we created categories ("folders") for the elements of our Hello World Application. Categories are not required, but they do help you keep things neat and tidy, especially as you build larger Applications that contain multiple forms, views, SmartObjects and workflows. In K2 terms, "application" refers to the all of the elements that make up a single project.
We will begin our Form and View construction by building our Hello World View. This View will contain a label, a text box and a button control. The button control will be configured with a rule to show a message after it has been clicked. Remember that views are logical groups of content. One Form might contain several Views. Views by themselves cannot be accessed by users; they must be contained within a Form for your users to access and submit them.
Step 2 Tasks
- In K2 Designer, create a new Item View and name it
Hello World - On the Create Layout Table Only configuration screen, set the number of Columns to
2
and the number of Rows to
2
Add a Label control to the first table cell and change the Name to
Name Label
then change the Text to
Enter your name:
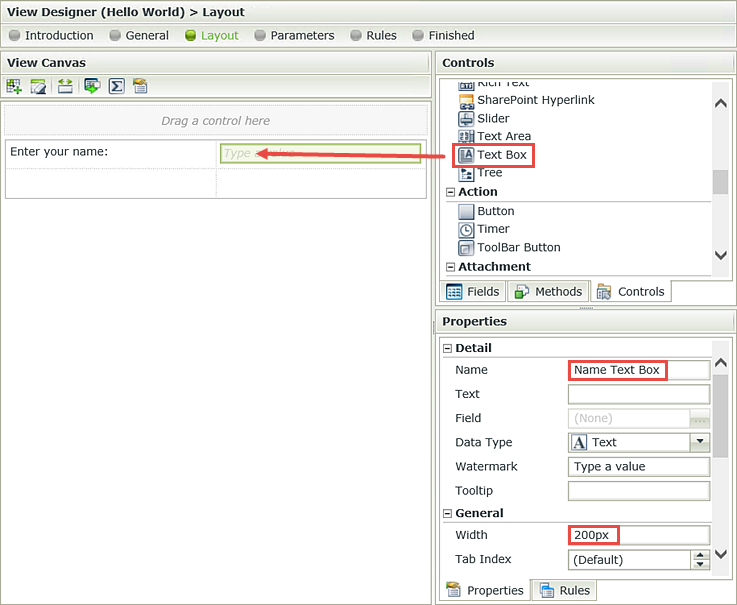
Add a Text Box control to the top row, second table cell and name it
Name Text Box
then change the width of the Text Box control to
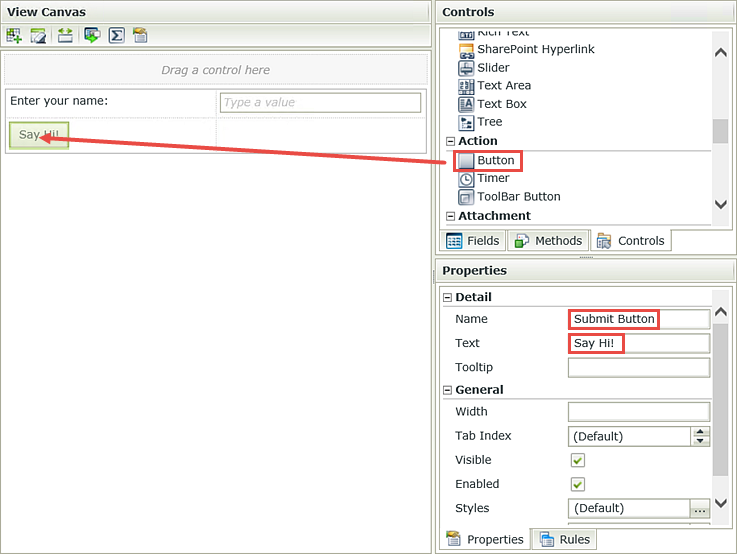
200px - Add a Button control to the second row, first table cell and Name it
Submit Button
then change the Text to
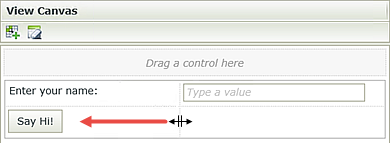
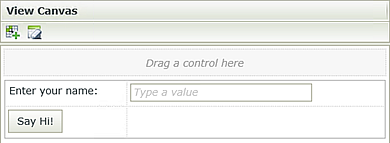
Say Hi! - Adjust the width of the table’s first column so that it better aligns with the Enter your name label.
- Add a Rule that fires off when the Submit Button is clicked. Add a Condition to require the Name Text Box control. Add an Action to show a message after the Submit Button is clicked. Configure the message as shown below using the Name Text Box control and the Current Date System Value in the body.
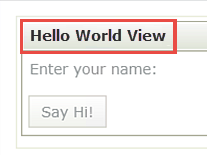
- Run the Hello World View and confirm the Hello World message box appears with the name entered in the Name Text Box and Current Date after the submit button is clicked.
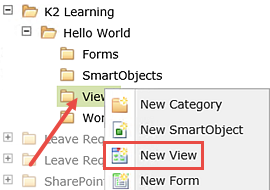
- Right-click the Views category and select New View.
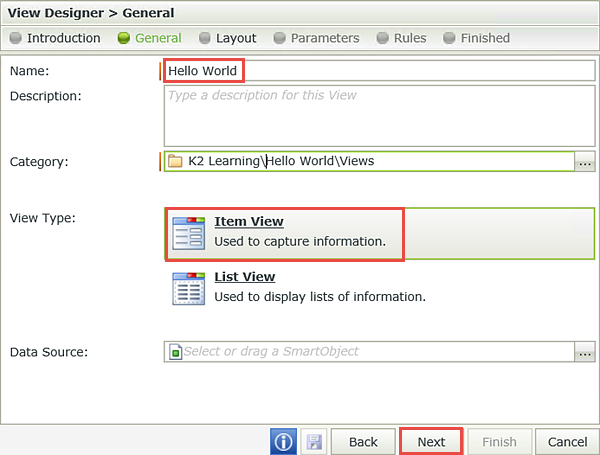
- When the Views home page opens, click Next. Name the new View
Hello World
and confirm Item View is selected for the View Type, then click Next. (No changes are necessary for the Data Source field.) - On the Layout screen, click Create Layout Table Only.
- Set the number of Columns to
2
and the number of Rows to
2
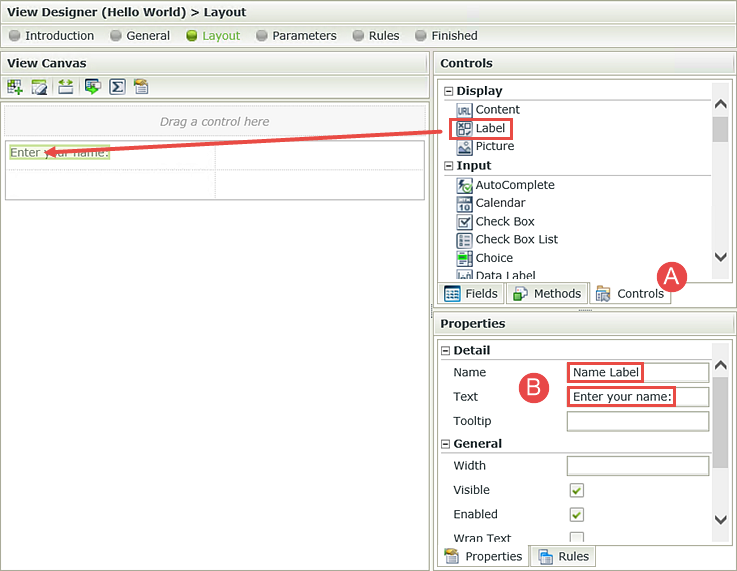
then click OK. - Expand the Controls pane (A below), then drag a Label control into the first table cell. Click the Label control once to highlight it. In the Properties pane (B below) change the Name to
Name Label
then change the Text to
Enter your name: - Back in the Controls pane, drag a Text Box control into the second table cell. Highlight the Text Box. From the Properties pane, change the Name to
Name Text Box
then confirm the Text property is empty. We do not need a Text Box display value for this exercise. - Change the Width to
200px - From the Controls pane, drag a Button control into the first table cell on the second row. Highlight the Button control. In the Properties pane, change the Name to
Submit Button
and change the Text to
Say Hi! - Change the width of the table’s first column by dragging the center column line to the left so that it aligns with the Enter your name label.
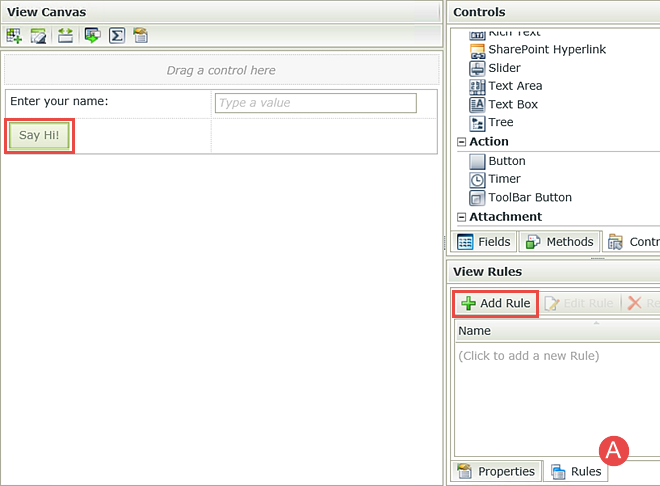
- Click the Submit Button once to highlight it. Click the control’s Rules tab at the bottom of the Properties pane (A below), then click Add Rule.
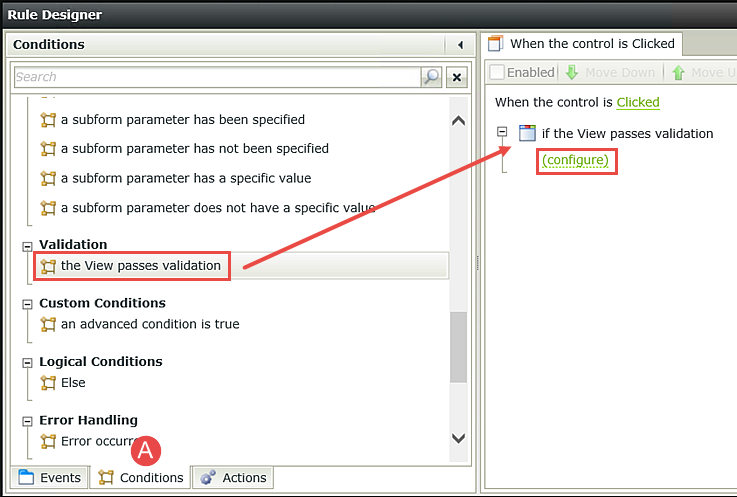
- Click the Conditions tab (A below). Scroll down through the available conditions until you reach the heading Validation. Click once on the View passes validation to add the condition to the When the control is Clicked rule. Click the (configure) link.
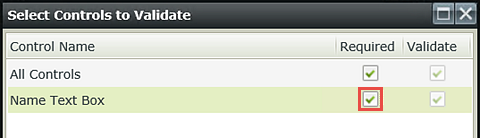
- Check the box to require the Name Text Box and click OK.
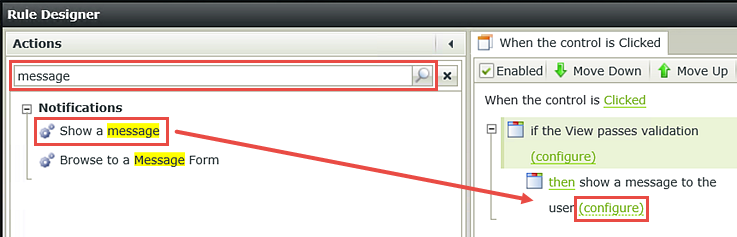
- Enter
message
in the Search box and click the Search icon. - Click once on the Show a message Action to add it to the Rule Definition pane. Click the(configure) link.
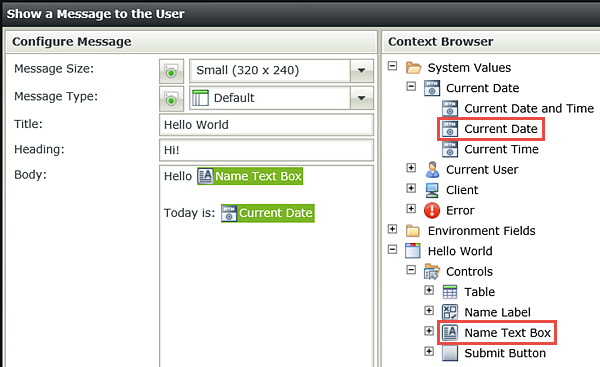
- Now we will configure the content of the message shown to the user. See the screenshot below this step for an example of what the message configuration should look like.
For the Title enter
Hello World
For the Heading enter
Hi!
For the Body enter
Hello [Name Text Box]
and from the Context Browser, expand the Hello World View, then Controls. Append the Name Text Box control to the end of the line (in place of [Name Text Box]).
After the Name Text Box, enter two new lines and enter
Today is:
then drag the Current Date from the System Values after the Today Is: text.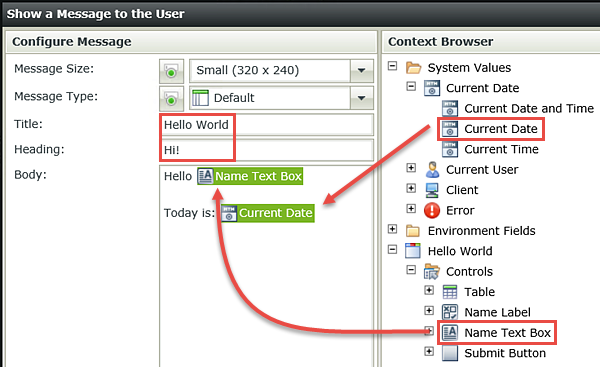
- Click OK to close the message configuration screen and OK once again to close the Rule Designer. Click Finish (located just below the Properties pane) to close the View Designer.
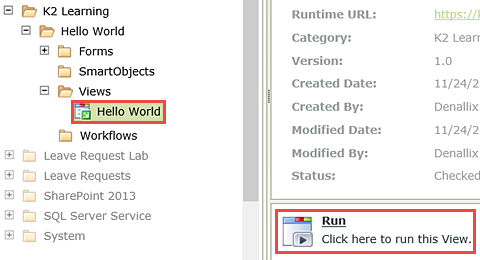
- The last step for Step 2 is to test the View. With the Hello World View highlighted, click Run from the Properties pane.
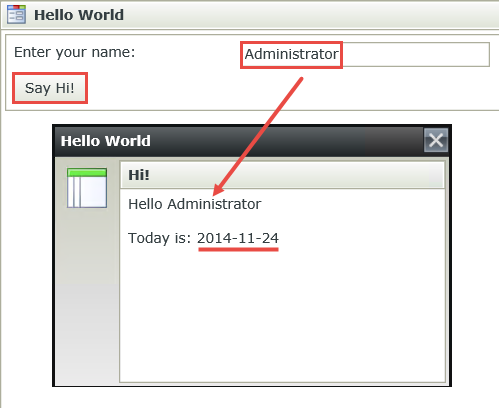
- Enter your name in the Name Text Box and click Say Hi! Confirm the Hello World message comes up with your name and today’s date.
(The Name element in the Properties refers to the control's identity. K2 references controls by their Name value. The Text entry is what the user sees, it is the control's display value.)
Now that we’ve created our basic View and have applied some formatting to the Name Text Box width and table column width, we are ready to add a rule to the Submit Button. We will add a condition to the rule that essentially turns the Name Text Box into a required field, then add an action that shows the user a message after they have clicked the Submit Button.
The first step is to add the Event. Recall that an Event is when something happens. In our case, it’s when the Submit Button is clicked.
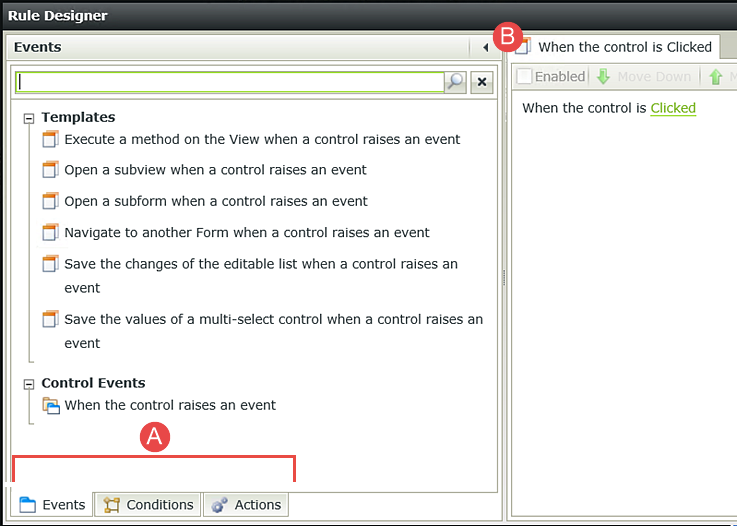
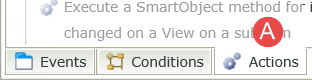
In the Rule Designer, notice there are two panes. On the left side are the Events, Conditions and Actions K2 offers out-of-the-box. Navigate to each via the tabs at the bottom of the left-side pane. (A below) On the right side is the Rule Definition pane. This is where you define the conditions and actions for each rule. The rule you are currently working with (When the control is Clicked) is shown at the top of the Rule Definition pane. (B below)
Notice just below the rule title, K2 has added the base rule. Because we had the Submit Button highlighted when we added the rule, K2 added the default method (Clicked) for you. The next step for us is to add our condition to require a value in the Name Text Box.
Now that we’ve configured a condition to require the Name Text Box, the second configuration to our rule is to add an action to show a message. Begin by selecting the Actions tab. (A below)
In the previous step, we scrolled through the Conditions until we found the validation condition. As you work with Rules, you will become more familiar with the terminology. Use the Search box to quickly locate the definition you want to add.
In this next step, we will configure the message we want to show our user. We will be using properties found in the Context Browser. These properties are dynamic, in that at runtime (the live message that the user will see), the properties will be replaced by the appropriate form field or system values. Context Browser properties are always green, so that you can easily find them in your content. In the step below, we will be dragging the Context Browser Name Text Box into our message. At runtime, this value will be replaced be the name entered into the form field. The Current Date system value will be replaced by the actual date.

STEP 2 REVIEW
In Step 2 we created our Hello World View. We added a Label control, a Text Box control and a Button control. We formatted our layout by setting the width of the Text Box control and by adjusting the column width for the View table. We then added a Rule that will fire off when the Submit Button is clicked. We added a Condition to require the Name Text Box and an Action to show a message if the Condition was met.
In Step 2, we created and tested the Hello World View from within K2 Designer. Views must be contained within a Form for our users to be able to access and submit them. In Step 3, we will build a Form for our Hello World View.
Step 3 Tasks
- Generate a Form from the Hello World View and name it
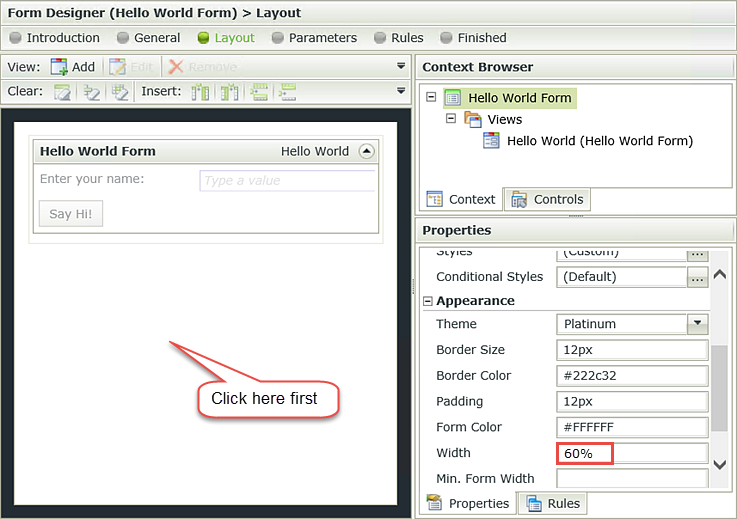
Hello World Form - Change the Form Title to
Hello World Form
and the form’s Width to
60%
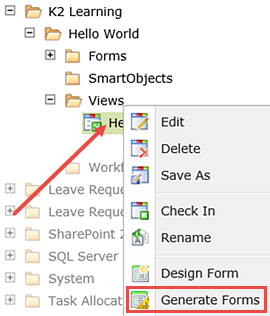
- Right-click the Hello World View title and select Generate Forms.
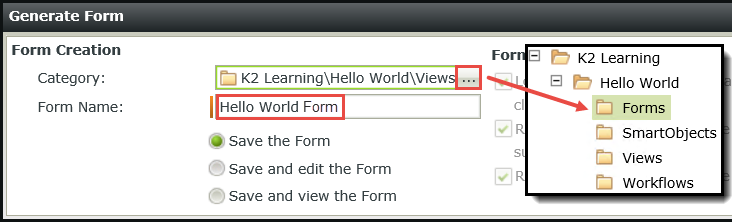
(While we could design our form manually, generating a form automatically adds the associated view to the design canvas, saving you a step.) - Change the Form Name to
Hello World Form
then click the ellipses to the right of the Category field and select Forms from the Category Browser. Click OK and OK again.
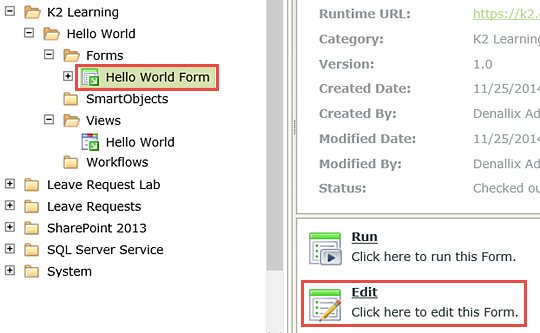
(Because we generated the form directly from the view, K2 automatically assigned the View as the form's category. We can simply move elements around into the categories that make sense and keep things organized.) - From the Category Browser, highlight the new Hello World Form and click Edit.
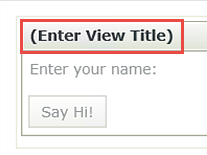
- Double-click the (Enter View Title) title bar and change it to
Hello World View - Click anywhere within the form canvas, but not within the View area. In the Properties pane, change the form’s Width to
60%
then click Finish to save your form and exit. - Right-click the Hello World Form and select Check In. (If you get a message about checking in associated views, click OK to continue.)
(Our simple form probably doesn't need a view title, but when you start building more complex forms with multiple views, giving them meaningful titles can help your user navigate your form elements.)
SmartForms are browser-based forms. If we were to open this form in a browser right now, it would stretch the width of the browser. Because this is a small form, we want to adjust the form’s width so that it is easier to use.
Our final task for Step 3 is to check in the form. Checking in views and forms 'publishes' them to the K2 server, making them available for use by your users. If you need to make a change to either your form or view, you must first check them out, make your edits, then check them all back in again to expose the changes to your users. You can check in views and forms individually, or check in the form, which will include any associated views.
STEP 3 REVIEW
In Step 3 we generated a Form from the Hello World View. We formatted the form by changing the default title bar and by setting the form width. Our form is now ready to be exposed to our users, which we will test in the next step.
In Step 4, we will test our form using an internal link and an external link. The internal link opens and processes the form from within K2 Designer. The external link opens and processes the form from the K2 Runtime Web Site. This is the URL you would use if you were linking to this form from a web page or providing your users with a URL to the Form, for example.
Step 4 Tasks
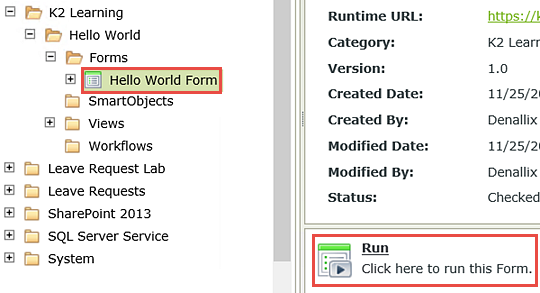
- First test the form using the Run link found in the Properties pane.
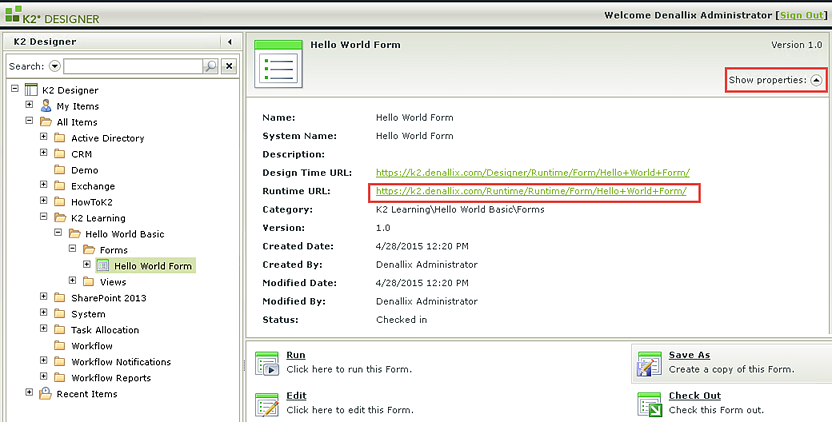
- Next, test the form using the Runtime URL link found in the Properties pane.
In both cases, confirm the form submitted with the Name Text Box and Today’s Date present in the confirmation message.
- From the Category Browser, highlight the Hello World Form and click Run.
- Click on the Hello World Form title once again in the Category Browser. This closes the test form and returns you to the Properties pane. Notice the Design Time URL and the Runtime URL links that appear in the Properties pane. The Runtime URL is the external link to your live form. (This would be the URL to use for linking to the SmartForm from other sources, a web page for example.) Click on the Runtime URL.
Note: you may need to click the Show Properties arrow to show the Form URLs - The form now opens in a browser. Enter a name into the Name Text Box and submit the form. Confirm the confirmation message has the name entered along with today’s date. Close the confirmation message and Close the browser.
Notice how the form opens from within K2 Designer. Enter a name into the Name Text Box and submit the form. Confirm the confirmation message has the name entered along with today’s date.
STEP 4 REVIEW
In Step 4 we tested the Hello World Form both internally and externally. We used the Run link to test the form and observed how it opened and processed from within K2 Designer itself. We then used the Runtime URL link to open and submit our form from an external browser. What's key here is that forms and views must be checked in before your users can access them and users can only access forms from a Runtime URL link. If you need to make a change to a form or view, you must check it out, make your changes, then check it back in. This "publishes" the forms/views to the K2 servers. Users cannot see any changes until the forms and views are checked back in.
Congratulations on building your very first SmartForm! You should now understand the very basics behind Views, Forms, Controls and Rules and how these are used to assemble SmartForms. In other tutorials, we will expand on the Data, Forms, Workflows and Reports components and explain how they are used together to implement K2 applications.
Challenge steps will test your knowledge by providing high-level guidance but no step-by-step breakdown. In this challenge step, you will create a Rule so that the Name Text Box is automatically populated with the current user's name when the Form is opened.
Challenge 1 Tasks
- Check out the Hello, World Form.
- Edit the When the Form is Initializing Rule for the new Hello, World Form.
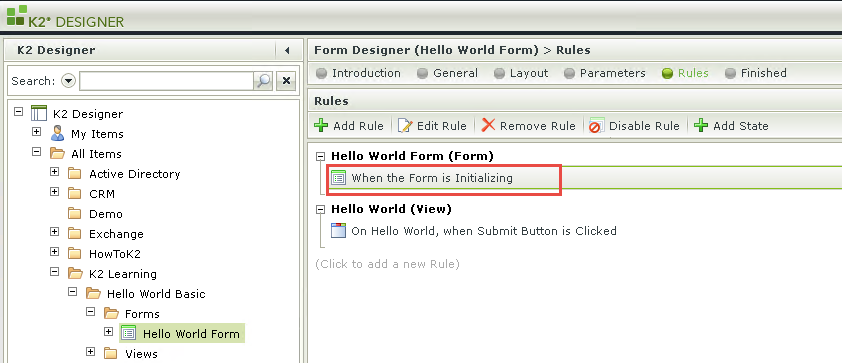
- Add a Transfer Data Rule Action and then configure it to populate the Name Text Box with the current user's Display Name

- Check in the Form, then run the Form and confirm that the username is automatically entered when the Form is opened.
- Ask another User to open the Form (or run a Browser as another user) and then confirm that the display name is changed for that user.
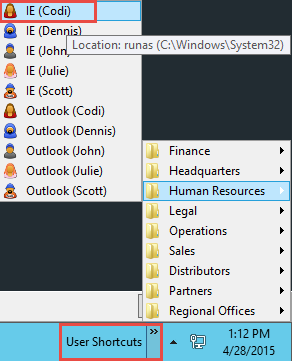
If you are using a K2-provided virtual machine for this tutorial, you can launch another user's browser with the shortcuts on the toolbar: