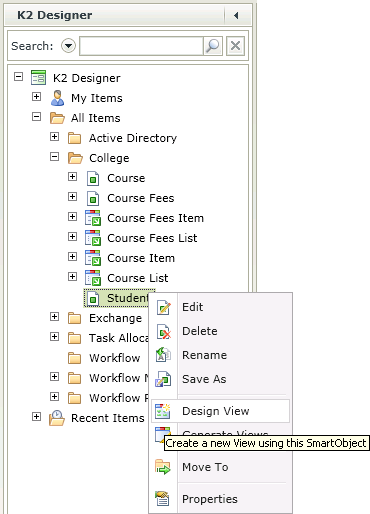
Create the Student SmartForms View
- Right-click on the Student SmartObject in the Category Tree and select Design View.
- On the Introduction step of the View Designer wizard click Next
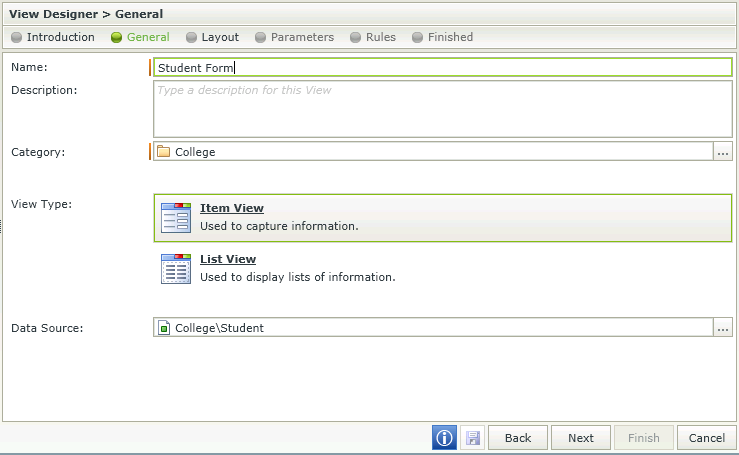
- On the General step of the wizard type Student Form in the Name Field.
- Note that the College Category is pre-populated for you, or you can click the ellipsis button to change the category.
- The Data Source is also pre-populated with the Student SmartObject.
- Select Item View as the View Type.
- Click Next.
- On the Layout step of the wizard, click on Create Layout Table Only then select 2 Columns and 7 Rows. This will create a blank table for you to design your View from scratch.
- Click OK.
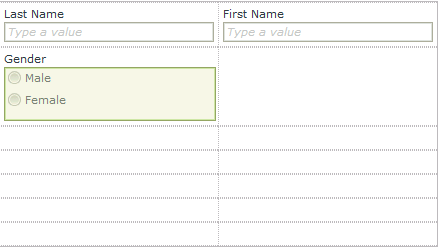
- To add fields onto the canvas, drag the field from the Toolbox and drop it on the canvas. Drag Last Name to the first cell on the canvas.
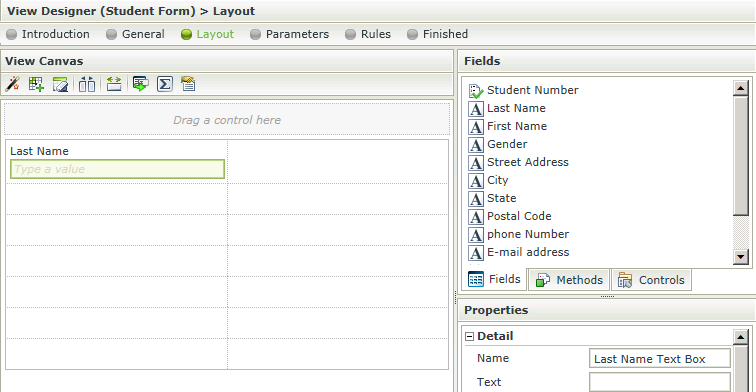
- Drag First Name to the second cell on the canvas.
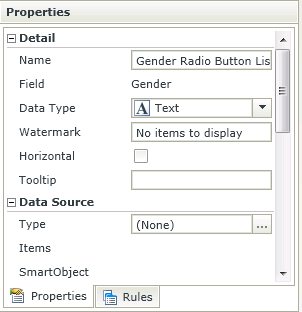
- Drag Gender to the third cell on the canvas under Last Name.
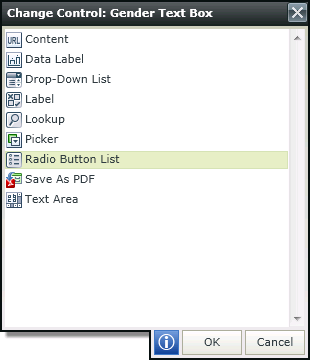
- Select the text box beneath the Gender label. Click on the Change Control icon
 in the Toolbar and select Radio Button List then click OK.
- In Properties for the radio button list, find Data Source and click the ellipsis next to Type.
- Select the Use a static list of values in the control radio button.
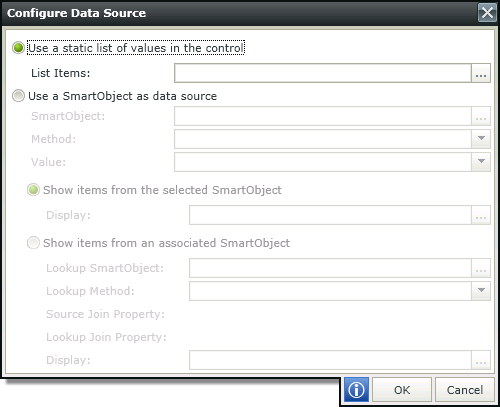
- Click the ellipsis button next to List Items.
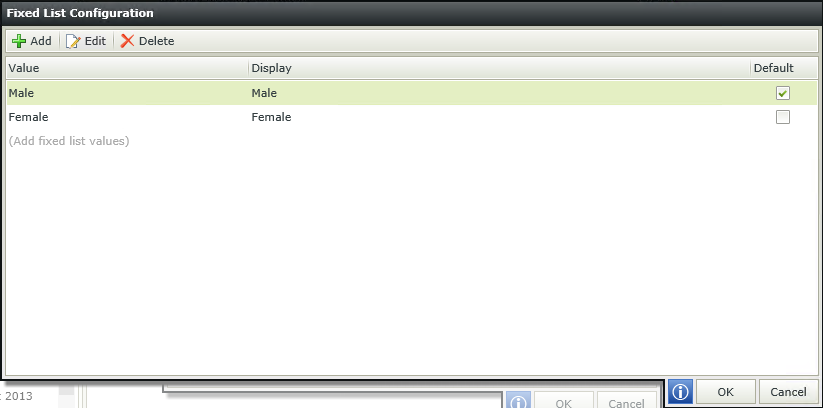
- Click Add, type Male in the Value and Display fields. Click Add and type Female in the Value and Display fields.
Select Male as the default option.
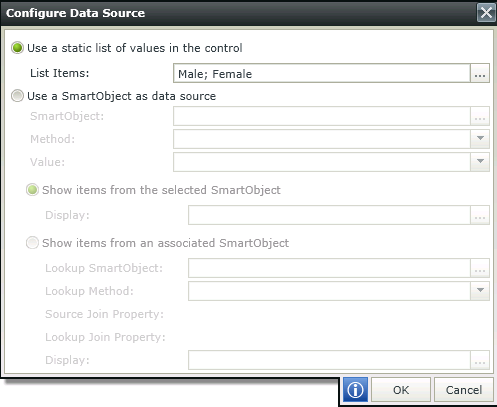
- Click OK.
- Click OK.
- Drag the following fields onto the canvas
- Street Address
- City
- State
- Postal Code
- Phone Number
- E-mail Address
- Birth Date
- First Language
- Course Name ID
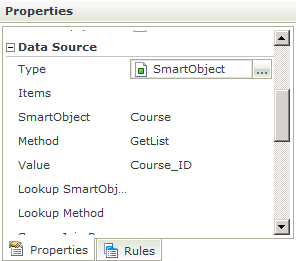
- With the drop down box selected for the Course Name ID ensure that Data Source in the Properties tab is populated with the Course SmartObject.
- Select the Methods tab in the Toolbox.
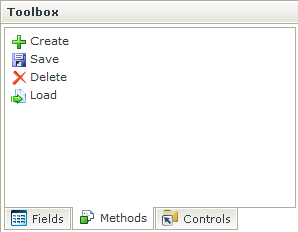
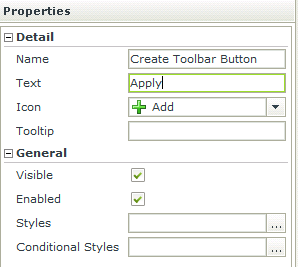
- Drag and drop the Create method to the top open cell on the canvas to add a menu bar button.
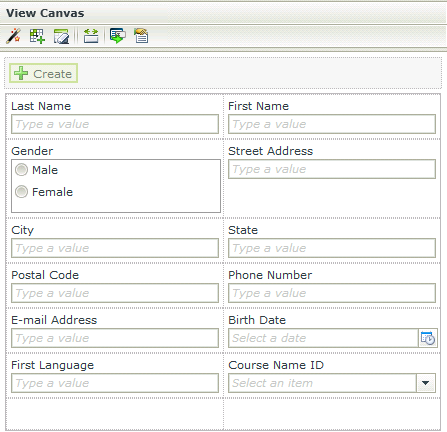
- With the Create button selected on the canvas change the Text field in the properties to Apply.
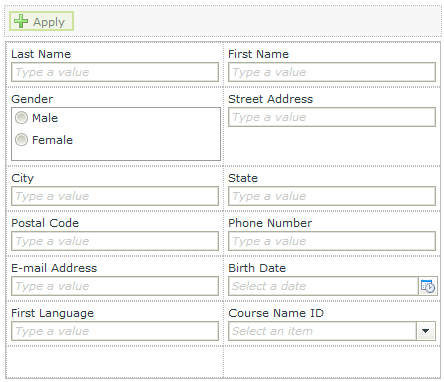
- Your View will look similar to:
- Navigate to the Parameters tab of the View Designer and add the Student Number parameter as shown below.

- Click Finish.
We will not test this View yet as this is the main View on the Form and will be tested as part of the Form steps, coming up next.

|
|---|