Create the Applicant Approval Form State
We want to add extra fields to the Denallix College Application to allow the administration officer to action the application. To do this we need to add two buttons to the Form and modify the rules.
- Double click on the Denallix College Application Form in the Category tree.
- Select the Controls tab in the Context browser. Locate the Action section.
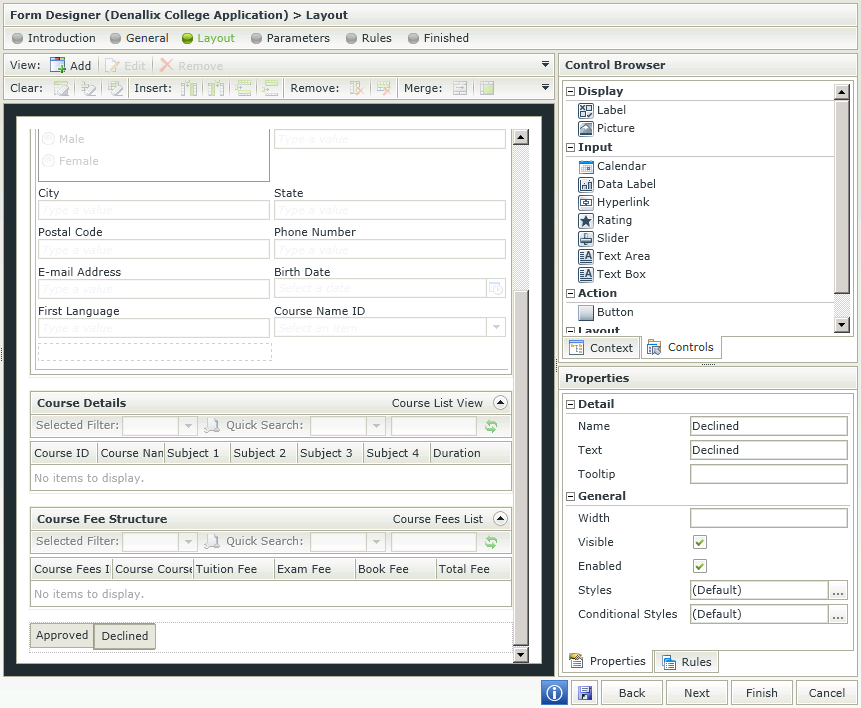
- Drag a button control onto the canvas under the last view and drop it in the marked drop zone.
- In Properties change the Name and Text field to Approved.
- Drag another button next to the Approved button and name it Declined.
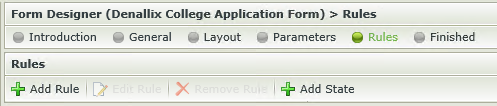
- Click on the Rules step in the Form wizard navigation.
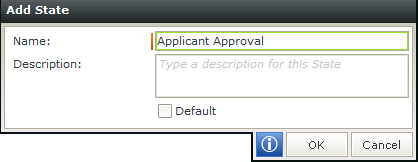
- Click on the Add State button on the toolbar.
- Type Applicant Approval in the Name field and click OK.
There are now two states to this Form. The (Base State) which is the original Form and now the Applicant Approval state, which will be the Enrollment officer’s task Form.
- We need to edit the (Base State) to hide the buttons from the student. Click on (Base State) in the States pane.
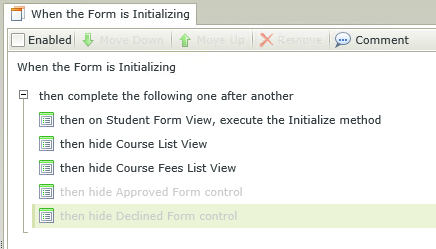
- Select the When the Form is Initializing rule and click the Edit Rule button.
- Click on the Actions option in the rule wizard navigation.
- Locate the Visibility section and select Hide a Form control.
- Change the green select control to Approved.
- Click Hide a Form control again and change the green select control to Declined.
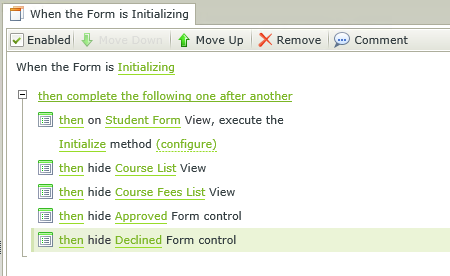
- Click OK to close and save the rule.
- We need to edit the Applicant Approval state to show the buttons for the enrollment officer to approve the application.
- Click on Applicant Approval in the States pane.
- Select the Form is Initializing rule and select the Edit Rule button.
- Hover over the rule definition that says then hide Approved Form control until the toolbar appears.
- Uncheck the checkbox as we do not want to hide the button but rather show it.
- Hover over the rule definition that says then hide Declined Form control until the toolbar appears.
- Uncheck the checkbox as we do not want to hide the button but rather show it.
- We also do not want the enrollment officer to be able to see the Apply button so we will add a rule to hide this button.
- In Actions under Visibility select Hide a View control.
- In the green select View link choose Student Form.
- In the green select control link choose Create Toolbar button.
- Click OK to close the Rule.
- Click Finish in the bottom right to save the Form.
Once the Approval Workflow has been created we will come back and create the rules defining what will happen when the Approved and Declined buttons are clicked

|
|---|