Placeholder step
Use the Placeholder step as a temporary step when building the workflow. It can be replaced by another step at a later point when you know the full extent of the workflow logic and path. This step needs no human interaction, and no action is performed on the server.
You can start building your workflow on the canvas, adding placeholder steps for paths and processes to tweak and configure at a later stage. Replace these placeholder steps by any step from the Toolbox by dragging the selected step onto the Placeholder step.
Use the Placeholder step in the following scenarios:
- Sketch out a workflow without knowing the exact implementation details yet
- Wireframe a workflow concept and return at a later stage to configure the step details
- Wireframe a workflow concept, save it and then hand it over to another designer to fully implement it
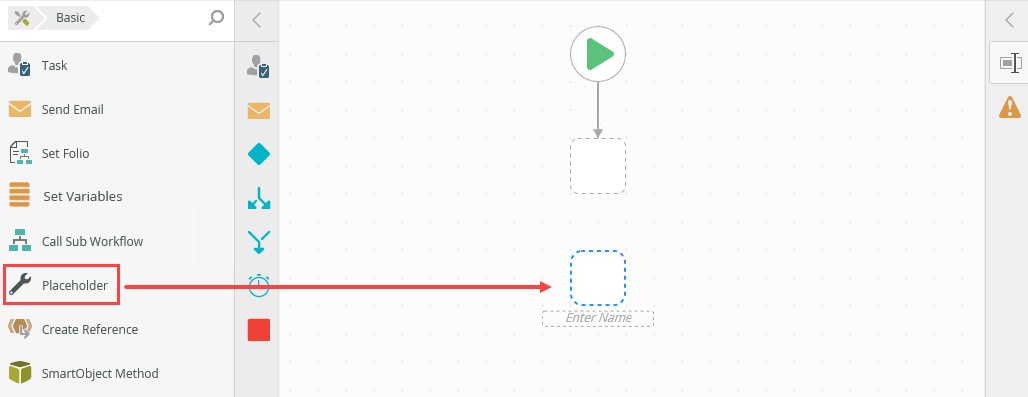
Drag the Placeholder step from the Basic category, Favorites bar, or the Recent category onto the canvas. Drag a line from any step into open space on the canvas to automatically create a Placeholder step.
Example of a Placeholder step in a workflow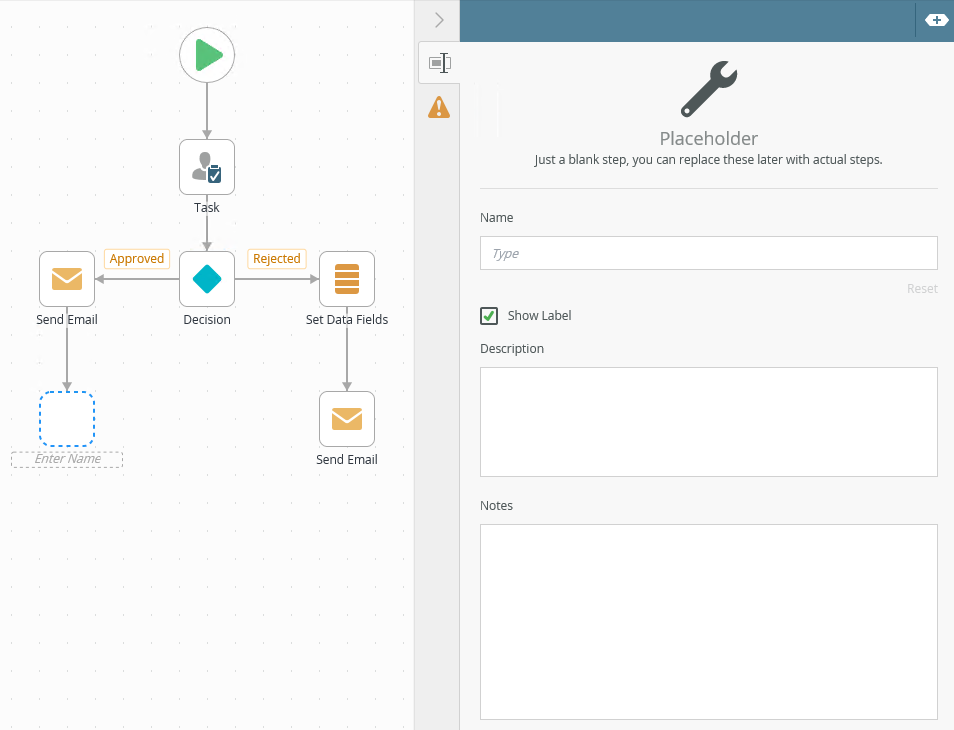
- From the Toolbox click the Basic category, and then click and drag the Placeholder step onto the canvas.
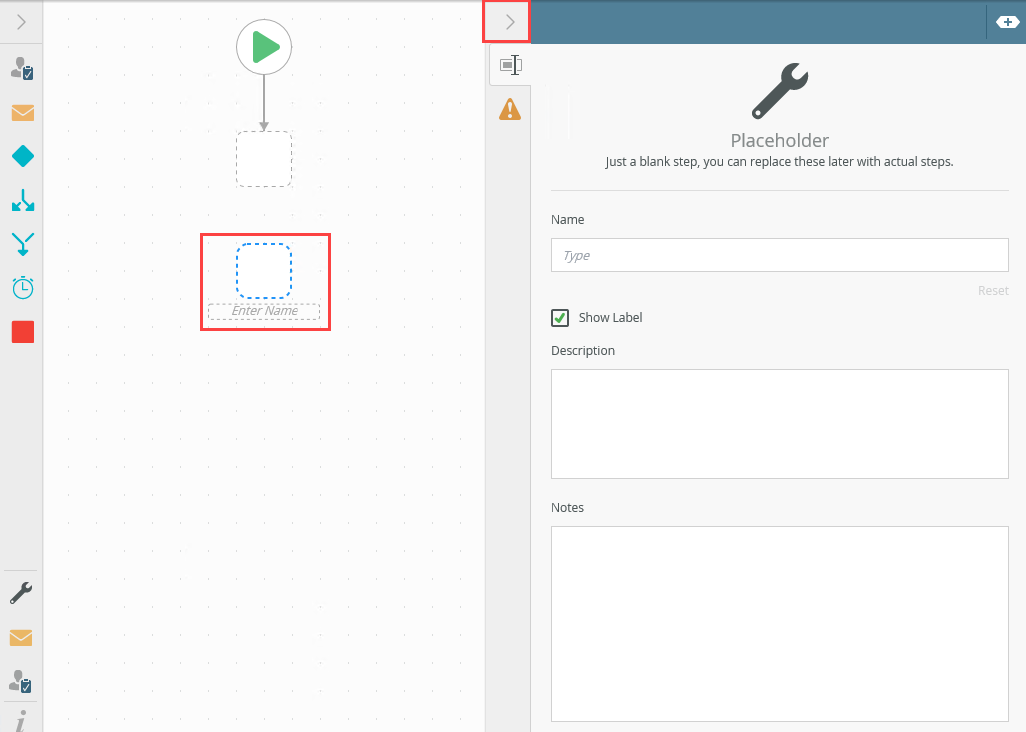
- Select the added step and click the expand / collapse toggle to expand the Configuration Panel. You can also double click the step to expand the panel.
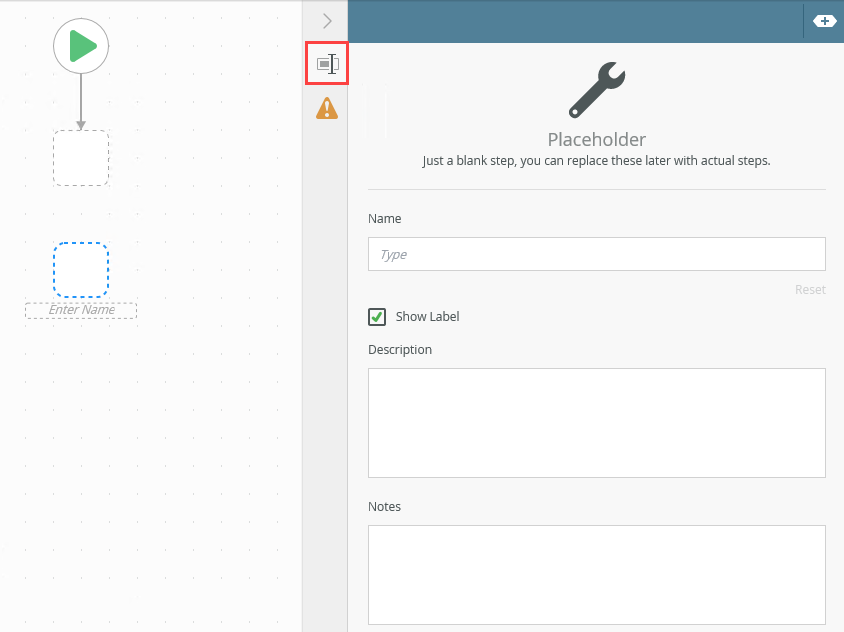
- With the step selected, select the Properties tab.
- Click the Errors tab.
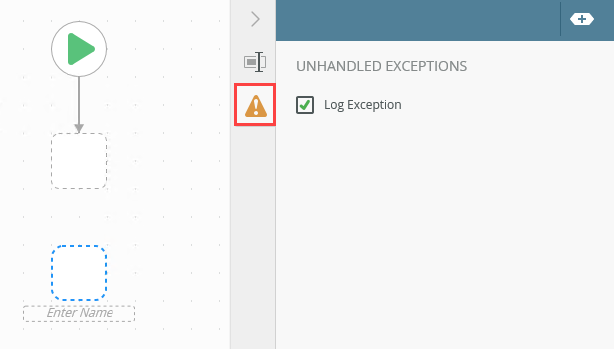
- The exceptions in the table above is an example of those available in Workflow steps. The exceptions available depend on the Workflow step used in the design canvas.
-
When you enable both Continue on Error and Force error when required SmartObject inputs are missing, the workflow continues with execution even if the required inputs are missing. The Continue on Error setting takes precedence.
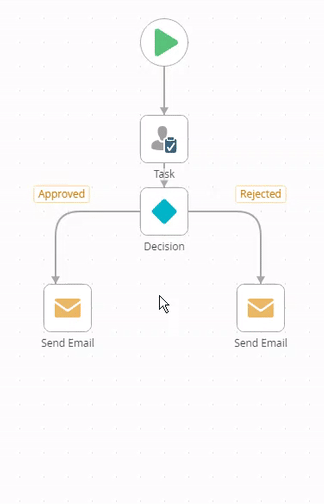
- To replace a Placeholder step with another step, select the relevant step from the toolbox and drag it onto the Placeholder step. In this example, replacing the Placeholder step with a Task step.
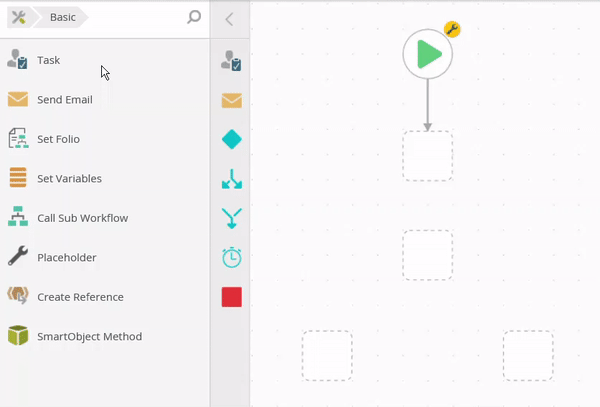
- To add a Placeholder step without dragging one from the Toolbox, drag a line from any step into open space on the canvas. This creates a Placeholder step.
-
Your changes are automatically saved.
The following table explains the options available on this tab:
| Option | Explanation | How to Use |
|---|---|---|
| Title / Name | By default, each step on the canvas has a step title. You can change this title to suit your workflow logic and show it on the canvas by checking the Show Label box. | Enter a value into the Title/Name field. |
| Reset link | Use the link to reset any changes to the title. | Click the Reset link to reset the Title/Name field to default value. |
| Show Label | Allows you to see the step label on the canvas. The label shows the value of the title. | Check the check box to display step label on the canvas. |
| Description | Allows you to add a detailed description for the step. | Enter a value into the Create New field. |
| Notes | Allows you to add additional notes for the step. | Enter a value into the Notes field. |
Different types of exceptions can occur on a step, such as:
| Type | Description |
|---|---|
| Known exceptions | Any SmartWizard or standard wizard that has Boolean options for handling known exceptions have these options displayed as check boxes in the Known exceptions section of the Exceptions tab. |
| Unhandled exceptions | Any unknown runtime exceptions. |
The tab contains the following unhandled exceptions:
| Exception | Explanation |
|---|---|
| Log Exception | Logs the exception to the error log. |
| Force error when required SmartObject inputs are missing | Will forcefully throw an error if a SmartObject method has input missing. |
| Continue on error | Will force the workflow to continue running the SmartObject method, even if it runs into an error. |
When working with the Placeholder step keep in mind the following considerations:
- When dragging a step onto the Placeholder step, the Name field changes according to the step replacing the Placeholder step, but only if the name of the Placeholder step was not configured beforehand. If you previously configured the Placeholder step's Name and then drag a step onto this Placeholder step, the added step name inherits the Placeholder step's name. Example: You rename the Placeholder step Name to My Placeholder. You drag a Send Email step onto the Placeholder step. The Send Email step name is My Placeholder.
-
If you add a Logic step (Decision, End, Merge, Split, Timer or Loop) onto a Placeholder step and no label is already specified for the Placeholder step, the Show Label check box will be unchecked. Check the check box to show the label. Dragging other types of steps onto the placeholder will retain the label applied for the Placeholder step and the Show Label check box will be checked.
- The Placeholder step can contain single or multiple steps.
- The Placeholder step requires at least one incoming line.
- Multiple steps can be dragged onto a Placeholder step to create a multi-step.
- A multi-step can be dragged onto a Placeholder step.
- The Placeholder step cannot be dragged into a multi-step.
- Any type of step can be dragged onto a Placeholder step.
- At runtime, a Placeholder step can execute without being configured, but keep in mind that nothing happens on the server.
- The Placeholder step is an empty step unless you drag a step onto it, which then replaces the placeholder step.
- Deleting a Placeholder step removes the step and all in and outgoing lines.