9. Add Additional SmartObject Method Steps and End Step
In this step, you will again use a SmartObject Method step to update the Leave Request SmartObject > Request Status property. You will add a SmartObject Method step to the Approved outcome and another to the Denied outcome. You will configure the save method to update the request status with either "Approved" or "Denied". You will complete the workflow by adding an End step. The End step provides a visual indicator that the workflow is complete. While not required, nor does it have any other functionality, the End step is a clear and clean method to end a workflow.
-
In this step, you will update the Request Status property so that it reflects either the approved or denied decision. Begin by adding a SmartObject Method step to the Approved outcome. Connect the two steps. Map the ID INPUT MAPPINGS to the Leave Request SmartObject > ID REFERENCE. Add the Request Status INPUT MAPPING and enter Approved. Repeat this step for the Denied outcome.
- This step is nearly identical to the first step you added and configured. You are going to update the Request Status property so that it reflects either the approved or denied decision. Ultimately, you will add two SmartObject Method steps to the canvas. One for the Approved outcome and one for the Denied outcome.
Drag a SmartObject Method step (Toolbox > Basic) onto the design canvas so that it aligns with the Approved outcome. Connect the Approved outcome to the SmartObject Method step.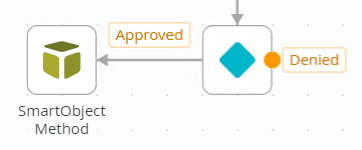
- Select the SmartObject Method step, then expand the Configuration Panel.
- Click the SmartObject Detail tab to confirm it is the active screen. In the SMARTOBJECT section, browse to, then select the Leave Request SmartObject. Click OK.
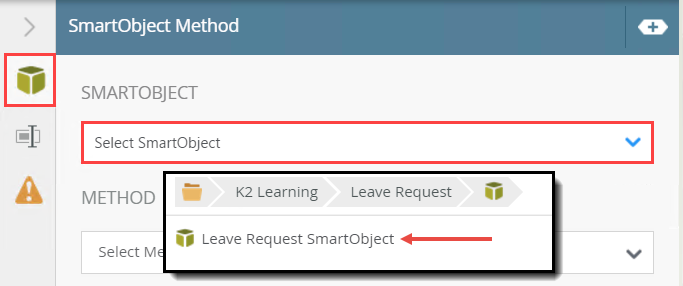
- Select the Save method from the METHOD drop-down list.
- Now, you will map the INPUT MAPPINGS to the Leave Request SmartObject REFERENCE so that K2 knows which record to update. In the INPUT MAPPINGS section, click the Add (+) icon. Select ID and Request Status from the drop-down list. If you like, you can select both properties at the same time by clicking the ID property, then clicking the Request Status property. Click outside the list menu to close it. Expand the Context Browser. Expand the Leave Request SmartObject REFERENCE. Drag the SmartObject ID so that it is mapped to the ID INPUT MAPPING. For the Request Status value, enter
Approved
then click outside of the box to set the value.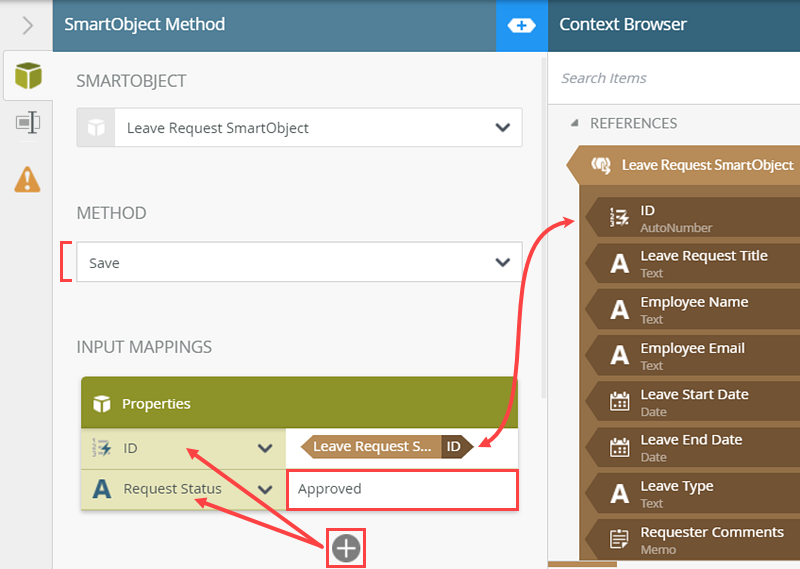
- Click the General Properties tab. Change the Name of the step to
Set Status Approved
then collapse the Context Browser and Configuration Panel.
- Using the same steps as above, add and configure a SmartObject Method for the Denied outcome. Be sure to rename the step to
Set Status Denied
from the General Properties tab.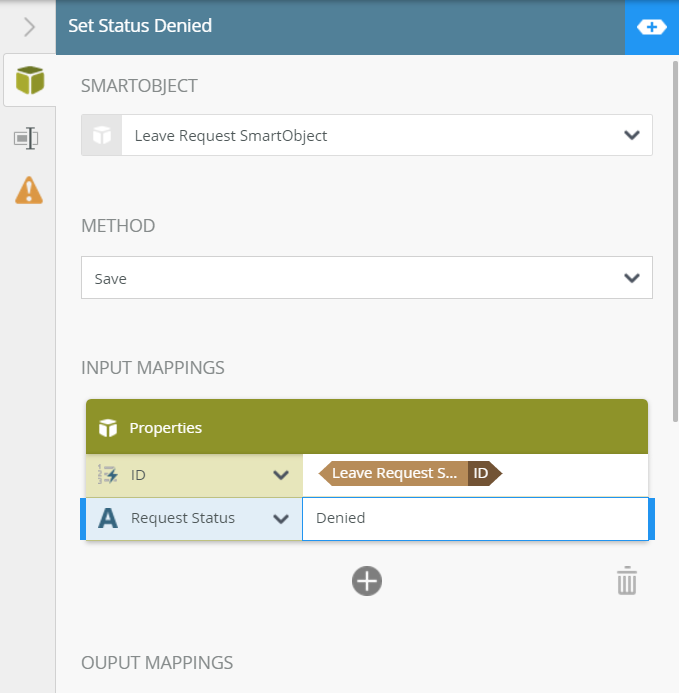
- This step is nearly identical to the first step you added and configured. You are going to update the Request Status property so that it reflects either the approved or denied decision. Ultimately, you will add two SmartObject Method steps to the canvas. One for the Approved outcome and one for the Denied outcome.
-
To show the workflow is complete, add an End step. Connect the both the Approved and Denied SmartObject Method steps to the End step.
The Completed Leave Request Workflow
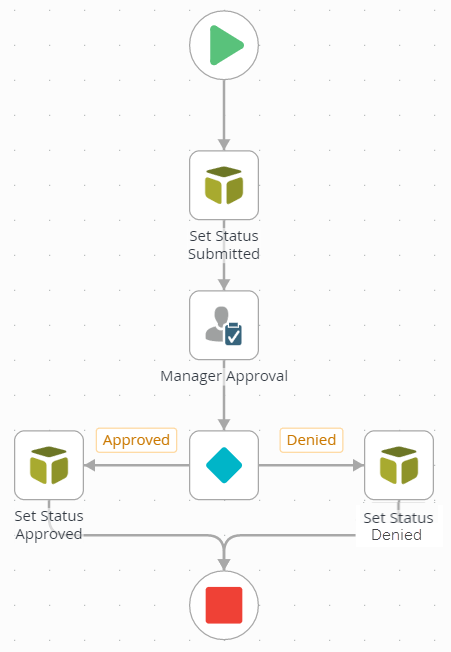
- The final task in building the workflow is to add an End step. (The End step is not required to finish a workflow, nor does it have any other functionality other than providing a clean indication that the workflow is complete.)
Drag an End step (Toolbox > Logic) below the Decision step.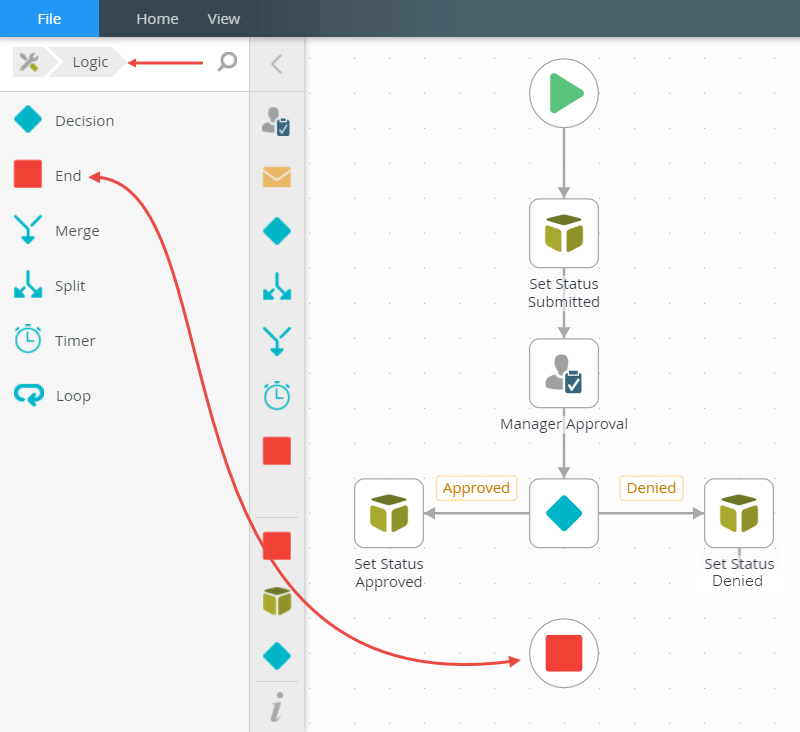
- Connect the Set Status Approved step to the End step. Then connect the Set Status Denied step to the End step.
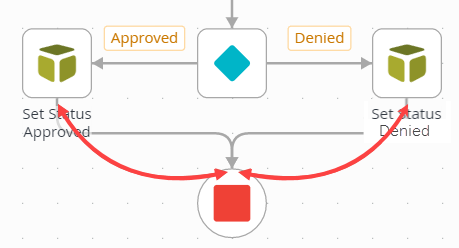
Your completed Leave Request Workflow should look like the image below.

- The final task in building the workflow is to add an End step. (The End step is not required to finish a workflow, nor does it have any other functionality other than providing a clean indication that the workflow is complete.)
Review
In this step, you added additional SmartObject Method steps to update the status property for the Approved and Denied outcomes. You added an End step as a visual indicator that the workflow is complete. In the next step, you will deploy the Leave Request Workflow to the K2 server.