Call Sub Workflow step
Use the Call Sub Workflow step to start another workflow. You can call the sub workflow and either wait for it to complete, or call it and continue with your main workflow.
Use the Call Sub Workflow step for the following scenarios:
- When a workflow branch contains a complex series of tasks, or can leverage an existing workflow, calling a sub workflow makes design, debugging, and maintenance of the application more manageable.
- Depending on settings, a sub workflow can allow a single workflow or multiple workflows to run in parallel.
- Reuse existing workflow logic and build a series of workflows that represent optional functional capabilities that a "hub" workflow coordinates, which is often used in case management and similar scenarios.
Drag the Call Sub Workflow step from the Basic category, or the Recent category onto the canvas.
Example of a Call Sub Workflow step in a workflow
See the following resources for more information:
- See How To: Create a Workflow with Multiple Instances of a Sub Workflow for an example of building a workflow that calls multiple instances of a sub workflow.
- See How To: Create a Workflow with a Single Sub Workflow for an example of building a workflow that calls a single sub workflow.
- From the Toolbox click the Basic category and then drag the Call Sub Workflow step onto the canvas.

- For more information on how to use the error console, see the Error Console topic.
- Select the added step and click the expand / collapse toggle to expand the Configuration Panel. You can also double click the step to expand the panel.

- Select the Call Sub Workflow tab. Use this tab to configure the sub workflow details.
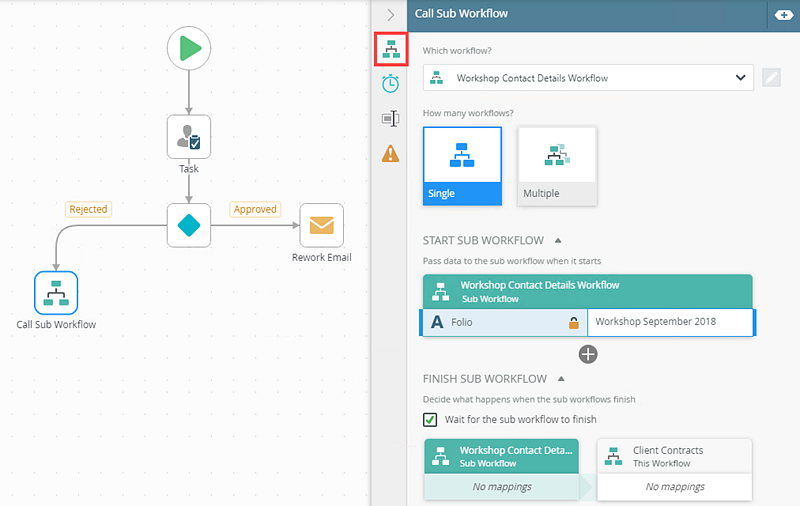
- Single - start a single sub workflow
- Multiple - start multiple sub workflows for each item in a list so you can process items in parallel
- You can also drop a list objection (collection) such as the result of a SmartObject Get List function or a list reference field
- When you do not specify an object (collection) SmartField in the control, the entire input is seen as a delimited list at runtime
- When you drop a list object (collection) into the dynamic list text box, the collection is used as the list at runtime
- When you drop a list SmartField into the dynamic list text box, a warning indicator shows in the text box when there are also other fields or text
- Don't Wait - when you select this option, the main workflow continues without waiting for the sub workflows to finish. This is the default selection
- All - when you select this option, the main workflow waits for all sub workflows to complete
- First - when you select this option, the main workflow waits for the first sub workflow.
- From the menu, select or browse to the sub workflow.

- Note the Start Sub Workflow section.

- Use the Start Sub Workflow section to configure input mappings and select fields, item references, and the folio for the sub workflow.
In the added property field, type a value, use inline functions, or dynamic fields, by clicking Add to expand the Context Browser. Within the Context Browser, select inline functions and fields from the
Functions,
Fields, SmartObjects and Workflow categories. Click and drag the function into the property field.
To add more properties, click the Add button.

- To configure the return values check the Wait for the sub workflow to finish depending on your scenario.

- Use the Finish Sub Workflow to return values from the sub workflow after it completes. In this example, the sub workflow updates details in a SharePoint list and returns values required in this scenario.

- Select the Deadline tab. You can expire a step at a future date, or after an amount of time, to stop waiting for a sub workflow to complete. After the deadline, the main workflow moves to the next step.

- Click the calendar icon to display the date picker. Select a date.
- Drag and drop inline functions and field properties (from the Context Browser) into the field to create dynamic functions
- Suppose the step starts at 2PM on a Friday. Since this is still within working hours for the Sales team, K2 will expire the step at 2:30PM, because 30 minutes of working time have elapsed.
- Now suppose that the step starts at 10AM on a Saturday. Since this time falls outside of working hours for the sales team, K2 waits until working hours start at 8AM on Monday, and then starts counting down. This means that K2 expires the step at 8:30AM on Monday, once 30 minutes of working time have passed.
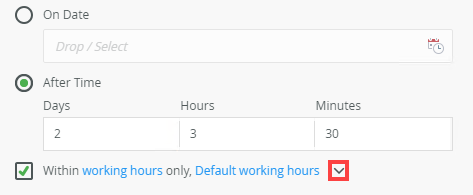
- Check the Within Working Hours Only check box to ensure the task expires after the set time within the specified working hours. Click the working hours link to edit or add working hours.

- Click the Default working hours menu to select a preconfigured (static) set of work hours. This allows you to set the deadline to occur within specified working hours. If you select one of these options (On Date or After Time), the task expires on a specific date or after the set time within the specified working hours. If you don't select this option, the deadline does not take these hours into consideration (so in most cases the deadline occurs sooner).
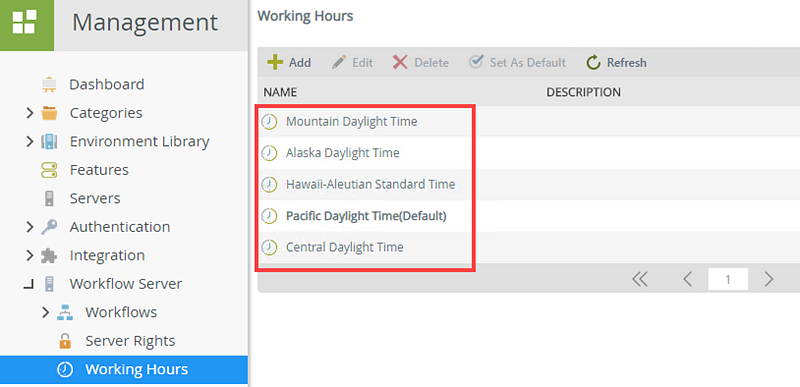
- You can define working hours on your K2 environment to store the working hours for your organization, or to create different zones for different departments and offices in the organization. To configure them, click the working hours link. You must have access and admin permissions in K2 Management to set the working hours. For more information on how to set your working hours see Work Hours. In this example, five different working hours are available in your organization.
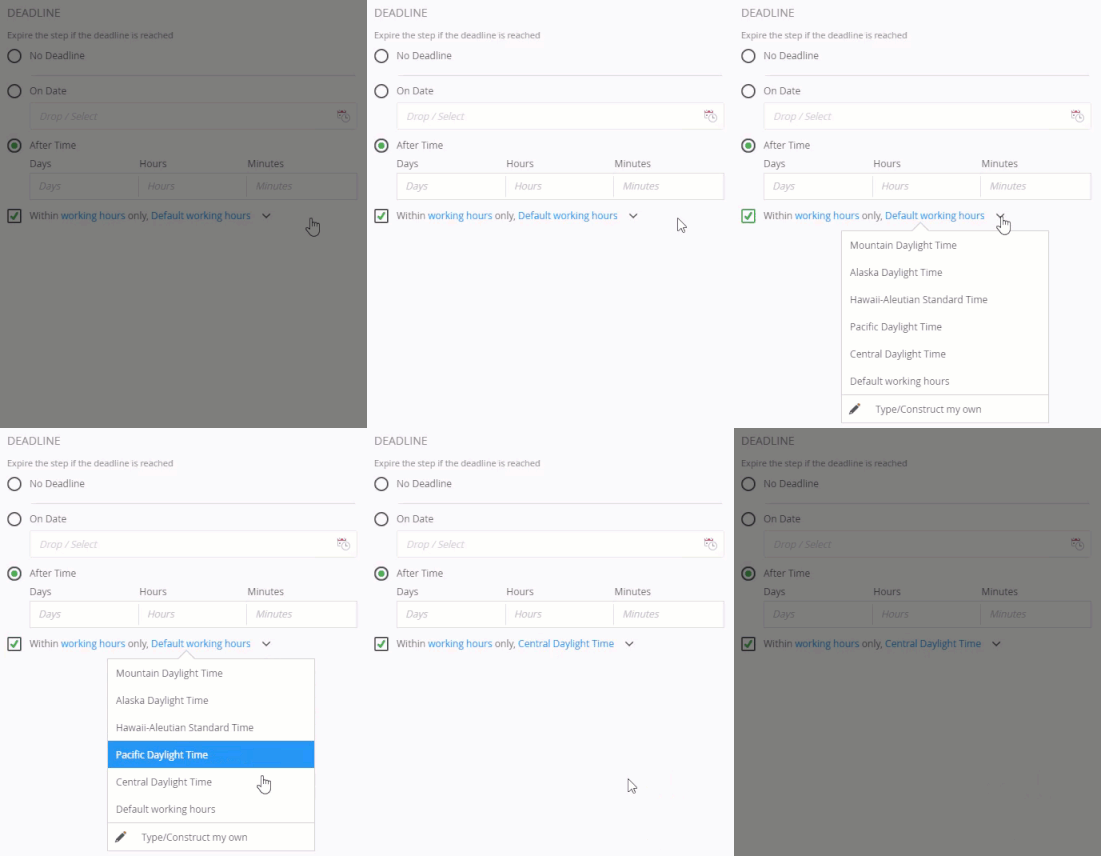
- To view and set the predefined working hours in the reminder, click the Default working hours link menu. By default, the Default working hours option is selected. In this example, select Central Daylight Time from the menu.
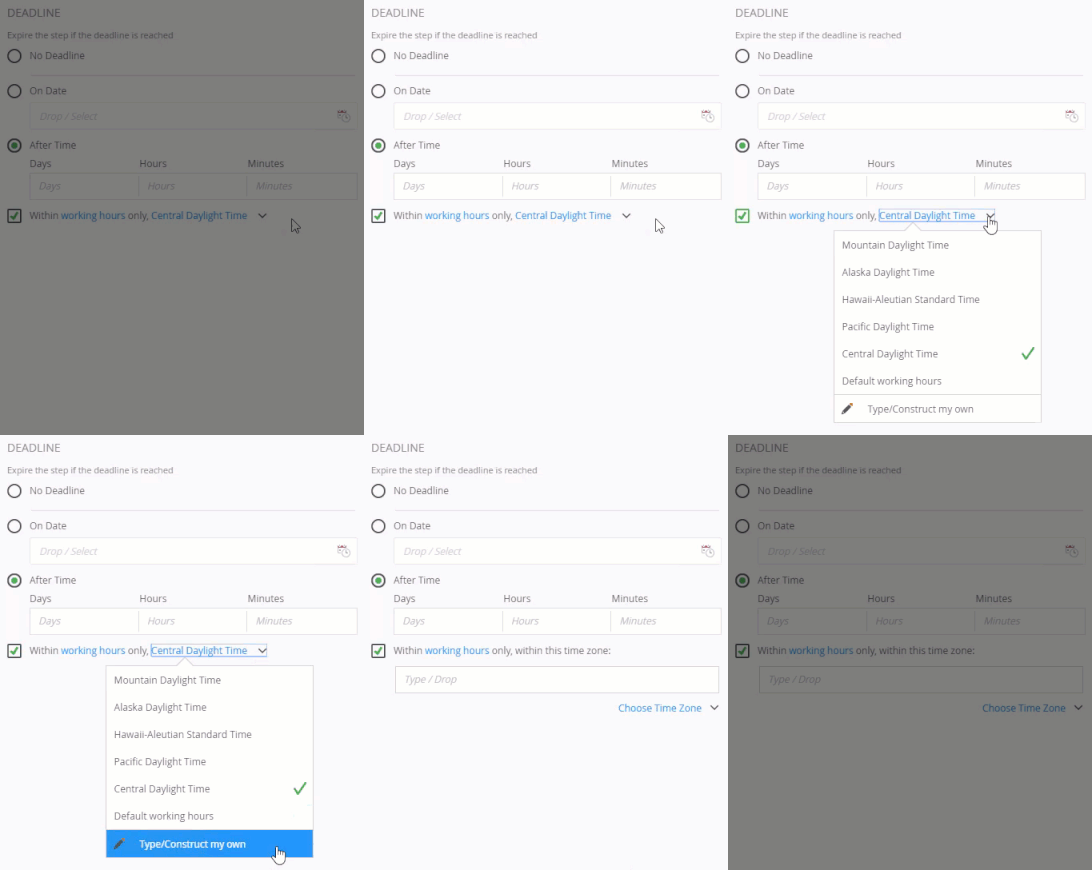
- To create a dynamic time zone, select the Type/Construct my own option.
Here you can specify a dynamic value for the working hours. This option is useful when you have global users across multiple time zones.
- You can use a combination of SmartObject calls and functions to determine where a specific user is based, and then use a variable in the Within working hours only option that matches their location.
Type values or create dynamic values by dragging Functions, Fields, SmartObjects and Workflow-related items from the Context Browser into the fields.

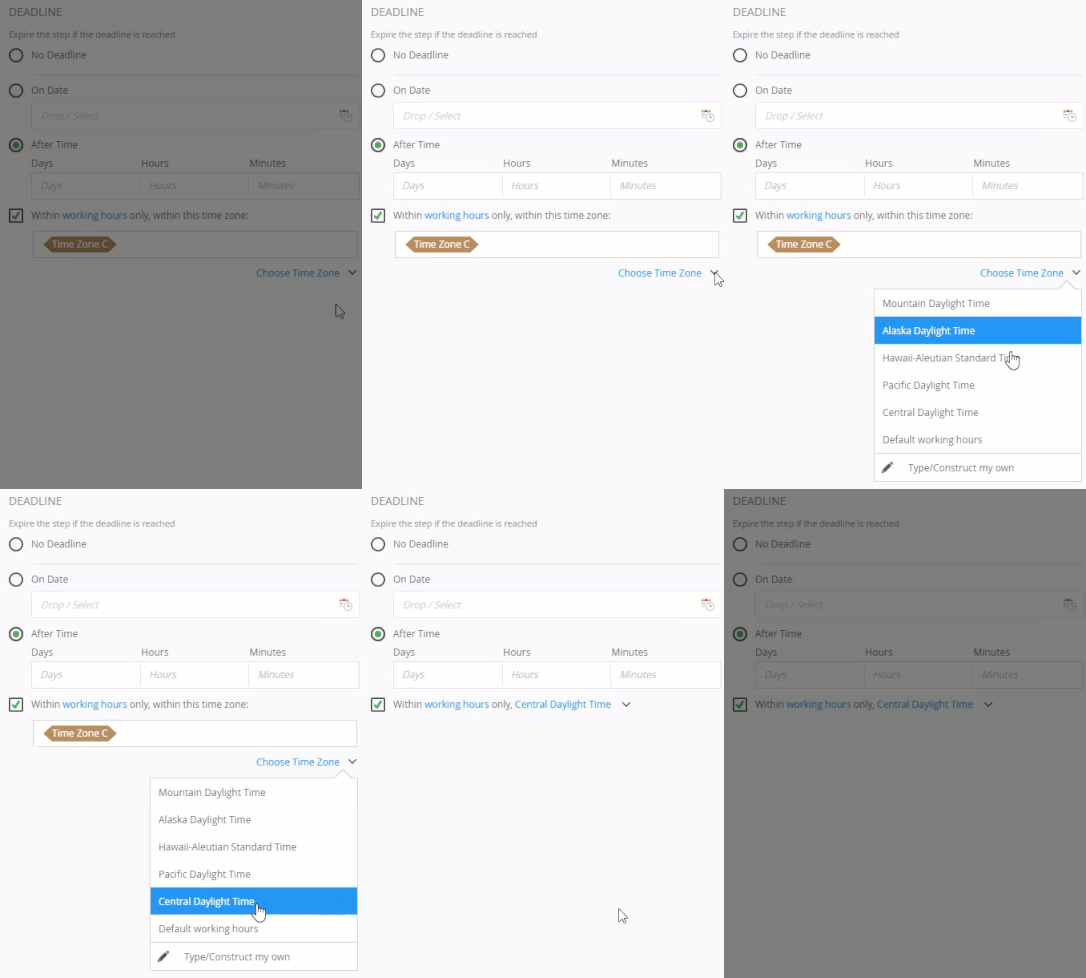
- To revert to static working hours, select one from the Choose Time Zone link menu.
- With the step selected, select the Properties tab.

- Click the Errors tab.

-
Your changes are automatically saved.
The following table explains the options available on this tab:
| Option | Explanation | How to Use |
|---|---|---|
| Which Workflow? |
Contains a list of recently picked workflows or browse to the required workflow. You can browse and select deployed workflows. You need to have Admin rights to the workflow you want to add. For information on workflow rights, see Rights. Use the dynamic mode to create your own. Type values or create dynamic values by dragging Functions, Fields, SmartObjects and Workflow-related items from the Context Browser into the fields. |
Select a workflow from the Which workflow? menu. Click the Browse option to browse to the workflow Click the toggle button to switch between the menu and a dynamic field. |
| How many workflows? |
Use this section to specify how many sub workflows you want to start from within the current workflow. You can use the Select from the following: By default, the Single tile is selected. |
Click to select one of the tiles. |
| Single Sub Workflow | ||
| Start Sub Workflow |
Use input mappings to set fields, Item References, and the folio of the sub workflow from the main (parent) workflow. Type values or create dynamic values by dragging Functions, Fields, SmartObjects and Workflow-related items from the Context Browser into the fields. |
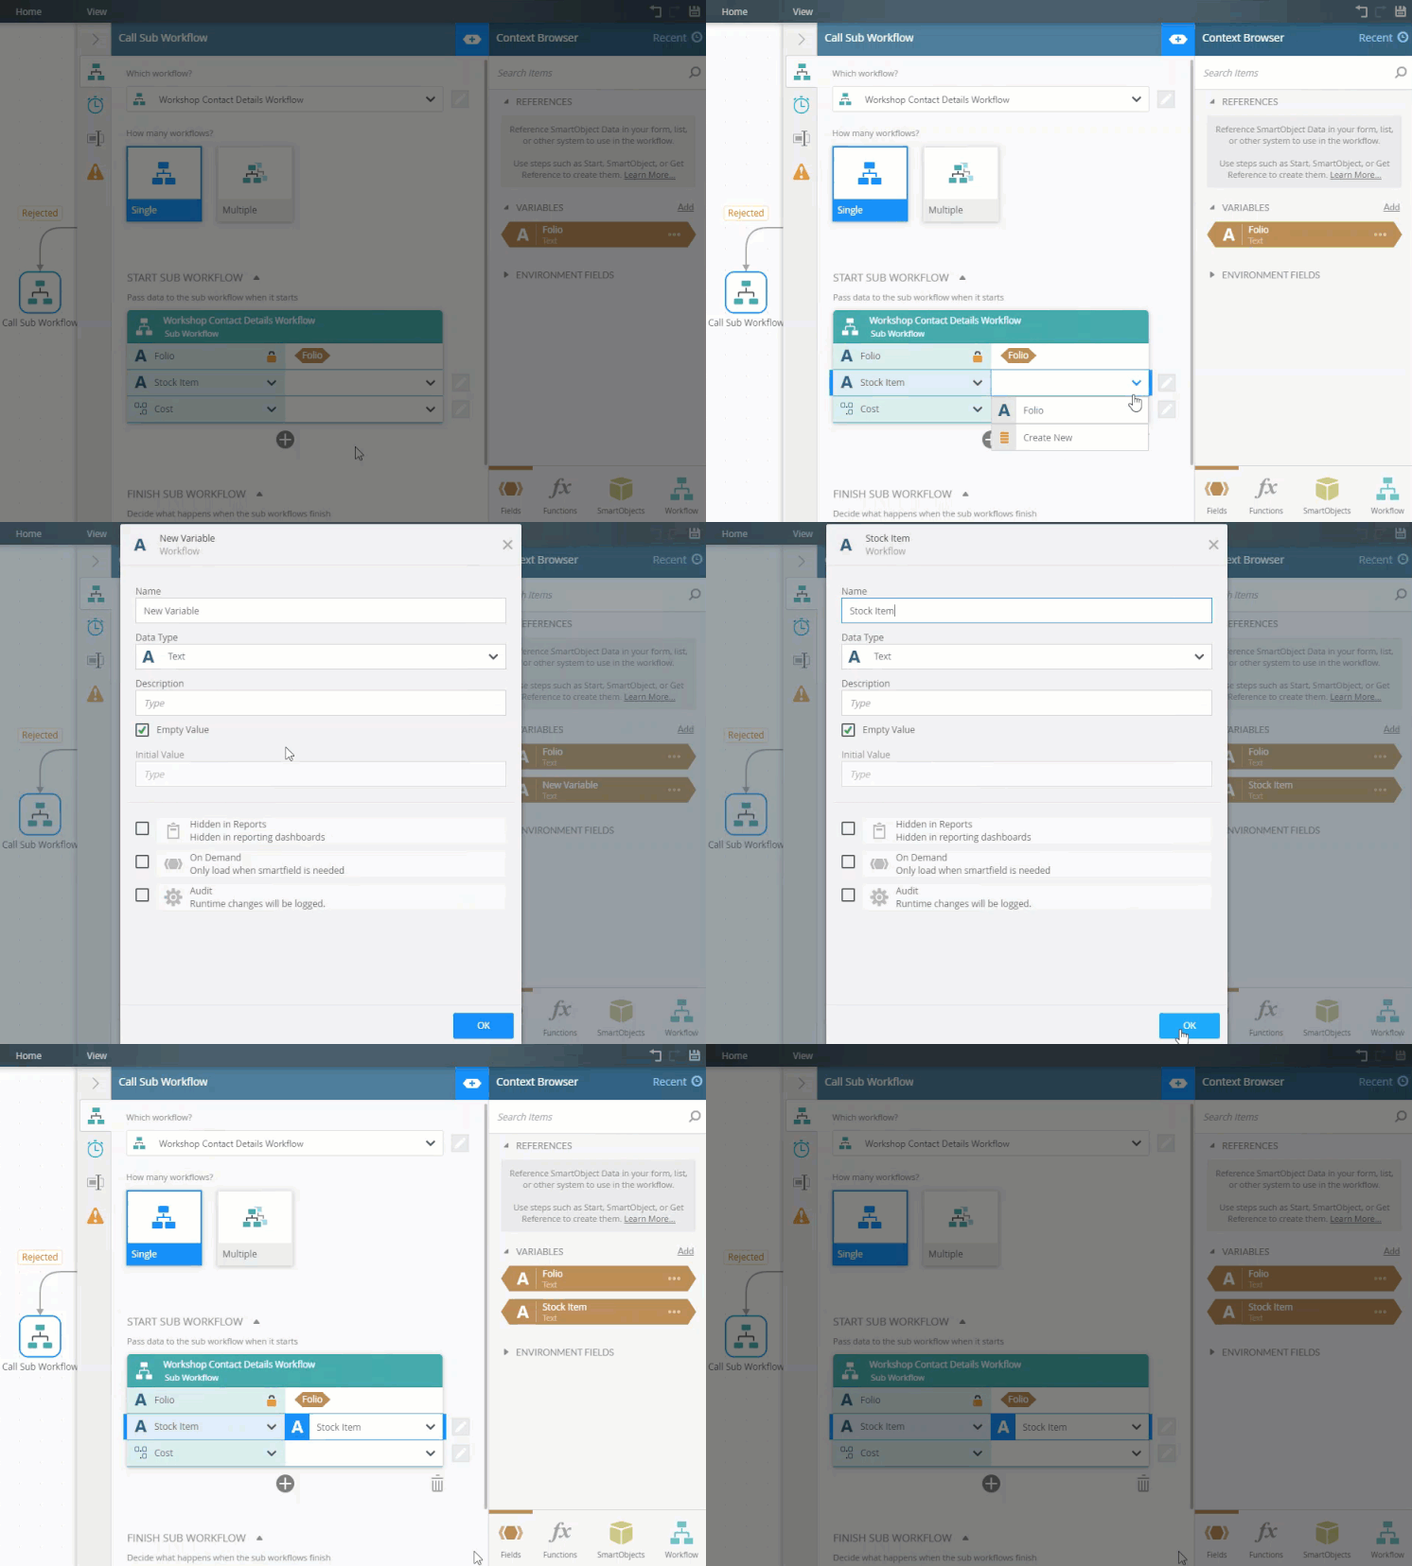
Click the down arrow to open this section. Select fields and supply values. Click Add to add additional property fields. Select Create New from the added property menu to add a new variable. Click the pen icon to toggle between select and dynamic mode. To delete a property select it and click the Trash Bin The Add button is disabled if there are no properties that you can set. |
| Finish Sub Workflow |
Use this to return values from the sub workflow after it has completed. Setup mapping between the sub workflow's fields and the main workflow. Make sure to check the Wait for the sub workflow to finish check box to show the return values in the Finish Sub Workflow section. The return value property mapper shows when this option is selected. |
Click the down arrow to open this section. Select properties and supply return values. Click Add to add additional property fields. To delete a property select it and click the Trash Bin The Add button is disabled if there are no properties that you can set. |
| Wait for sub workflow to finish |
Allows you to specify if the main (parent) workflow waits for the sub (child) workflow to complete before continuing. By not selecting this option, the main workflow continues to the next step while the sub workflow runs. You can see the duration of the Call Sub Workflow step in K2 Management > Workflow Server > Workflows > [workflow name] > Reports tab > Process Overview > Activity Duration section. For more information see, Process Overview Report. This is not selected by default. |
Check or uncheck the check box. Check the check box to show the Call Sub Workflow duration in K2 Management > Workflow Server > Workflows > [workflow name] > Reports tab > Process Overview > Activity Duration section. |
| Multiple Sub Workflow | ||
| What list of data? |
This control is only available when you select the Multiple tile option. Use this to specify a list of data to use for each sub workflow instance. You can add a SmartObject Get List property, Variable, or type a delimited list into the field. Drag a SmartObject property into the field and configure it with the Smartfield Composer. Configure with the Smartfield Composer and select the All items as a collection option from the menu. Example of SmartObject Get List property: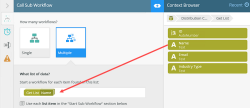
You can switch between select and dynamic mode. In dynamic mode, you can use a semi-colon delimited list by typing or dropping a field that contains a delimited list. When working with the control in dynamic mode, keep in mind the following: 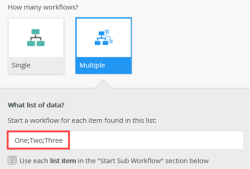
You can also drag a Variable into the What list of data? field. This variable needs to be contain a semi-colon delimited list. Example of Variable: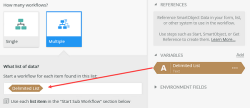
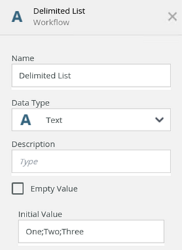
If you leave this field blank, the workflow considers the list empty. |
Drag a SmartObject Get List method property or a variable into the field. Click the pen icon to toggle between select and dynamic mode. Type values separated by a semi-colon to created the delimited list. |
| Start Sub Workflow |
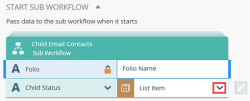
Use input mappings to set fields, Item References, and the folio of the sub workflow from the main (parent) workflow. Type values or create dynamic values by dragging Functions, Fields, SmartObjects and Workflow-related items from the Context Browser into the fields. Select the List Item option from the menu to map the reference back to your sub workflow when using a delimited list.
|
Click the down arrow to open this section. Select fields and supply values. Click Add to add additional property fields. Click the pen icon to toggle between select and dynamic mode. To delete a property select it and click the Trash Bin The Add button is disabled if there are no properties that you can set. |
| Finish Sub Workflow |
Use this section to decide what happens when the sub workflows finish. Select from the following: Use this to return values from the sub workflow after it has completed. Setup mapping between the sub workflow's fields and the main workflow. |
Click the down arrow to open this section. Select properties and supply return values. Click Add to add additional property fields. To delete a property select it and click the Trash Bin The Add button is disabled if there are no properties that you can set. |
This is an example that allows you to store a task action result from the sub workflow in a variable of the main workflow.

The table below explains the options available on this tab:
| Option | Explanation | How to Use |
|---|---|---|
| Deadline | ||
| No Deadline | Use this to indicate if step deadline is added. This is the default option. | Click No Deadline to wait indefinitely for the sub workflow to complete. |
| On Date | Use this to indicate if step deadline is added for a specific date. |
Click On Date to configure a deadline: |
| After Time | Use this to indicate if a step deadline is added after the specified time. |
Click After Time to wait for an amount of time before moving on. Enter values in the Days, Hours, Minutes or Seconds fields. Enter values individually or in combination. |
| Within Working Hours Only |
Within working hours only allows you to set the deadline to take the specified working hours into account when calculating when the deadline should run. This function applies when either the On Date or After Time option is selected. If you select one of these options, the deadline will take working hours into consideration. If you don't select the Within Working Hours only option, the deadline does not take working hours into consideration (so in some cases, the deadline occurs sooner. For example: suppose that you configure a deadline to expire the task after 30 minutes. You also configure this deadline within working hours, and you selected the Sales team working hours zone, which is set up as Monday through Friday, 8 am - 5 pm. To define the working hours for your organization, click the working hours link. You must have access to, and admin permissions in, K2 Management to set the working hours. For more information on how to set your working hours see Work Hours. Keep in mind that working hours are based on static time zones because you select a specific time zone when defining the working hours. If you want the time zone to be dynamic and change depending on some condition (such as a user's geographical location), select the Type/Construct my own option to add logic that determines which working hours configuration to use when calculating the time limit. Select the Type/Construct my own option to configure which working hours should apply to the deadline. You can use this approach to specify a dynamic value for the working hours, based on some logic. This option is useful when you have global users across multiple time zones. You can, for example, use the result of a SmartObject method and/or functions to determine where a specific user is based, return the name of that working hours zone, and then use the returned working hours zone value in the Within working hours only option to match their location. Type values or create dynamic values by dragging Functions, Fields, SmartObjects and Workflow-related items from the Context Browser into the fields. The Default working hours menu has a list of defined working hours. If you have not defined any working hours, the Default working hours option is selected. For instance, if working hours do not include weekends but you don't configure this option, your workflow will expire two days sooner than you want. Example: You've setup your working hours as Monday - Friday, 8 am - 5 pm. You configure the Call Sub Workflow step to expire after three days, but you do NOT check and configure the Within Working Hours Only option, a sub workflow started on Friday will expire on Monday, when it should expire on Wednesday. By default, the Within Working Hours Only option is checked. |
Check the Within Working Hours Only box. Click the working hours link to edit or add the working hours parameters. Click the Default working hours menu to select a preconfigured set of work hours or select Type/Construct my own to configure a dynamic time zone. |
For more information on how to set your working hours see the Work Hours topic.
The following table explains the options available on this tab:
| Option | Explanation | How to Use |
|---|---|---|
| Title / Name | By default, each step on the canvas has a step title. You can change this title to suit your workflow logic and show it on the canvas by checking the Show Label box. | Enter a value into the Title/Name field. |
| Reset link | Use the link to reset any changes to the title. | Click the Reset link to reset the Title/Name field to default value. |
| Show Label | Allows you to see the step label on the canvas. The label shows the value of the title. | Check the check box to display step label on the canvas. |
| Description | Allows you to add a detailed description for the step. | Enter a value into the Create New field. |
| Notes | Allows you to add additional notes for the step. | Enter a value into the Notes field. |
Different types of exceptions can occur on a step, such as:
| Type | Description |
|---|---|
| Known exceptions | Any SmartWizard or standard wizard that has Boolean options for handling known exceptions have these options displayed as check boxes in the Known exceptions section of the Exceptions tab. |
| Unhandled exceptions | Any unknown runtime exceptions. |
The tab contains the following unhandled exception:
| Exception | Explanation | How to Use |
|---|---|---|
| Log Exception | Logs the exception to the error log. | Check the box to log the exception. |
In this example, you work with two workflows called Workshop Main Workflow and Workshop Contact Details. The Workshop Contact Details workflow is added and configured to the Workshop Main Workflow in a Call Sub Workflow step and referred to as the sub or child workflow. This then makes the Workshop Main Workflow the main or parent workflow.
The Workshop Main Workflow (parent) contains the following:
- The workflow starts with and moves on to an approval task.
- The approved path sends an email.
- The rejected path calls a sub workflow.
- The main workflow ends when the sub workflow completes.

The Workshop Contact Details (child) contains the following:
- This workflow contains a step that creates a list item in a SharePoint list
- The sub workflow starts when the rejected path is followed in the main workflow

- In this example, start the main workflow (Workshop Main Workflow) from K2 Management site. Click Start New.

- Add folio name and click Start to run the workflow.

- The workflow starts and is active.

- From the Workshop Main Workflow Process Details click the Reports tab. To view the active instance, scroll down to the Activities section of the report. Notice the main workflow is active.

- Open Workspace, and from the Denallix Administrator task list, select Reject and click Submit.

- After rejecting the task, select the Workshop Main Workflow Details Reports tab. Scroll down to the Activities section. Make sure the Include System Activities check box is checked. The main workflow is no longer active and the sub workflow is started.

- Find the sub workflow in the Related Processes section and click the link.

- From the Process Overview report for the sub workflow, scroll down to the All Instances section. Notice that the sub workflow started and completed successfully. This is also true for the main workflow because it ends after the sub workflow completes.

- From the SharePoint Workshop Contact Details list, the sub workflow executed successfully and updated the list item as expected.

- Images in this section might differ depending on your version of SharePoint. For more information on the recent changes to SharePoint Online user interface (UI), see SharePoint Online User Interface Changes.
For more information on reports, see the Reports topic.
In this example, you work with two workflows called HR Workflow and Leave Approval. The Leave Approval workflow is added and configured in the HR Workflow in a Call Sub Workflow step and referred to as the sub or child workflow. This makes the HR Workflow the main or parent workflow. This example shows how you can use data returned from the child workflow in the main workflow. You then use the data in a recipient rule to route a task correct recipient.
The HR Workflow (parent) contains the following:
- The workflow starts and then calls the sub workflow.
- A value within a variable is returned to the main workflow after the sub workflow completes.
- This variable determines who receives the task. This is set up using the variable in a custom recipients rule.

The Leave Approval (child) contains the following:
- This workflow contains a Manager Approval step. The actions on this step are Approved and Rejected.
- Depending on what action is selected, the variables are set accordingly.
- An Approved action sets the variable to True. This value is sent to the main workflow.
- A Rejected action sets the variable to False. This value is sent to the main workflow.

- In this example, the main workflow starts and calls the sub workflow. The sub workflow handles the Manager Approval part of the workflow. The manager approves the leave request and the Approved variable sends a True value back to the main workflow, and the sub workflow ends.

- The Finish Sub Workflow section, within the main workflow, handles the mapping of the return value from the sub workflow. In this example, the value is passed through to the Child WF Return Value field.

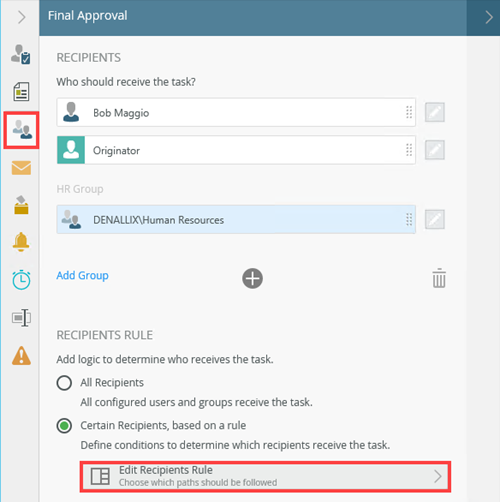
- The custom recipient rule makes sure that the Final Approval task (in the main workflow) is assigned to the correct recipient. This means that if the value passed through from the sub workflow is True, the task goes to the Human Resources department for approval. If the value form the child workflow is False, the task goes to Bob Maggio.
- Use the Edit Recipient Rule to create the rule.

- After the Final Approval tasks is actioned, the main workflow ends.
For more information on how to create a workflow containing a Single or Multiple sub workflow, see the following How To topics:
When working with the Call Sub Workflow step, keep in mind the following considerations:
- When you configure the step and select a deployed workflow, select recently picked workflows from the list or browse to the required workflow. You need to have Admin rights to the workflow you want to add. For information on workflow rights, see Rights.
- A Call Sub Workflow step cannot be added into multi-step.
- Use the same variable types between main and sub workflow.
- There is no validation done on the variable types between the main and sub workflow configuration. You might run into runtime errors if you have setup a main to sub workflow (or vice versa) mapping using invalid variable types, such as mapping a Text type to a Number type.

