2. Create a SQL Server Service Instance
In this step, you create a new service instance of the SQL Server Service type. The service instance is essentially a connection configuration that targets a database on Azure SQL. The database provides a list of leave types that you will use in your Leave Request Form.
-
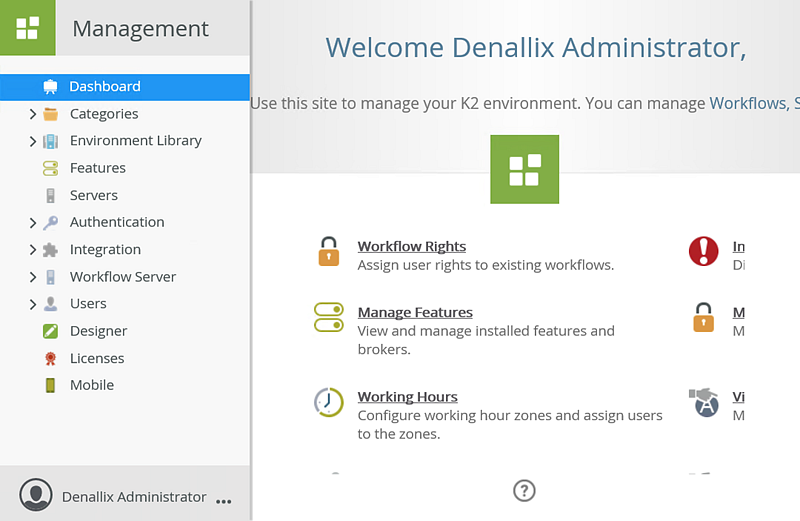
Launch the K2 Management site.
- Launch the K2 Management site.If you are unsure of how to launch the K2 Management site, see Accessing K2 Sites.
- The management site opens with the dashboard.
- Launch the K2 Management site.
- Add a new service instance of the SQL Server Service type using the table below as a guide for the properties. If a property is not shown, you can assume the default value.In a shared environment, you only need to create the service instance once. If the service instance already exists and you want to create your own, use a unique identifier of some kind. One example might be to add your initials to the service instance name.The database you will be connecting to is hosted on the internet as a SQL Azure database. This database should be accessible through port 1433, and unless your organization has strict firewall policies in place, it should be available for use anywhere. If you need to host this SQL database internally, you can download a SQL script to recreate the database from the following location: https://help.k2.com/files/8553. Contact a member of your application development team for help, if necessary. You will need to adjust the Service Instance's Database and Server keys and potentially the authentication method to connect to a local version of this SQL Database.
Field Name Setting A Display Name Leave Types B Description Returns a list of leave types. Service Type SQL Server Service (default) C Authentication Mode Static D User Name K2LearningUser E Password K2LearningPass F On Different SQL Server true G Command Timeout 90 H Database K2Learning I Server uh8ydarb4m.database.windows.net J Use Native SQL Execution false K Generate SmartObjects for this Service Instance UNCHECKED 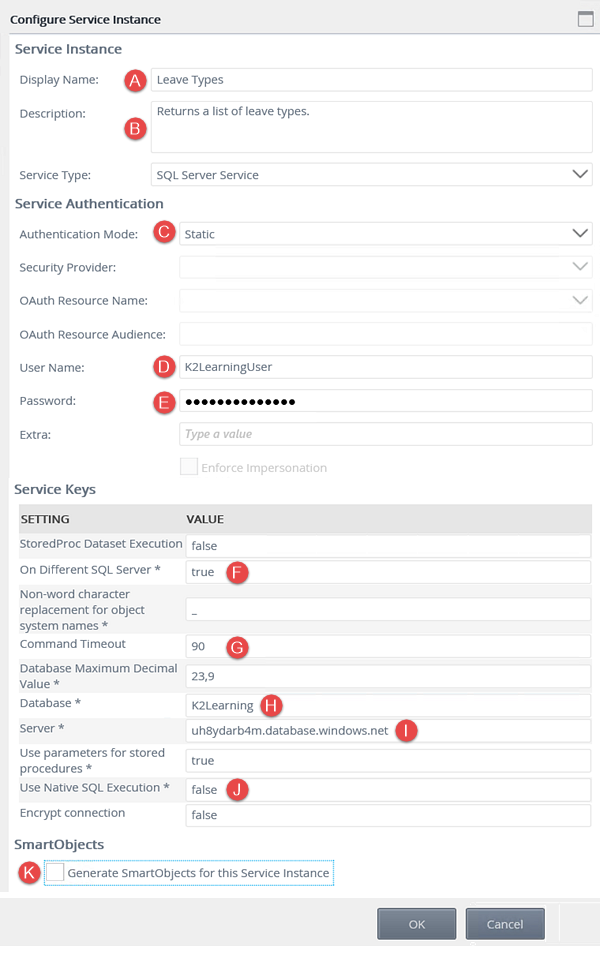
- Next, you will create a new instance of the SQL Server Service type. To summarize this process, you are creating a connection to a specific data source (Azure SQL Database) so that you can retrieve the properties and methods (Leave Types) from that data source to use in your application (Leave Type drop-down list). K2 has a large number of out-of-the-box service types that you can use to connect to other data sources and you can create your own as well.
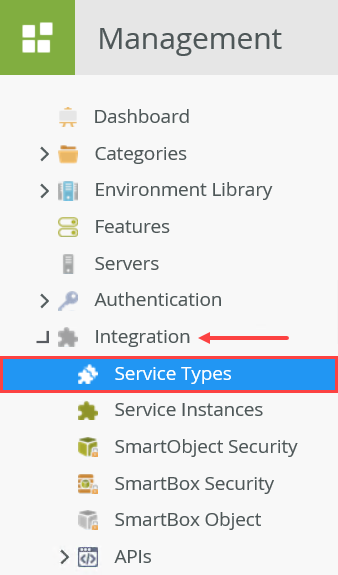
Expand the Integration category, then click Service Types.Service Types, Brokers, Instances, and SmartObjects
Service types, service brokers, and service instances are the elements that allow K2 to interact with other systems, and which form the base layer for SmartObjects. The following is a brief overview of each concept:- Service Type: A service type is a pointer to a broker file for a specific system or data source. Examples include: SQL Server, SharePoint, CRM, and web services. Each service type has an underlying service broker associated with it.
- Service Broker: A file that contains the logic needed to interact with a specific system. Each service type has its own requirements for interacting with the system. For example, what type of authorization will the system allow? What type of data is contained in the system?
- Service Instance: A service instance is a single connection to a data source, and is based on the service type. The service instance uses the requirements defined by the broker to connect to the target data source. For example, you might have an instance of a SQL Server service type. The instance is specific to a single SQL database. If you have multiple databases, you need multiple instances. From the instances, you can then generate SmartObjects.
SmartObjects: The middle layer that allows interaction between a K2 object (form, view, workflow) and the target data source. For example, you have a form bound to a SQL SmartObject. When you submit the form, the SmartObject creates a new record or it updates an existing record in the SQL table. The SmartObject connects K2 to the system via the service layer.
- Service Type: A service type is a pointer to a broker file for a specific system or data source. Examples include: SQL Server, SharePoint, CRM, and web services. Each service type has an underlying service broker associated with it.
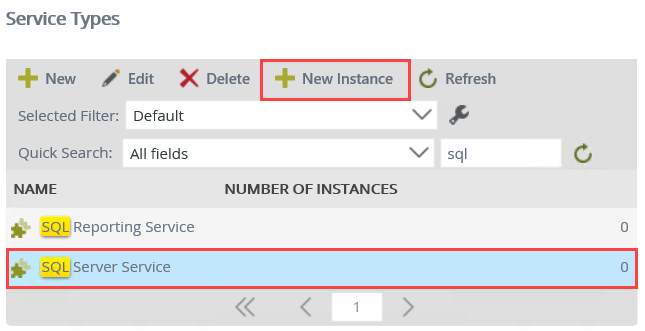
- The available service types appear in the Service Types central pane. K2 provides many of these service types out-of-the-box, however, there may be additional service types added along the way. You will be adding a service instance of the SQL Server Service type for this step. To help you locate the correct service type, enter
sql
into the search text box, then click the green refresh icon.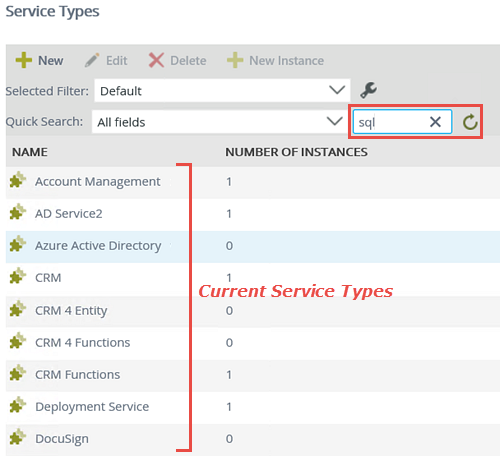
- K2 returns any service types with "SQL" in the name. (Depending on your environment, you may see additional service types.) Select SQL Server Service, then click the New Instance button. In this step, you are creating a new instance of the SQL Server Service type.
- Configure the service instance using the table below for reference. There is also a reference image below the table. If a setting is not specified in the table, then assume the default value. Click OK after you have set the fields.
In this step, you are adding the configuration information necessary to connect to the external Azure SQL database.
Field Name Setting A Display Name Leave Types B Description Returns a list of leave types. Service Type SQL Server Service (default) C Authentication Mode Static D User Name K2LearningUser E Password K2LearningPass F On Different SQL Server true G Command Timeout 90 H Database K2Learning I Server uh8ydarb4m.database.windows.net J Use Native SQL Execution false K Generate SmartObjects for this Service Instance UNCHECKED Notice that you did not check the box to Generate SmartObjects for this Service Instance. In the next topic, you will create a new SmartObject manually from this service instance. You will create the SmartObject, then add the methods and properties for retrieving leave types. By checking this box, K2 creates SmartObjects for you, based on the tables and views it discovers in the database. Checking this box has the potential to create many SmartObjects from a single service instance. Creating the SmartObject manually allows you to create one SmartObject with the properties and methods you need. - You should see a confirmation dialog box. Click OK.
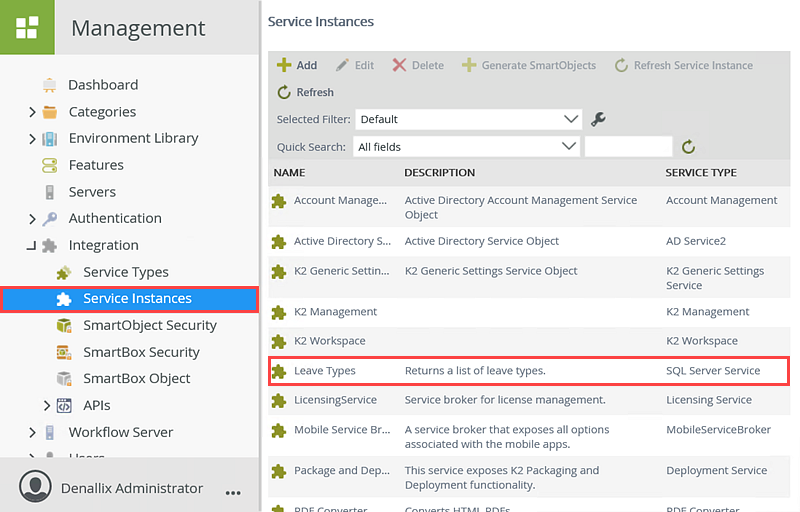
- Take a moment to locate the new service instance you created. Still in the Integration node, click Service Instances. Scroll down and locate the Leave Types service instance. Notice the name, description, and service type correspond to your configuration settings.
- Next, you will create a new instance of the SQL Server Service type. To summarize this process, you are creating a connection to a specific data source (Azure SQL Database) so that you can retrieve the properties and methods (Leave Types) from that data source to use in your application (Leave Type drop-down list). K2 has a large number of out-of-the-box service types that you can use to connect to other data sources and you can create your own as well.
Review
In this step, you created a new service instance based on the SQL Server Service type. The new service instance contains the configuration necessary to connect to an external SQL database.