Publishing and Updating an Existing Service Object and SmartObject
Now that we have extended the K2 connect Service Object with the additional details (Job info, Company info and the emails as an XML property), we will extend the existing SAPEmployees SmartObject and include these methods in the ReadEmpByEmpID method. (We won’t be adding the additional properties to the ListEmplByLastname method, since it is not necessary to return detailed info when listing employees in our scenario.)
When the new SmartObject has been published we will use the SmartObject Service Tester confirm the SmartObject works as expected.
Finally, if time permits and if you completed the optional Step 4 of Part 3, (using a SmartObject in a view) you can extend the existing SmartForm-based user interfaces and create a new view which includes the detailed employee data. This view will be opened when a user clicks an employee record in the SearchEmpByLastName list view.
As we did in Step 5, we will break Step 6 down into three sections:
- Step 6a: Update the existing Service Object and SmartObject to include the additional data that was added in Step 5
- Step 6b: Test the updated SmartObject
- Step 6c: Extend the user interface (SmartForms) to include a "Employee Details" View (Optional)
Part 1: Update the existing SmartObject to include additional data
Part 2: Test the updated SmartObject

Part 3: Add a new View to show the additional employee data, and extend the existing SearchEmpByLastName list view to open the details view when a row is clicked in the list of employees
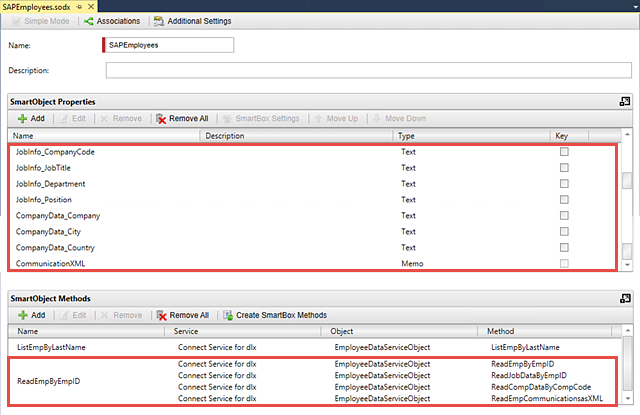
In this step, we are going to edit the existing SAPEmployees SmartObject and add the new employee job and company methods that we created in Step 5. We will then create a new property in the SmartObject to receive data from the employee's communication XML property.
Step 6a Tasks
- In Visual Studio, Publish the EmployeeDataServiceObject Service Object.
- Use the SmartObject Service Tester to view and confirm the new methods and properties have been added to the EmployeeDataServiceObject.
- In Visual Studio, open the SAPEmployees SmartObject. Edit the ReadEmpByEmpID method in Advanced Mode.
- Make sure the method is a Read type.
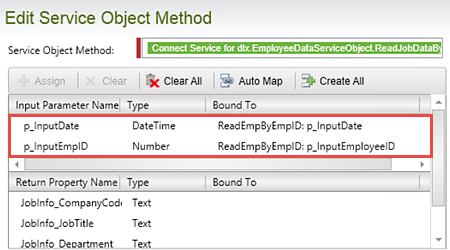
- Add the ReadJobDataByEmpID of the EmployeeDataServiceObject and confiure the two input parameters (p_InputDate and p_InputEmpID) to the existing SmartObject parameters.
- Map the Return Properties to new SmartObject properties.
- Add the ReadCompDataByCompCode service object method and configure the Company Code input parameter to map to the SmartObject Property (JobInfo_CompanyCode).
- Map the Return Properties to new SmartObject properties.
- Add a new SmartObject Property named CommunicationXML then make the data Type a Memo.
- Edit the ReadEmpByEmpID SmartObject Method and add a call to the ReadEmpCommunicationsasXML service object method.
- Map the input parameters to the existing SmartObject Method parameters.
- Configure the method to return the CommunicationXML property to the new CommunicationXML property.
- Save and Deploy the updated SmartObject.
In the next few steps, we are going to edit the existing SmartObject and extend the 'read' method to include the additional methods that we added to look up the job information and the company information.
First up, we'll add and map the job information.
Now we will add the company information.
Next, we will add a new SmartObject property for the returned XML value.
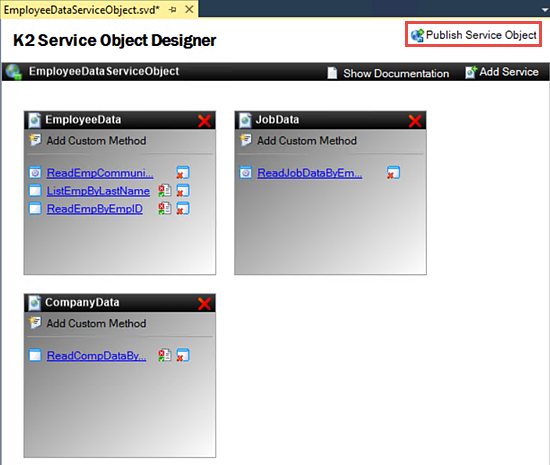
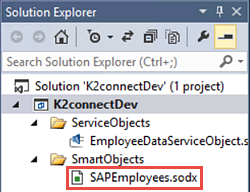
- In Visual Studio, publish the EmployeeDataServiceObject.
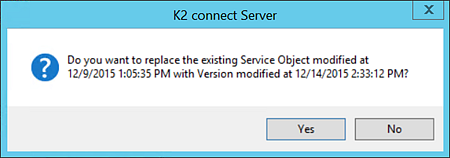
- Click Yes to confirm you want to replace the existing Service Object.
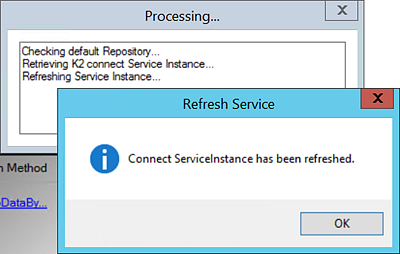
- You should see a dialog that states the Service Instance was refreshed. Close the confirmation notice.
- Launch the SmartObject Service Tester utility. (C:\Program Files (x86)\K2 blackpearl\Bin\SmartObject Service Tester.exe)
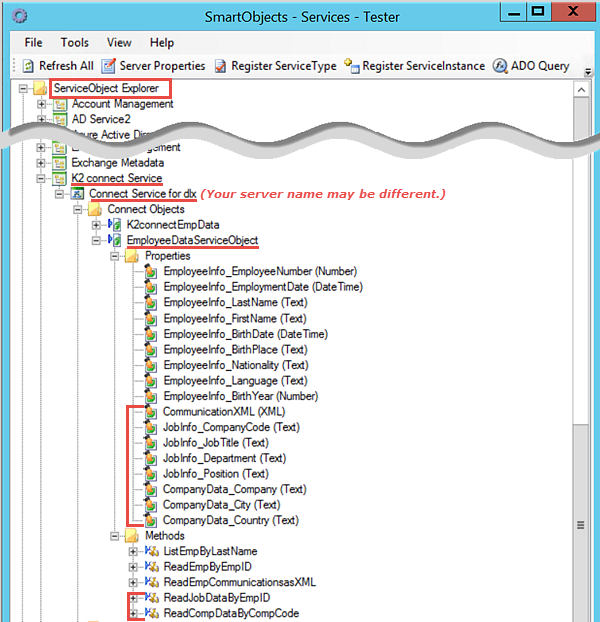
- Expand the ServiceObject Explorer and navigate to our K2 connect Service Object. We want to locate the EmployeeDataServiceObject, then review the properties and methods it contains.
- Confirm the new properties and methods we added are shown.
One thing to note is that importance of friendly names. You should see now how much of a difference it makes for a person developing the SmartObject to be able to easily distinguish the names and purposes of the properties they are working with.
- Return to Visual Studio and open the SAPEmployees SmartObject.
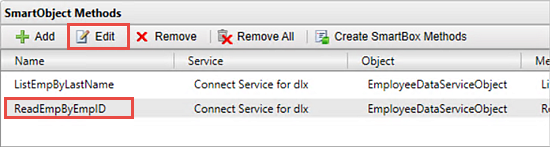
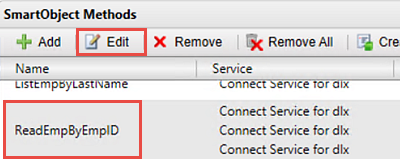
- Click to highlight the ReadEmpByEmpID method, then click Edit.
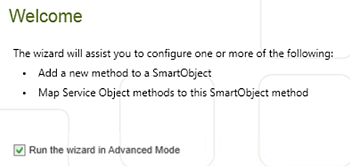
- On the wizard landing page, CHECK the option to Run the wizard in Advanced Mode, then click Next.
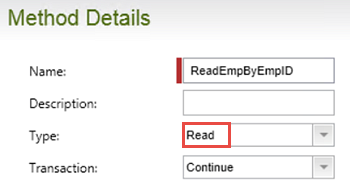
- Change the method Type to Read and confirm the Transaction is set to Continue, then click Next.
- On the Configure Method Parameters (Optional) screen there are no changes, so just click Next.
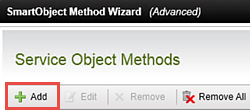
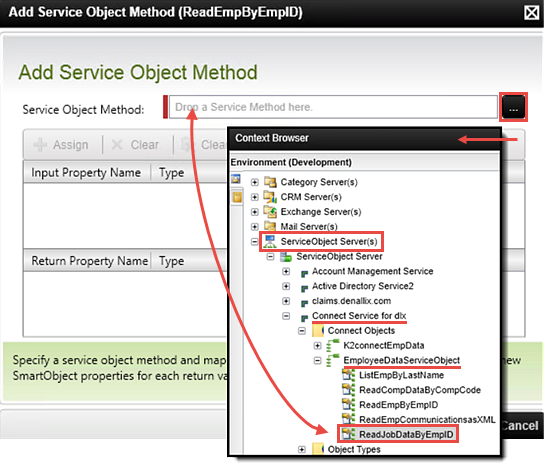
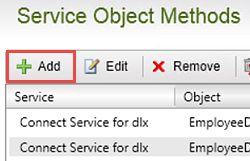
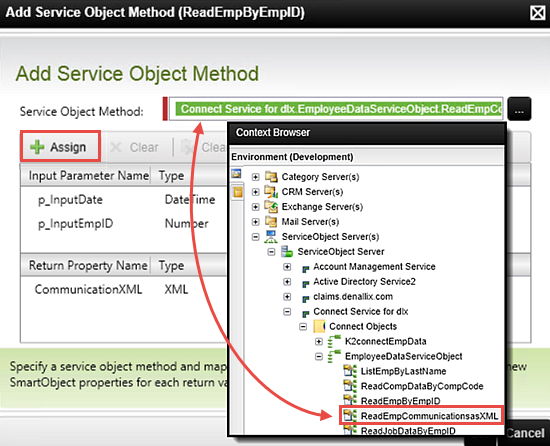
- On the Service Object Methods screen, we will add the two new service objects we created previously. Click Add.
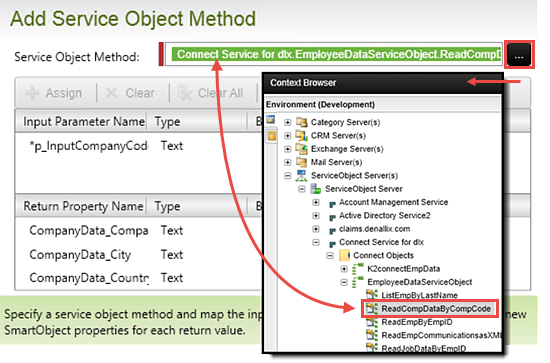
- Use the Context Browser to navigate to the ReadJobDataByEmpID method of the EmployeeDataServiceObject Service Object. Drag, then drop, the method into the Service Object Method text box.
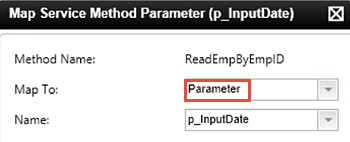
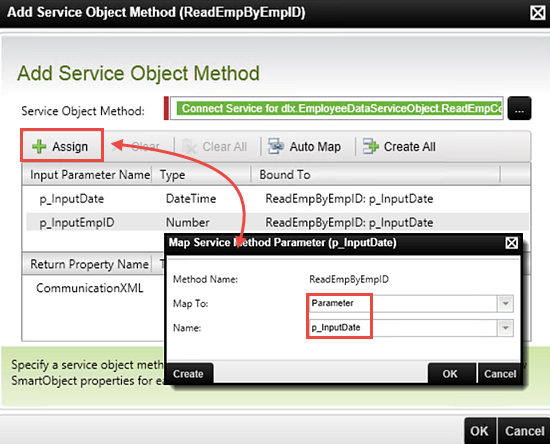
- Click to highlight the p_InputDate input parameter. Click Assign. Map it to the existing p_InputDate Parameter for the SmartObject method.
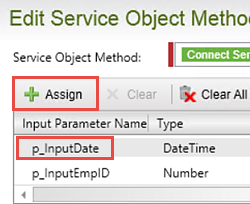
- Repeat this step and Assign the p_InputEmpID to the existing p_InputEmpID Parameter for the SmartObject method.
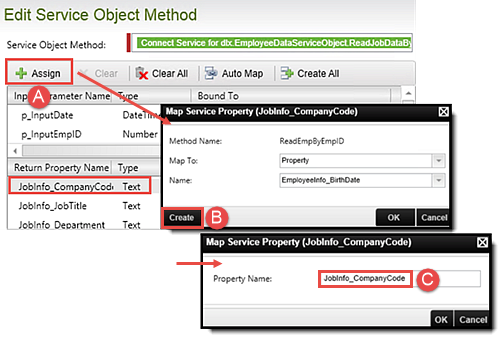
- Click to highlight the JobInfo_CompanyCode Return property, then click Assign. Click Create. Confirm (or enter) the JobInfo_CompanyCode Property Name. Click OK twice to return to the Edit Service Object Method screen.
- Repeat these steps to create properties for the remaining Return Property values.
Return Property Name Bound to SmartObject Property JobInfo_JobTitle SAPEmployees.JobInfo_JobTitle JobInfo_Department SAPEmployees.JobInfo_Department JobInfo_Position SAPEmployees.JobInfo_Position 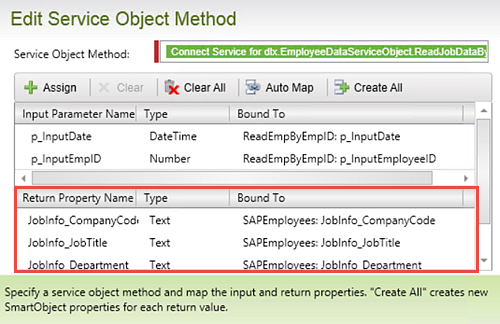
- Click OK to save the new method.
- Begin by selecting Add to attach a new Service Object Method.
- Using the Context Browser, navigate to, then Add, the ReadCompDataByCompCode method to the Service Object Method text box.
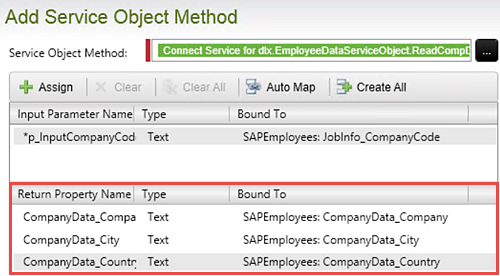
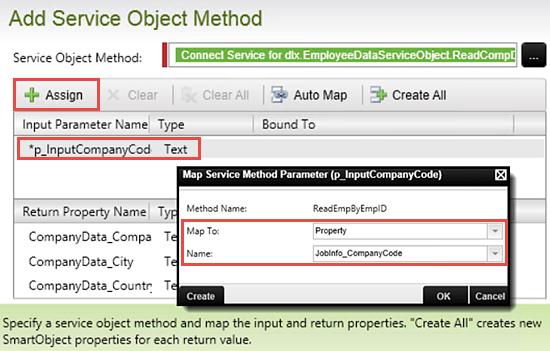
- Just like before, we need to assign a property to the p_InputCompanyCode input parameter. Click to highlight the p_InputCompanyCode parameter, then click Assign. Change the Map To value to Property, then select the JobInfo_CompanyCode Name from the drop-down list.
- Repeat the step above and Assign each of the Return Properties to new SmartObject properties. Remember to Create a new property with the same name value as the Return Property. (Highlight return value > Assign > Create)
Return Property Name Bound to SmartObject Property CompanyData_Company SAPEmployees.CompanyData_CompanyName CompanyData_City SAPEmployees.CompanyData_City CompanyData_Country SAPEmployees.CompanyData_Country - Click OK to accept the property mappings. Click Next, then Finish to complete the SmartObject Method wizard.
- Save your project.
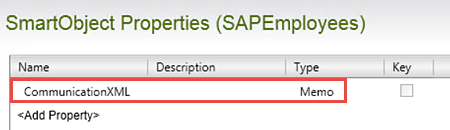
- In the SmartObject Properties pane, click Add.
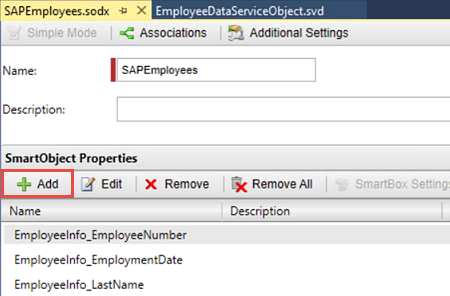
- Create a new SmartObject Property called
CommunicationXML
then make its data Type a Memo. - Edit the ReadEmpByEmpID SmartObject Method.
- Click through the Next buttons until you get to the Service Object Methods screen. Click Assign, then use the Context Browser to navigate to and Add, the ReadEmpCommunicationsasXML method.
- Assign the p_InputDate input parameter to the existing SmartObject parameter with the same name. Assign the p_InputEmpID input parameter to the existing SmartObject parameter with the same name.
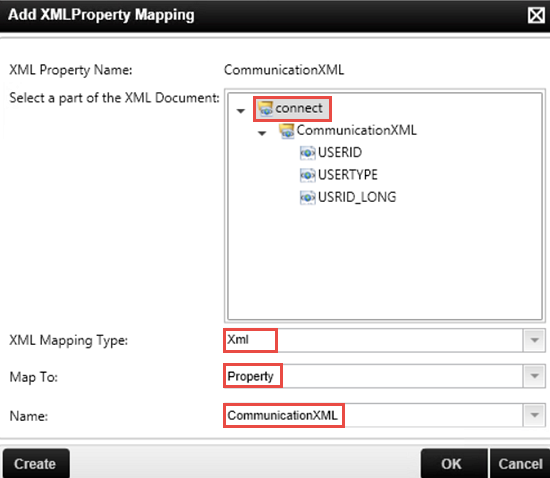
- Click to highlight the CommunicationXML Return Property. Click Assign. On the XML Property Mapping screen, click Add.
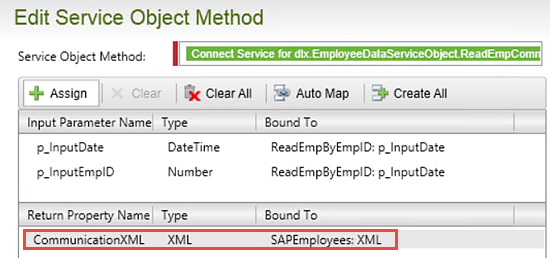
In the Add XML Property Mapping screen, select the connect node, then set the XML Mapping Type to Xml. Set the Map To value to Property. Select the CommunicationXML [Memo] property we created earlier from the Name drop-down list. Click OK twice to complete this mapping. - Back on the Edit Service Object Method screen, confirm the CommunicationXML property is mapped to the SAPEmployees SmartObject. Click OK, then Finish to complete setting up the method to return the XML property.
- Save and then Deploy the updated SAPEmployees SmartObject. When the deployment has completed successfully, you can close Visual Studio. We have completed all of Visual Studio steps for this tutorial.
We'll take a minute now to test the update Service Object and SmartObject using the SmartObject Service Tester.
Minimize the SmartObject Service Tester. We will use it again in a later step.
In the next few steps, we are going to edit the existing SmartObject and extend the 'read' method to include the additional methods that we added to look up the job information and the company information.
When using multiple BAPIs in a sequence (when those BAPIs need to transfer data between each other such as an employee ID) we need to expose each method as a separate Service Object, then 'chain' the methods together inside of the SmartObject.
Notice the Input Property and Return Property values load. We need to map the input parameter to the SmartObject method to establish a communication link between the two.
Now we need to create SmartObject properties for the Return values. We cannot map these to existing properties because they do not exist in the SAPEmployees SmartObject. We will create new properties instead.
We've just added the first of the additional methods required to read additional employee details. What is especially significant here is that we retrieved the employee's CompanyCode as part of this method, so now we can use that property to call the ReadCompDataByCompCode method and retrieve information about the company that the employee works for. We will use the CompanyCode as the input parameter for retrieving data from the company details method.
We can see now that the ReadEmpByEmpID method now calls three separate Service Object methods to build a collection of detailed employee information. This method can now retrieve employee personal details, the employee's job details and the employee's company details.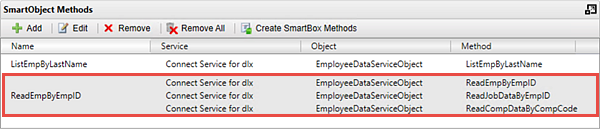
Our final step in building the SmartObject properties is to add a property to capture the returned XML employee communication data. Generally, we want to return XML properties as 'Memo' data types, but we can manually map XML properties to SmartObject properties as well.
Now we need to bind the CommunicationXML Return Property to the new SmartObject property 'Memo' property.
Step 6a Review
We have now updated the SAPEmployees SmartObject to call the additional methods that return more detailed information about the employee. Remember each method is a separate call to different SAP BAPIs, so this way, we can build up a composite SmartObject which returns data from different SAP BAPIs, passing in return properties from one method as the input parameters for a subsequent method.
Remember also that we could have added any other Service Method as an additional method, so you could have included data from any other system as part of the SAPEmployees detailed information. For this learning module, we are only using data from SAP, but the principle is the same: we can "chain" multiple service method calls in a single SmartObject method call to build up a SmartObject that combines data from different systems, (as long as we define the sequence of operations correctly and we pass values between method calls correctly).
We also added a new XML property to return a BAPI Structure as an XML property rather than "flattening" it to a collection of SmartObject properties.
In the step part we will test our updated SmartObject.
In this step, we will once again return to the SmartObject Service Tester to test our latest SmartObject configuration. After entering the input date and Employee ID parameters, we will confirm the data returned includes the employee's job information and company information.
Step 6b Tasks
- Use the SmartObject Service Tester to execute the ReadEmpByEmpID method found within the SAPEmployees SmartObject. Use the following input parameters, then confirm you have a result returned that shows the additional properties (job information and company information):
p_InputDate: Current date
p_Input EmployeeID: 1037
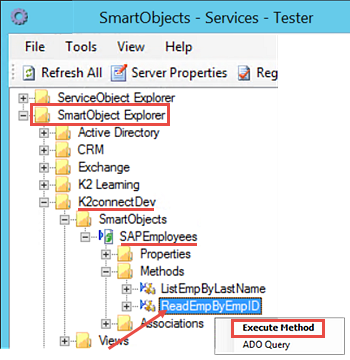
- Open the SmartObject Service Tester once again. Expand the SmartObject Explorer and navigate to the ReadEmpByEmpID method for the SAPEmployees SmartObject. Right-click the method and select Execute Method.
- Recall that we have two parameters that are required: the input date and the employee's ID. Locate the p_InputDate input parameter, then CHECK the box to the left of the date value, then confirm the date value reflects the current date. For the p_InputEmployeeID value, enter
1037
then click Execute. -
You should see a list of the additional properties (JobTitle, Department, Company and so on) along with an XML property containing the email records for the employee.
Step 6b Review
In this step, we returned to the SmartObject Service Tester and confirmed our additional methods (and XML property) have been configured properly. At this point, we are now ready to use the SmartObject within K2 Workflows and SmartForms.
The next step is optional if time allows, but it nicely demonstrates the use of our extended SmartObject in a SmartForm View.
You will only be able to complete this part of the tutorial if you completed the previous optional step to show a list of employees on a SmartForm View. In this step, we will create another View to show the employee details when the user clicks an employee's name from the list.
Step 6c Tasks
- In K2 Designer, Design a View from the SAPEmployees SmartObject with the following settings:
View Name: Employee Details View
Category: Views
View Type: Item View - Use the Create Label and Controls options to create a 2-column layout table with All Fields Included and Displayed.
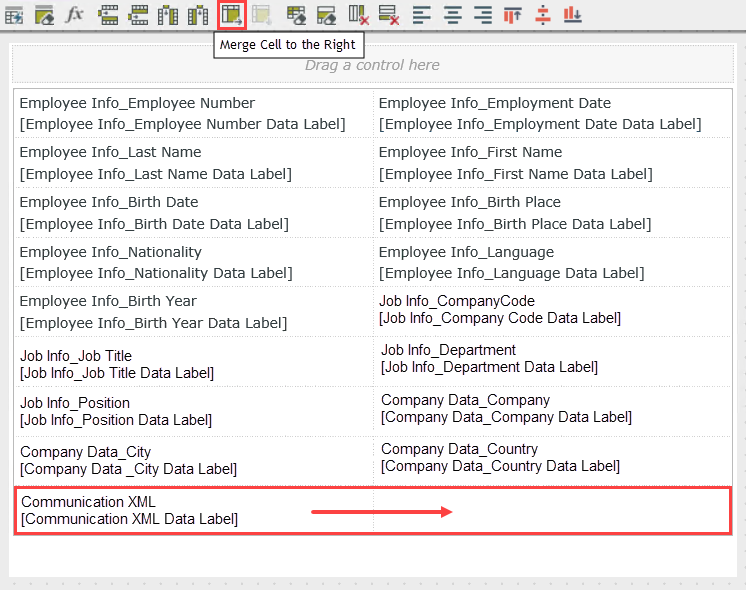
- Located the Communication XML control and merge its table cell with the cell to the right.
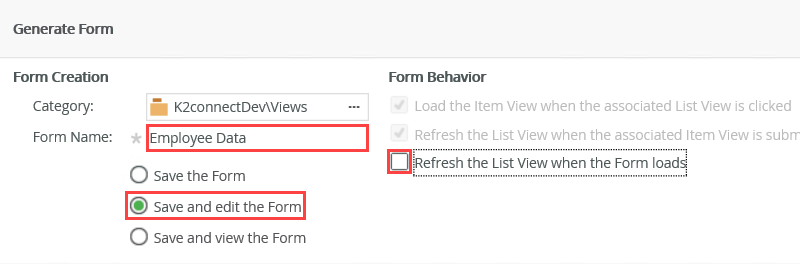
- Generate a Form from the SearchEmpByLastName list View and name the Form Employee Data then Save and edit the Form. (Be sure to UNCHECK the option to Refresh the List View when the Form loads.)
- Add a Rule to the Form to open the Employee Details View when a row in the SearchEmpByLastName View is clicked. Configure the Rule Action to call the method which populates the Employee Details View, and pass in the EmployeeID of the selected row.
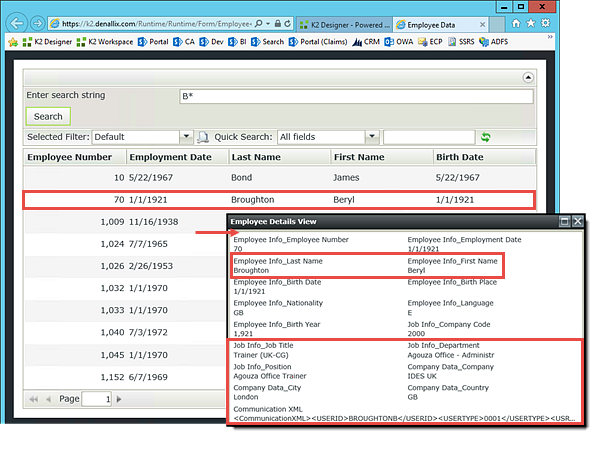
- Use the Runtime URL to test the SAP configuration. Enter a search string such as B*, then click one of the rows after data has been returned. Confirm the subview pops up with the extended employee details.
- Launch K2 Designer. (Start > scroll too K > K2 > K2 Designer)
- Click BROWSE on the landing page. Navigate to the K2connectDev node, then expand the SmartObjects folder. Right-click the SAPEmployees SmartObject, then select the option to Design View.
- On the General screen, Name the new View
Employee Details View
then change the Category to the Views category, then confirm the View Type is an Item View. The Data Source should already show the SAPEmployees SmartObject (remember, we designed the View from this SmartObject). Click CREATE.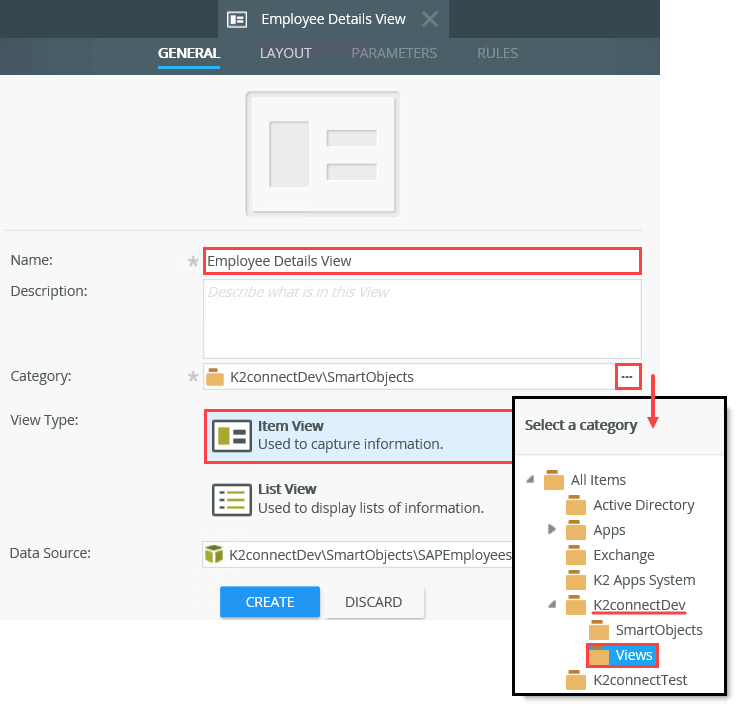
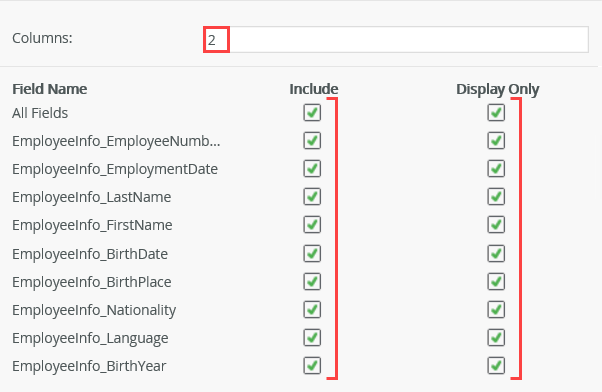
- Select the option to Create Labels and Controls.
- On the Create Labels and Controls settings screen, leave the default number of Columns at 2. Select all of the fields to Include on the View in Display Only mode. Leave the remaining settings as is and click OK.
- Locate the Communication XML control (it should be in the last row) and extend its table cell so that it is merged with the cell to the right. (Click once in the first cell, then click the Merge Cell to the Right icon found in the View Canvas menu bar.)
- To save time, we will not format the View's styling or layout. Click FINISH to complete the View build. The Finish button can be found new the lower right corner of the View design canvas.
- From the Category Browser, Right-click the SearchEmpByLastName View and select the option to Generate Forms.
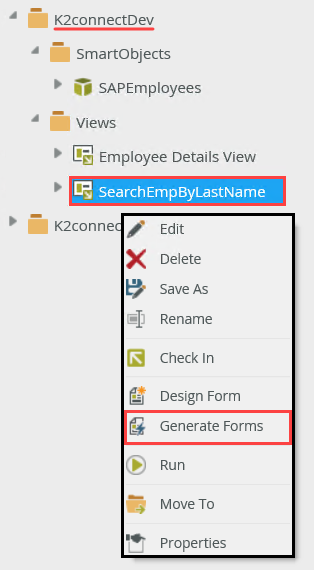
- Change the Name of the Form to
Employee Data
then CHECK the option to Save and edit the Form. UNCHECK the option to Refresh the List View when the Form loads. Click OK to continue. - The Form will now open with the design canvas in the LAYOUT screen. We will now add the rules for populating the Employee Details View. Click the RULES tab found in the breadcrumb bar. On the Rules screen, click Add Rule.
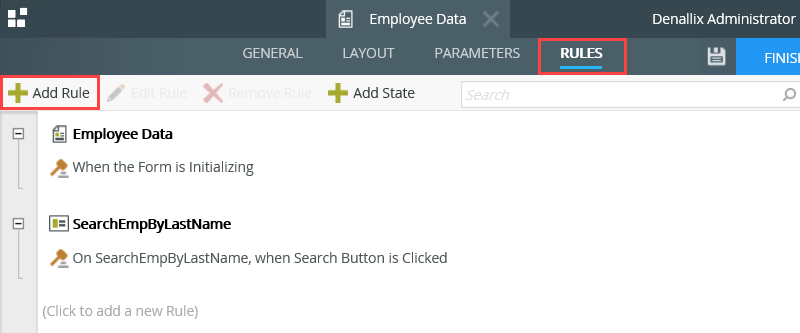
- Events define when the rule should run, such as when a button is clicked, or when the form loads. (Events are optional, you can define "event-less" rules that you can call from other rules.)
- Conditions define whether the rule should run. If the criteria are true, continue the rule, and if the criteria are not met, stop the rule. For example, a condition might evaluate a form to confirm that required fields have content. (Conditions are optional - not all rules will require conditions.)
- Actions define what the rule should do. For example, show a message, start a workflow, or enable a form field. Rules can contain multiple actions that are run in sequence or in parallel.
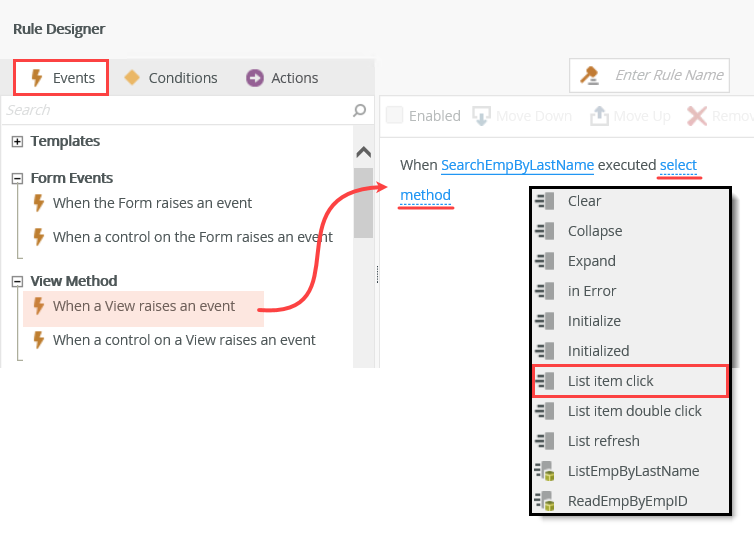
- Confirm that the Events tab is active. Locate the When a View raises an event event and click it once to add it to the rule definition pane. Since we only have one View on this Form, the View name should already indicate the SearchEmpByLastName View. Click the select method link and select the List item click method.
- Now switch to the Actions tab. We've told K2 the event is when a list item on this view is clicked, now we need to tell K2 what to do after the list item is clicked. (In our case, we don't need a condition, but if you were to have conditions, you would add them prior to adding the action.)
- On the actions screen, locate the Open a subview and execute a method action (under the Subview Interaction heading) and click it once to add it to the rule definition pane.
- Click the select View link the, navigate to, and select, the Employees Details View. Click the select method link and select the ReadEmpByEmpID method that we previously created in Visual Studio.
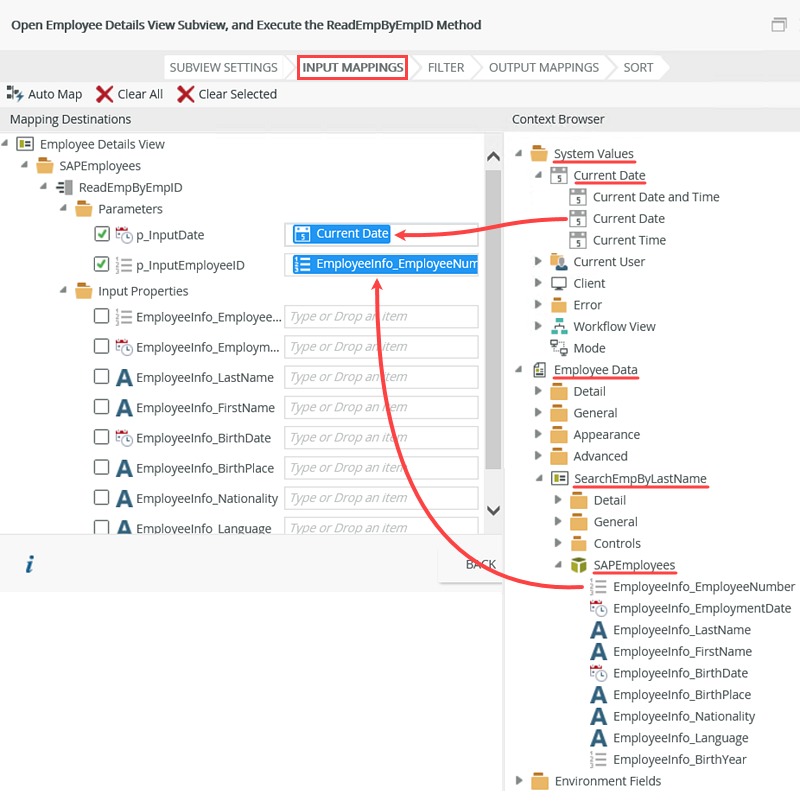
- Now we need to map the input parameters that are required for this method. Recall that they consist of the p_InputDate and the p_InputEmployeeID properties. Click the (configure) link.
- Click the Input Mappings tab. Expand the Context Browser, then drag the System Values > Current Date into the p_InputDate Parameter.
- Now we need to add the employee ID parameter. We will find this value located in the Employee Data (Form) node, then SearchEmpByLastName (View), then SAPEmployees SmartObject, then Employee Info_Employee Number property. Drag this property into the p_InputEmployeeID Parameter.
- Click FINISH to complete the subview method. Click OK to complete the Rule configuration. Finally, click FINISH once again, to complete the Form build.
- From the Category Browser, click once on the Employee Data Form. Click the Runtime URL link found in the Properties pane.
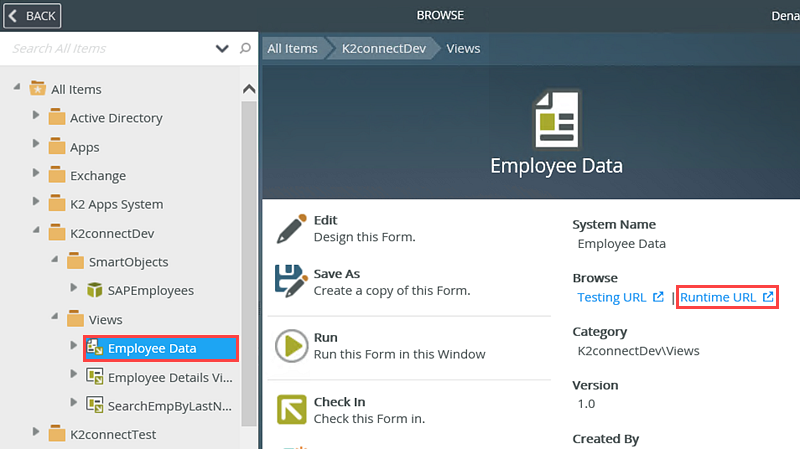
- The Employee Data Form will open in your browser. Search for wildcard value
B* - When the list of employees is returned, click on one of the records. The subview should pop up with that details from the employee selected.
We have a few more steps to complete before we can test our expanded SmartForms configuration. Next, we will generate a Form from the SearchEmpByLastName list View. Then we will add a Rule for when a row in the list View is clicked. We will configure this Rule to populate the Employee Details View and pass the Employee ID from the selected row to the Details View.
This action is telling K2 to open another view as a subview (think pop-up window), then execute a method. In our case, the method will be to populate the subview (the Employee Details View) with the details of the employee that was selected from the list. We will configure the method to pass the employee's ID from the list item to the subview so that K2 knows which employee record to retrieve for the details view.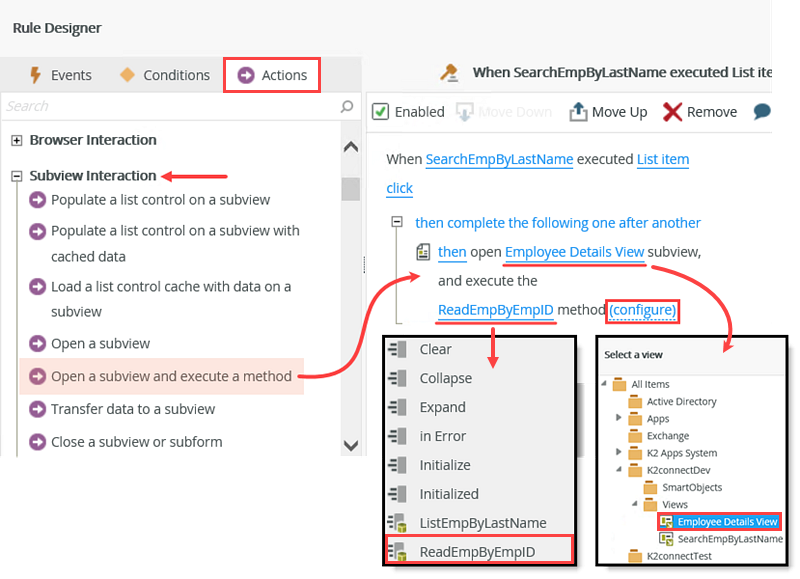
To close out this tutorial, we will test our extended configurations.
Step 6c Review
In this step, we tested the extended Service Object Method configurations. We generated an item View, then a Form. We configured Rules that will populate a subview (the Employee Details View) with the extended methods (job and company information) when a row is clicked in the list View.
What is significant here is that we are able to use multiple sources of data and return it to one location. While we are using data from an SAP system, we don't have to. We could "mix and match" data from multiple data source types and return them in one SmartObject.
Last, if you are new to SmartForms, this step gave you a nice introduction to Rules: Events and Actions and how you can configure them to provide additional information to your users in a subview format.