
|
 |
|
 |
|
 |
|

|
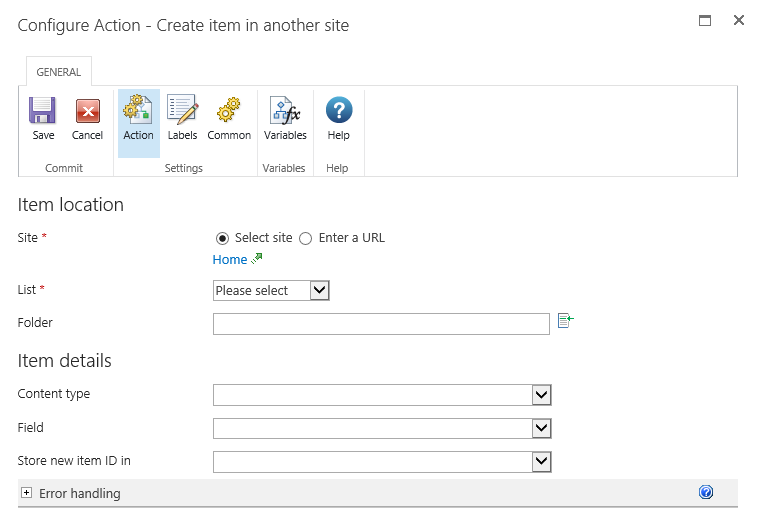
This workflow action creates a new item in a list within another site.
To use the workflow action:
-
Locate the action in Workflow Actions Toolbox (located on the left hand-side);
-
Click on the Category listings to reveal the actions; OR
-
Search for the action using a keyword.
-
Select the action, drag it onto the design canvas and drop it onto a design pearl.
Alternatively
-
Left-clicking the pearl, mouse-over Insert Action and then the Categories to reveal the actions, click the required action from the list.
To change the settings used by the action:
-
On the action’s title click the down arrow to activate a drop-down
-
Select Configure; OR
-
Double-click the action's icon.
For more information on the other options in the drop-down, please refer to the Getting started with the Nintex Workflow designer.
Options for this action
Item Location
Site
The target site for the new item.
- Select site: Enables a site picker (Select a team site) to navigate through the portal structure and select the target location.
- Enter a URL: Allows manual entry of the URL or selection using Inserting reference fields.
- Refresh Lists: Refreshes the drop-down list for List according to the entered URL.
Note: If the URL includes variables, then the Site URL dialog box prompts you to manually enter a URL for the refresh operation. The manually entered URL is not used during execution of the action.
List
Drop down list containing available Lists at the target location. Additional Fields are displayed depending on the option List selected.
Folder
Either specify a value or use the lookups feature to specify a new folder to create the item in. If no folder is specified, the item will be created at the root level of the library or list.
Item Details
Content Type
Used when creating the item. If a folder content type is selected, a folder is created. Likewise, if a document content type is selected, the appropriate blank template will be used.
Field
Available fields that can be added to the created item will be dependent on what fields have been created in the destination list. More than one field can be selected. By default, the Name of the item must be specified. When a Field is selected, an input field is added to the dialog to allow a value to be specified. To remove a field click on  .
.
Store new item ID in
The created item will be assigned an ID. This new item ID can be stored in a List Item ID Workflow Variable. For more information on using variables, please refer to Workflow variables.