User Defined Actions (UDA) provides the ability to string together a predefined set of multiple workflow actions for workflow designers to use when creating a workflow. The UDA feature is similar to using workflow snippets, however a UDA will allow for Input and Output parameters to be defined which can then be used as a single action within a workflow.
An example of when a UDA might be useful is preconfiguring a web request workflow action and saving it as a UDA which a workflow designer can then drag and drop into their workflow without having to configure any of the settings within the web request workflow action. In addition to that, an input parameter can be defined for a user to provide their credentials for the web request and the output parameter for any values that might be returned by the web request.
Note: Only Site Administrators, Site Collection Administrators and Farm Administrators can manage User Defined Actions.
Managing User Defined Actions
A UDA can be defined globally for the farm in SharePoint Central Administration, for a specific site collection or for individual sites.
Note: UDAs must be initially created at a Site level. They can then be used at the:
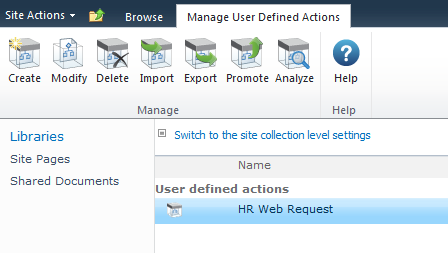
To manage UDAs for a Site:
- Navigate to the Site home page.
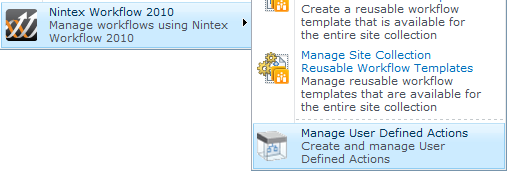
- Activate the Site Actions menu, hover over Nintex Workflow 2010, click on Manage User Defined Actions.
To manage UDAs for the Site Collection:
- Navigate to the Top level site home page.
- In the Site Actions menu, hover over Nintex Workflow 2010, click on Manage User Defined Actions.
- Click on Switch to site collection level settings.
To manage User Defined Actions for the Web Farm:
- Navigate to SharePoint Central Administration.
- In the Quick Launch pane, click on Nintex Workflow Management then Manage user defined actions.
Things to note when using UDAs:
- For UDAs that have been modified but are currently in use in a workflow, the new settings of the UDA will only be in place once the workflow using the UDA is republished.
- A UDA containing a disallowed action will still run, but can only be imported if the user importing has rights to use all the workflow actions in the UDA.
- A UDA has a unique GUID ID. When importing a UDA, if the UDA has the same name but a different unique GUID ID, the UDA can be imported, however if the UDA has been renamed and an existing UDA with the same GUID ID exists, the user will be presented with options to overwrite or create a new UDA.
Create a User Defined Action
To create a UDA for a site:
To create a UDA for a Site Collection:
-
Create the UDA in a site.
-
Once completed, return to the Manage User Defined Actions page at the Site level.
-
Promote the UDA. Refer to the 'Promote User Defined Actions' section below for more information.
To create a UDA for a Web Farm:
-
Create the UDA in a site.
-
Once completed, return to the Manage User Defined Actions page at the Site level.
-
Perform an Export and Import process of the UDA. Refer to the 'Import and Export User Defined Actions' section below for more information.
Modify a User Defined Action
UDAs for a Site and Site Collection level can be modified. However, UDAs on the web farm level will need to be modified at the site level and re-imported at the site collection level.
To modify a UDA:
-
Navigate to the Manage User Defined Actions page.
-
In the Manage User Defined Actions page, select the UDA from the list, click the Modify button
Delete a User Defined Action
UDAs can be removed from a site, site collection or web farm level.
To delete a UDA:
-
Navigate to the Manage User Defined Actions page.
-
In the Manage User Defined Actions page, select the UDA from the list, click the Delete button.
Import and Export User Defined Actions
UDAs can be exported and imported.
To import a UDA:
-
In the Manage User Defined Actions page, click the Import button.
-
The Import a User Defined Action dialog will appear.

To export a UDA:
-
In the Manage User Defined Actions page, select a UDA from the list and click the Export button.
-
The export file will be created and will trigger the file download process in the web browser.
-
Click the Save button and follow the standard procedure for downloading and saving files from the web browser. Consult the web browser documentation for more information on downlading and saving files.
Promote User Defined Actions
This will move the UDA to be managed from the parent scope. To promote a UDA:
- In the Manage User Defined Actions page, select the UDA from the list and click the Promote button.
- In the Confirmation dialog, click the OK button.
Note: Once a site level UDA has been promoted to the site collection level it cannot be undone.
Analyze User Defined Actions
This function displays all workflows that currently use the UDA. It provides information such as the Workflow name and Workflow Version that uses the UDA and the version of the UDA it's using.


